How To Use Über'S At-Home Keratin Hair Straightening Kit
- Posted on 27 March, 2015
- Hair Knowledge
- By Anonymous
ORDER ONLINE: http://www.uberbeautyusa.com/store/p19...
Uber's new Keratin straightening and smoothing systems are an ideal way to control curl, frizz, bulk and generally unruly hair. This smoothing system is the ‘at-home’ product that protects while giving you the result you want.
Simple solution to curly, frizzy and unmanageable hair.
Contains advanced collagen and Keratin Protein complex.
Results that last up yo 60 days
Uber Straightening Kit’s key ingredient is Keratin, the hair’s natural protein. During the formula’s smoothing and straightening process Keratin is introduced back into the hair. The result is straight, smooth, controlled hair with renewed vitality and condition.
Uber Straightening Kit is designed for use on regular, resistant and very curly hair types, it reduces daily styling time down to a minimum which means those many hours spent drying and ironing your hair can be radically reduced if not eliminated shields against humidity and controls curly, wiry, unruly hair for perfect sleek results day after day, week after week.
Firstly – check your hair health. Although Uber Straightening Kit adds proteins and nutrients it is still a chemical process. If your hair is not in good condition, is damaged, heavily bleached or breaking it is NOT recommended you do this process. It is also so not recommended for use on hair which has been treated with henna, metallic salts or lye relaxers.
Uber's at-home permanent straightening and smoothing system can be used in two ways – to create a salon style Japanese Thermal Straightening, or to achieve a quick traditional hair straightening for removal of waves and curl without the sleek ‘salon straight’ result. You will be undertaking a salon service at home, so it’s important you read the instructions at least twice before you begin (included with kit or view here: bit.ly/Uber958).
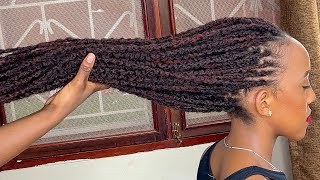
Emma has naturally curly hair and over the last few years she has on a regular basis, dyed her hair. Her recent coloring was with a l'oreal, color and she's. Also added a few extra highlights, so straight hair is a simple process. The first step is the straightening cream. This is followed by the keratin protein and, finally, the fixing cream. First, you need to towel dry your hair, but ensure that it remains suitably damp. Then gently comb, the hair with a tangle comb and section it into four. Just as you can see, the stylist are doing make sure that you part the hair exactly where you want your parting, to sit in the middle or on the side prior to the straightening cream and place a towel around your shoulders. Firstly, remove the clip on one of the sections at the back of your head, ensuring you are wearing the gloves provided begin applying part a straightening cream lightly onto this area of hair. As you apply, a small olive sized amount comb, the hair very smooth and use your thumb and forefinger to gently pull the hair in the section you are working on into a straight pattern. So at this point we are starting to break down the hairs disulfide bonds, which are contained within the hairs cortex. This is deep inside the actual cortex of the hair. This will enable us to reshape and reform the hair into this nice smooth, silky effect. So at this point we have finished rinsing emma's hair and we are going to start part b. This is applying the keratin protein part a has softened and lifted the cuticles allowing deep penetration of the keratin protein. So emma has returned from the basin and her hair has been thoroughly rinsed and we have completed step two. We are now going to start step three in step. Three. We are going to iron the hair into the direction that we want it to finish. So what you will do is when you are ironing your hair. It is up to you to decide how straight you want the hair and first you are going to start by sectioning the hair and start very gently running the irons from the roots. Through to the points here, you can see, the hair is starting to become smooth and straight once you have set your hair. This will be your final position. As you can see. Emma'S hair is starting to look beautifully straight. It'S starting to look shiny and smooth, but at this point the hair is not complete, it needs to be fixed. This is where step four comes in and we apply the fixing cream. This is in order to rejoin those disulfide bonds, making the hair permanently straight. So that completes step four. We have rejoined the disulfide bonds and, as you can see, the hair is smooth silky shiny, the kinks, the curls, the frizz has been removed. So now that the hair is fully rinsed, we are going to apply an olive sized amount of protein keratin to the hair work it through the hair for one minute then rinse off for a further three minutes. We are going to blow dry and finish with ironing. We'Re going to iron into the desired style, to give it that sleek shiny finish for the next three days. Do not wet or shampoo your hair or clip your hair back or tie your hair back in any way. Keep the hair sleek and straight as it is still finishing, its final fixing. So here we have the final result: beautiful silky, straight lustrous, hair, i'm going to spin them around in order that you can see the back and what you will see is the light just starting to shine through the hair. Her hair looks a lot longer. It'S smoother. It'S shiny, it's straight, it's absolutely beautiful. It feels soft. The condition is wonderful. I'M going to spin her back now and, as you can see, emma's happy. The girls are happy for more detailed information, refer to the leaflet within the carton or visit our website at www.uberbeautyusa.com.

Comments
IHUFS: Is it ok if that straightening cream will touch the scalp?
Diana: Permanent ?? Also bleached hair ??