Side Swoop Wig Install Ft. Vshow Hair
- Posted on 08 December, 2020
- Bangs
- By Anonymous
Hey My Niya babes❤️ this is my first time installing a wig, I have so much more to learn.
★★★★★★★★★★★★★★★★★★★VSHOW HAIR★★★★★★★★★★★★★★★★★★★
Code “VSHOWYT7”, 7% off for all products.
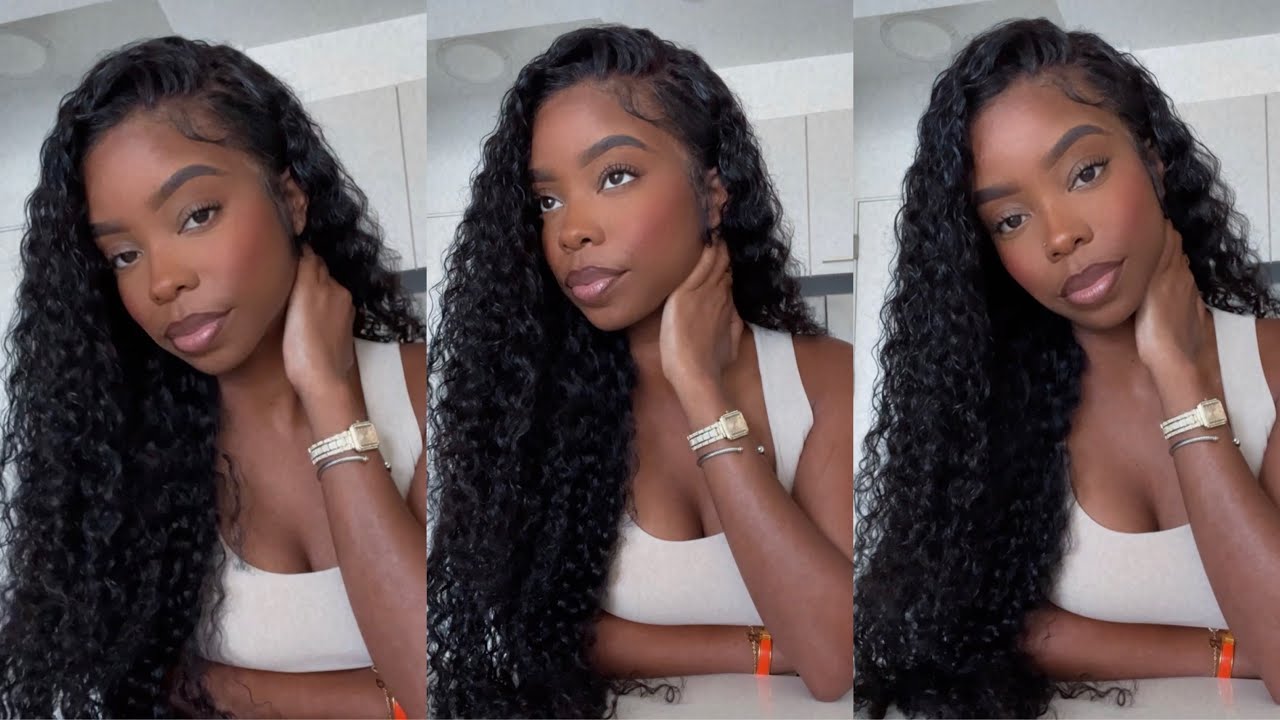
Same Peruvian Water Wave Wig in the video ► https://bit.ly/3fi55js
#VshowWig details: 26”, 180% density,13x4 lace front
#VSHOWHAIR official store ► https://vshowhair.com/
Affordable #lacefrontwig ► http://bit.ly/2YLaFlu
90% Girls will order hair from here ► https://bit.ly/37N31yp
2020 must buy #headbangwig ► https://bit.ly/31HCMFo
New color 99J Burgundy wigs ► https://bit.ly/3lFDLOx
━━━━━━━━━━━━━━━━━━━━━━━━━━━━━━━━━━━━━━━━━━━━━━━━━━━━━━━━━━━━━━
Stalk with #VSHOW HAIR, get the newest promo info and free hair.
Instagram :@vshowhair7 http://bit.ly/ins_vshowhair
YouTube: VSHOW HAIR http://bit.ly/yg_vshowhair
Facebook : VSHOW HAIR http://bit.ly/fb_vshowhair
Twitter : VSHOW HAIR http://bit.ly/tw_vshowhair
Whatsapp & message:+8618697378673
Subscriber Count♡ 14,075
Goal♡20,000
Follow My Media’s
Fb♡ Aniyah Sanaa
Ig♡ https://www.instagram.com/official._ba...
Sc♡ Macccgalll
Tw♡ Officialbadie
Tiktok ♡ Official._badie
Business Inquires Only♡ [email protected]
Frequently Asked Q’s
Age♡ 17
Grade♡ Senior
Height♡ 5’5
Weight ♡ 140
Birthday♡ Dec.25th
Zodiac ♡ Capricorn
City♡Chicago
What do I film w/♡ IPhone XR
What do I use to edit♡ iMovie B
I do a little bit of YouTube.
Ig @official._badie
Sc@macccgalll
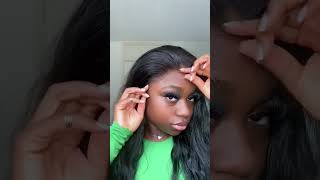
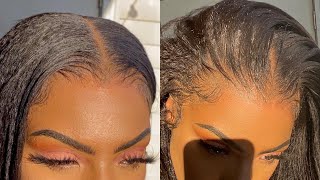
Hey my night babes, it's your night back with another video and in today's video i'll, be doing a wig. Install using hair from v show hair company. This is the box itself and on the back it has their social media tags. But inside the box comes the wig, the two wig caps and their social media business card, okay, so here's the wig itself. It is a peruvian wave, wig and 26 inches. It is a 13 by 6 lace, front and 180 density. As you can see, the back piece is the color. The lace originally was, but i tinted it using lace, tint um, this wig is really soft and it really curls well when wet. If you're interested in this wig. Please use my coat on the screen and let's get right into this video okay. So, as you can see, i already have my cornrows in. I already have my cap on i'm going to start by applying, got to be glued gel around my edges and brushing it back to make sure that all the extra hairs are not on my hairline so that they won't get glue on them here. I'M just taking some alcohol on a cotton swab to make sure that there isn't any got ta be glue gel on my hair on my skin. I do this a couple of times after i glue it and spray it. I got a bigger spray to make sure there isn't any residue on my actual skin. Then i'm going to start applying the glue and small dots you want to make sure it's small and not big, for how i did it. I had to redo the whole process. I had to take the cap off, but i'm gon na still include that footage, but i'm just going to you know restart with you know me redoing the lace piece so in the next clip you will see. I already have the cap down and everything is glued on. That'S because i redid the whole process. As you can see, i'm applying way too much glue. You don't want to apply this much. You also want to flatten it out and make sure it's really thin, so it doesn't be white how mine is, but you know you live and you learn. This is my first time installing a wig. So now i know so here's the cap after i redid it. I put a layer of glue on the on my skin at the bottom and then a layer of glue on the top on top of the cap, and then i dried it and it's really thin and really see-through. That'S how you want it to be. It'S still white in the front, but you know i didn't feel like redoing it again, but just make sure it's really thin. So you don't have any white glue now, i'm just spraying and got a big groove blade to make sure got to be glue. I always say that wrong got to be glued spray to make sure everything is really hard. So you know you can protect your hair yeah. After that, i will be using this small little razor thingy to cut the lace in the front. You want to make sure you cut it really close to where the glue starts, so you don't have any excess cap in the front. So yeah i'm just going to be cutting the lace around the front. I already cut the back and everything and then next i'm going to be applying the makeup to make it match my skin and i'm also going to spray a little bit of lace. Tint on the cap to match the color of the lace front on the wig. Do so after you've lined your wig up um to your hairline, you want to start cutting off the ear pieces to make sure that the wig lace piece goes over the top of your ear. You don't want it to be. You know covering your ear so yeah. That'S what i'm doing just cutting the side pieces off to make sure that my ears are not covered wow do so now i've cut the lace into three different sections to make sure i can lay the each part down. Equally, i apply a little bit more glue when i let that dry. Until it is clear, then i place the lace down. I start combing it back to lay the lace down with the glue that's on my skin, so so next, i'm going to be cutting the excess lace completely off. You want to make sure that you are not cutting in a straight line straight across me. Make sure it's like rigidy like a normal hairline would usually be, but you want to make sure you don't have any excess lace. I don't go. I do go in after and make sure that i cut off some little bitty pieces because i did mess up with the alignment of my hairline, but you know rookie things we're not going to get into that, but, as you can see, i'm just cutting off all The excess lace and then i'm going to get to styling it bye. So i did go ahead and make me a side part. I did not plug the part at all. All i did was just apply the hot comb to it and lay it down with a slick. Stick um. My hair is wet now because i went ahead and wet it off camera. I wet it with mousse and water spray bottle water, but right now i'm just going to be cutting off the um edges and making my little edge pieces i'm going to make two sideburn pieces and one edge swoop on the side. As you can see, i'm plucking the edge pieces, i'm going to go ahead and cut it and lay it down, and that would be it for this voiceover i'm going to go, go ahead and let it play out the rest of the video so hope you all Enjoy go ahead and use that discount code in the link in the description box, and i want to thank vshow hair for sending me this wig bye do thomas. So this is it for this video. I used a slick, stick to slick it down along with got ta, be cool spray, and i also use mousse and water to get the curls to look how they do look. I did not comb the wig out fully but later on, i did and it did lay down more, but this wig is really cute, really softly curly. I really love it and, if you're interested check out that link in the description box and go ahead and copy this wig bye,
Comments
kaluumarii: you did really good!!
J1vaeh: You did a really good job