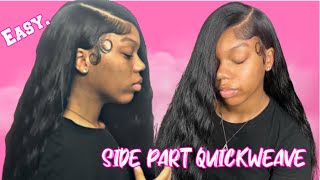
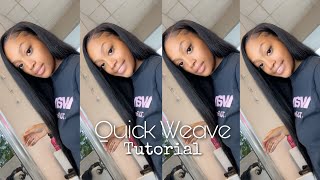
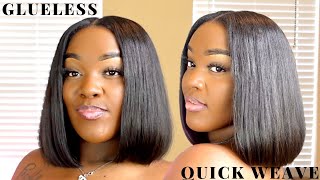
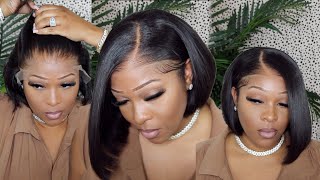
How To: Perfect Protective Quick Weave Bob No Leave Out *Detailed Hair Tutorial *
- Posted on 18 July, 2021
- Bob Hairstyles
- By Anonymous
Tutorial of PROTECTIVE QUICK WEAVE BOB NO LEAVE OUT
Hello I'm Mz Magic and my YouTube Channel is all things Hair, Tutorials and Lifestye
I upload content weekly hope to see a lot more of you in the future
Subscribe:
https://www.youtube.com/c/MzMagic
like share and comment it's Free
Follow me
Instagram: http://instagram.com/mzmagictv
Twitter:
https://mobile.twitter.com/mzmagicsalo...
For all inquires
Business email: [email protected]
#QUICKWEAVE #BOB #PROTECTIVESTYLES
#Alopecia #weave #quickweavebob #bangs #bayangs #hair #haircut #hairstyles #pixiecut #pixie #pixiebob #hairstyles #blackhair #tutorial
Music by frumhere - rooftop cinema. - https://thmatc.co/?l=A34BF26C
Every single day, hey superstars, it's your girl, malika aka, miss magic back with another video. Today i will be doing a quick weave bob no leave up. This is a very highly requested video, so i am going to explain it a little bit um if you are new here, welcome to my channel. Thank you for coming, go ahead and hit that subscribe button for me and if you like, this video, give me a big thumbs up and go ahead and hit the notification bell so that you can be alerted when i do post another video. If you are returning welcome back magic superstars, all right, so we're gon na get right into this quick weave bob um. The first thing i do she has been molded. Now i'm going to she's dry, i'm going to go ahead and fit the cap to her hair. Using glue all around her perimeters, i will cut the cap and fit it to her head. As i said once i done, i will start cutting the tracks starting at the nape of her neck and will just fit the tracks going up in a half circle. All the way until i get to basically her eyebrow and then i will start circling the traps tracks, but i will get back to you when we do that. We will be using dreamweaver, remy hair and my a quick 30 second glue and we're going to begin doing our tracks. Okay, like i said now, once we get a little bit above her eyebrows, i will just start circling the tracks in a circle. Until i get all the way to the top and i have almost a quarter a little bit bigger than a quarter size of a track left and then we will leave that and then we will start splitting the track so that the hair will lay down nice And flat, on top of her head, so i'll come back to you when we get to that part, my foreign do! Okay! So now, when you have a quarter sized opening left at the top of her head, you are going to start splitting your tracks. When you get your track hair, it usually comes in twos, it's sewn together, two pieces sewn together. So what you want to do is take some hair and split it with a razor just getting up in there you'll see where the two tracks are sewn together, and you want to separate that with your razor making it uh one single track. So i will show you that in just a second once i pull this apart, okay and as you see, i am going to just pull those apart and you're, just going to use the single layer to fill in that top quarter. Size um amount that you have in the opening and, like i said this will make it look very natural at the top and we're going to do our own closure, just circling it around and then we'll close it as you see, so that's the quarter size opening. I was talking about now you're going to go back in with your glue and just go ahead and fill in the circle until you get to the end and then you'll take the last little piece cut it and just like take your tail comb and just poke It in so that the track does not show at all do all right. So this is the part where you just take your little tail comb and you finagle it until you don't see the track all right. So now we're going to just begin on cutting this blunt cut bob, and i i usually just do an outline on the first cut to see where i'm at and then i'm going to go back in and actually clean it up and trim it and then we're Going to curl it now, if you want that blunt look, then you'll just take your flat iron and just go straight down with it, but i'm going to give her like a small bump. She wants a small bump and basically it'll it'll after a few days. It'Ll go to a straight look anyway, but right now we're going to do a a straight bump, but you don't have to bump it. You can just take the flat iron straight down and it'll. Give you that blunt cut. Look so alright guys. So this is the final look. I want to thank you guys for watching go ahead, hit that subscribe button. If you like this video, don't forget to give me a big thumbs up, go ahead and watch my other videos and i hope to see you in future videos love. You guys bye and go ahead, hit that little subscribe button with you know my face right there. Just go ahead and press that so that you can subscribe to my channel i'll, see you guys, love you bye! You
Comments
Mumzy Ed: Thank youuuuu for sharing. Very detailed and informative plus nice hair
EverythingTypical M: Beautiful great job
Hair by Mz Magic: Thanks for watching
froggyx: Thank you for making this