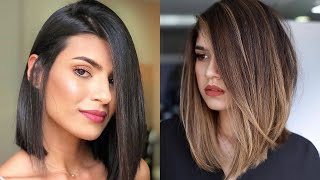
How To: Short Layered Bob Haircut Step By Step - Textured Bob Haircut
- Posted on 26 September, 2020
- Bob Hairstyles
- By Anonymous
How to: Short Layered Bob Haircut Step by step
Textured bob haircut Tutorial
*Giving is hold forever*
Hi good morning, everybody i'm carmel, i am the head of the education for erosio all three locations, and today we're gon na have a little fun haircut. I believe this is our last day for our four-week facebook live, which has been fantastic. I mentioned it yesterday in my post, um we've had a lot of really great um ambassadors. We'Ve done some color. We'Ve done some cuts, we've done some styling, so i think it's been really good, that everybody's kind of put their foot forward and been wanting to play. So today is going to be the last day. Let me just get my comb it's very hard to talk about hair when you don't have a comb in your head. I don't know why, but it is okay. So last time we were here, which i believe was, i don't know, 2018.. I don't know what day it is it's sunday yesterday that day this day, we're not really sure um okay, so we did something kind of mid-land. We did a little bit of uh disconnection and then we did a square top, so we're going to kind of play off that a little bit and do a little bit more of a shorter beefier. So the length is going to come up really short um. I'M going to do a little bit of a squirrel, i'm going to do the bottom with a scissor and then i'm going to do the top working from the front and i'm going to work around the head. So it's going to be more of a curved feeling to it, so it's going to kind of have a little bit of roughness and a little bit of lightness. So i like to do that a lot inclines because sometimes clients when they feel their hair. They like to feel that it's thick, you know, so if you like that feeling it's kind of a good way around it so working from one of the hands from the last time that we did the class it's again, it's going to be in this kind of Man, it's probably going to be a little bit shorter, i'm going to make it a bit beefier. So i'm going to work up as short as i can, i'm going to work to the mannequins hairline um they've got really ugly hairlines and i'm not really afraid. Even on clients to cut off the hairline, so we can discuss that and if you guys have any questions on that, you know please ask so we can try and get as much information in the class um and hers is square, which is exactly what we did. The last time and this time we're going to do the complete opposite, so we're going to work in the front and we're going to work around the head. So it's going to be a little bit more like a round layer in the front and then a square there on the back head sheets. It'S fairly complicated, but it's really not that complicated. I think. Sometimes, when you look at a head shoe, it's like. Oh sweet, mother god there's so many things going on, but so everything here everything's brought down. So this is going to be your baseline or your outline or your length. Whatever terminology you use, so i'm gon na do with a scissor. I'M gon na do classic bob sections. When i do a bob, i tend to power through it really quickly. I know a lot of people do not do that and they spend four hours doing it, and then you have to spend another four hours, fixing it when it's dry, because there's so many different details that go into the game. For me personally, i like to go, and i like to put in a strong shape. I still stick to the routine that i would normally do it and then, when i dry it that's when i really allow my the details to come out, i think it's very important to kind of understand what hair does when it's wet and then because it does Something completely different when it's dry, so it's really important to understand that and to allow the hair to move and have its own rhythm, because once you detail it when it's dry, that's when it's! You know when it really kind of comes to life. So all of your sections are going to be brought down, you're going to be creating your lens, we're going to work right above the occipital, but still below the crown so mid head shape right around the top of the ear give or take. I think it'll be good for somebody with fine hair. It'S also good for somebody with thick hair. It'S going to flatten the back out and it's going to beef up the top. So the layering. Here it's going to be square to the head. So again the squareness. What it's going to do is it's going to flatten out the back, which is great um and then working on to the side. The same thing. So this is the back of the head right here. This would be four which is be equivalent to this, and then we've got our three two and our one. What we're going to do differently instead of bringing everything back the first three we're gon na bring back. This would be four, so three is going to work into four two is going to work into three and then one, instead of bringing it back to create the squareness on the back, i'm going to curve it around the face. So what it's going to do is going to kind of open up the underneath here we're still going to work to the length. Now we can decide um what we want to do with that. At the end, i kind of thought of maybe rounding it off completely and maybe taking that corner off, but i'll see how it goes and that's where the details come into the game and you can have a little bit of fun with it. I think it's good to have a rough plan and then you can kind of change as you go along, i'm a big believer and if you're driving a car and you're going to point a to point b and you've never been there before. What do you do? You get a map, aka google maps, and it tells you exactly what to do, but this is the same kind of thing right. This is our google maps. This is our. This is google maps erosion maps, but it is important because you know it'll give you a couple of directions, a couple of different sets and then you can decide which, which one works for you. So this is kind of the same thought process. It'S a it's! A rough map of what you're doing and then you can change it accordingly, because sometimes, when you put the corner and on the bottom, you're like. Ah, i'm not really into it. Let me take it off and that's what makes you creative understanding the classics and then having a bit of fun with them, so we're going to cut out her front here, i'm going to use the same mannequin. I hate to be frugal with man or i need to be frugal with mannequins. You know it's like there's no point in doing just one haircut and then throwing her out so we're going to use the same mannequin, so we're going to curve out the front. This is the fringe that we did and you know what we can change it and have a look at that and then on the top. It'S going to work around the head, so we're going to be squared of the head and then we're going to be round to the head, and we spoke the last time about body position. Body position is really important here as well. The back everything is going to be brought to us. It'S going to be square, then we're going to start in the front and then we're going to work the way around work our way around the head and then the top is exactly the same as this. So each section goes to where it should be going curving around the head, which will give you more of a round curved shape. This is the fringe on top, and then you know, depending on how many sections we have left um and how much openness of the blade we can create a lot of texture. Okay, so, let's get to work. How are we doing we're doing good? I see some of the irish flags okay, so here we go with the irish people. I retreated to my family and the last time i uh mentioned everybody, including the dog, and it's about the brother-in-law and he was not happy so hi kevin. Sorry i had to do some major damage control. He was there being supportive and there was me ignoring him. So i think my mom is there and my sister and the dog is probably watching so okay. So for our pattern again working from the top again there's her friend from the last time: she's not pandemic chic. This time i didn't yeah, we downgraded her, so we're going to take sev. I already have the sections so just straight around the head: again, you can have this a little bit squarer or a little bit more curved depending on your personal choice. Um for me, i think i say that word a lot. Do i um. Maybe i should stop saying that you're great working around the head, you're doing great doing great okay focus working around the head um with here here i go again with the mannequin head - it's very thick here, so i am going to work around the head a lot And i want to work on two taking a lot of the bulk out of here, because for some reason, the way they are made, the crown area is really dense. Okay, so paul. This is a one of my favorite shapes. I love a good bob, there's nothing better than watching somebody walk down the street with a really sexy ball, there's also nothing worse than walking down the street in somebody with a bad okay, because it's a really ugly haircut. If it's not done well, it's very systematic and it's just the same thing over and over and over and over. So i understand why people get annoyed with it and get frustrated, but once you do it and you master it, it looks really pretty. Okay, i'm gon na power through this fairly swiftly. So you know it's a judgment-free zone, my again for the same reason once you've done this and you layer it because you're layering it flat to the head. The weight distribution shifts. Okay. So if you go in, you spend an hour putting in this perfect line the minute you layer that it's already over, because everything ships, because you don't have as much weight pushing down to keep that line consistent, consistent the way you cut it. It is imagine so i like to take that into consideration, so her head isn't making all that nice nick stop making so much noise. No response, no response! He just ignores you. Okay, i'm going to do it in my comb because it's very hard to do it on rubber, so every single section i'm going to do here is exactly the same teeth straight in attached to the skin comb straight down. We'Re going to cut next section same thing: boom boom. All the way through everything is exactly the same. There'S very little over direction on this there's a very slight bit on the corner, just to make sure that you keep the corner a lot of the time. People cut it square. What you forget is that you're doing it on a round object. So the minute you move, you've now created a round bob, which is exactly what you do not want. You always want to have it at a very slight angle, coming down just to maintain that corner okay body position square the head right behind her. I'M gon na use the skinny side to come. Also just fyi. I wouldn't use an expensive scissors if you are playing around with the mannequin. They kind of draw your scissors a lot. So if you've got a cheap scissors, i would definitely i mean, i know no cure dressing. Scissors are cheap, but if you have one, maybe it's old, i would use that as opposed to using a a very expensive scissors, because it really does do a lot of damage. Okay, so slight diagonal, i'm going to work right to her hairline wow subtle. The show must go on. You know we got to get those back. I said the show must go on. We got to get those packages sent he's like got ta get the packages sent okay on the right side. I like to go down with my scissors opposed to coming up. It'S definitely harder to do, but once you actually master it, it makes your job so much easier because your scissors is pointed in the same direction on both sides. So the weight of the scissors is a little bit easier for you to handle. Generally. If you come up the way you generally cut that corner, so you really want to make sure if you are doing that just be very present and make sure that you don't cut off your corner now i haven't seen any questions pop up yet so i thought I would ask my own question: okay, even though it's not question, i'm not looking at that, i'm not. I haven't seen anything so here i am. I want to ask my own question. I color, so maybe this is silly, but who knows in a consultation? What would be some key words that might pop out to you that this would be the technique or the concept that you would want to use or like an inspo pic that you would see what would be kind of something that would gravitate you to be? Like? Oh, i want to use this technique on well. I think it really depends on the client's, texture. Okay, firstly, would be my the first thing i would look at you know. Did she have a lot of hair? Does she still want to keep it in the mid-length family? You know a lot of people, don't really want short, hair or long hair. They want kind of like that in between in between phase - and this is actually a good shape for that, because it gets rid of all the stuff underneath, but then it'll still keep the stuff on top. You know so they'll have something to play with. It'S also fun to color, because you can keep the bottom dark or light and do something else with the top love it. Thank you so again, nice and consistent. Now, right now, it's not over directing back a lot of people make that mistake, and then you get this like heaviness working towards the front. You don't necessarily real need to do that. All you're really trying to accommodate is for the lack of hair around the hairline, because this part has the most amount of hair, and then this part has the littlest amount of hair, so you're really just trying to accommodate for that corner. So always just make sure you don't want to comb it down and cut it here, because you'll automatically go up and you'll get your rambo. So all you're really doing is just combing it back into the exact same position as this section was and again keeping your comb. If you are working in your comb, keeping that slightly angled down towards your face how's my sister today, she seems to be doing good. She'S been sending some nice flags, oh and kev, says hi. Oh there you go, i hope he's happy now he won't be mad at me. Oh my god, i nearly died. I was mortified. I felt so bad there he was wasting. He doesn't even do hair. You know, and he was sitting there watching me - i was like oh, my god, the dog and my sister and my mother woke up. She said very good with lots of heart, okay, so again just putting in a basic shape. Now you can see it already. It looks like it's coming up because there's not as much hair under here, so this is where you always have to make sure i mean. I know it's not because i know at the stage of the game, my habits and what i do. What i don't do, um just always be aware too, on a mannequin head when you cut something to the hairline, it tends to bounce up a little bit here. So just be aware of that: it's not that you've cut it incorrectly, but there's definitely a little bit more bounce to that you'll see a little bit of graduation. It'S not technically done, but it is because of the way the mannequins are made. Okay, head position on her head up and then slightly tilt it over to the side. A lot of people do this incorrectly also and what it does is you know. So if you're cutting a client and her head is down - and you do this really pretty bob and then she comes up and then you got around your corner is gone so again, just always make sure that her head position is in a natural natural state here And then you're just tilting her over, so it really just kind of like puts you in the right space and if you need to tweak it when you're done, you can do that and it's really easy as fence said, it's weird seeing you with shears carmel. Sometimes it's weird using them all right, so same thing, now, general rule of thumb. You know you can't take the ear off, which is really unfortunate um. So there has to be a little wiggle room. I'M not a big fan of over compensating for the ear um. Again, a lot of hair is going to be coming down on top of this, so it's a lot of hair, it's all about the weight distribution right if we were cutting this really really really short. On top. You know i'm kind of doing something in the very heavily layered bob i might think differently, but there's going to be so much hair coming down. This is going to push it back down. So again it's a weight, distribution, so it'll definitely hold it. I'M going to start cutting some hair okay, so get to the ear. Just do a little tap above a little tap below and just continue on same thing. What you do want to do, though, is you want to do it for the whole section? Now i didn't pre-do her like we did the last time. Um. Sorry, i'm going to blow-dry her i'm going to blow-dry her furnace with it and i will um iron her opposed to going through the whole process with a blow-dryer, because that's like torture for everybody watching so just cutting towards your line. Again, it's a little bit thicker in the front, so i don't know if i would stretch it too much. That'S why i'm not using the wide side of the comb again just giving a little bit of wiggle room anybody who's having any volume problem. I think it might be good because we're using a ipad - i don't know if that has effect on volume or anything, but if you can just push your volume all the way up, we uh everything is clear over here on our side. So am i not talking about enough? Maybe you could talk a little louder, huh sure that might help okay? Is this better i'll start screaming? Everybody like, oh, my god, so on the other side, exact same thing straight down, we're just going to work, be very aware. Like i said a few minutes ago that your scissors, you want to just make sure that you're combing it in really in exactly the same position, just working it right here again, i'm going to layer this, so i don't really care about this hair time's sake. I'M just going to cut it on a client that would probably take a little bit more time but again body position for her just gon na be aware so head over, and this is just a little bit of convenience for myself. Also, i'm just going to take some of vector out of the way just clip it in. Wouldn'T it be great if you could just take their ear off, especially when you're doing this haircut. You'Re like oh here, you go i'll, give it to you later. You can have this on your way out too much and how awesome would that be so much less hassle, although i think the ear at this stage of the game, considering what we're going through is going to be very important to more concerns, also very important. It holds on to some of the masks so again just tap above the ear tap below the ear working very consistent. Again, i'm not going to lose too much sleep over a bit of hair here and there again once we layer it and we dry it everything's going to change just getting a little bit of room. Are we moving on to the other part of the head sheet? Now, yes, okay, okay, so what do i do with the the second part of the back of the head? Let'S go over here, yeah, okay, so we did our length, which would be right about here, also same thing here now we're in this part of the haircut. So this is our section one. Second, we're going to cut this flat to the head straight out: 90 degrees cutting straight down to our line. So what it'll do is it'll flatten it out, and it will automatically give it a little bit of graduation. It'S more of a visual graduation than a technical duration. I'M not going to cut it with it in it, but it does it automatically because the head is round. So this is where the head kind of comes into play. So second section is going to go into one third section is going to go into two fourth section is going to go into three and what that does is it makes it lean and skinny on the back of the head. So head position just down a little bit: okay center section, combing straight out now, as you can see, if you guys just look at the bottom of my fingers here, i'm going to work to the existing length like this is my length right here. All the way down - and i'm going to use this as my guide - to go all the way up so straight out from the head 90 degrees, not dipping down. If i'm at a 45, i'm graduating up, that's going to make it beefier it's going to make it thicker trying to avoid that. I want this like slick and lean to her head straight out body position again. Mine make sure that your feet and your body are right behind her and then you can just maneuver your body out of the way. I can't believe you have to go that far back plane to see my whole body, nice, clean square shape just a little assess. I think i'm probably going a wee bit shorter, so again straight out from the head. If you can't fit all of the section in your hand, don't sweat it better next section. So this is now two. So two gets brought to one straight out: 90 degrees. I'M not over directing it all the way in i'm just placing it on top off number number, one so number three. Now what i might do is, i might just get one out of the way. So one would be here to here, and then two was here to here, so two came here so sometimes i feel - and i know i do this - if i take all of this in one hand, i'll generally over direct everything towards that which makes it heavier - which Again is what i'm trying to avoid so sometimes i'll just take one section out of the game, so third section straight out, you can see your guide right there, flatten it down working all the way through to my length. So we have a question here. So are you directing back to the previous section? Yes only to the previous, not any further, so this is section four section. Four is going into section three just a little moisture, so this would never be about five on mannequin heads for some odd reason you tend to have so many more sections than you would on a client and then she's got a really big head all the way Through again keeping it nice and lean nice and skinny, i also love the fact that blaine can be right over my head, josephine said that you have 49 inch legs. Okay, so there's a running joke in my family. Just give you guys a heads up so me and my sister are like five foot in like one inch and she said to her husband one day. Something about. I don't, i don't even remember what the conversation was, but she asked him if she had 49 inch legs and he nearly collapsed. Like her whole body is like 49 inches. Sorry total speed she's like do you think i have 49 inch legs. Okay, so section six again very systematic combing from the root working all the way out coming flat to the head body position doesn't really change. Everything is very much like this, which will automatically keep me square. If i drop down i'm going to drop everything, so i'm going to start graduating, so it's very important to make sure where your body position is in relation to the head. Okay, so section 945. I think we're at section 6.. Now: here's where it changes just a little bit, not necessarily this section but the next one. What we're going to do is we're going to have to have a little bit more over direction. So let's say this is the next section is seven, so we're going to bring seven into like five and a half five again to accommodate for the lack of hair moving forward around the hairline um. If this was a client and she had a normal hairline, you wouldn't necessarily need to do that. You'Ll tend to do it more in the very front, but not necessarily in the back. But again it all depends on your. You know the goal that you're trying to achieve. Okay, so here same thing, working all the way back. My idea, my eye goes to here. I want to make sure that i'm not cutting the length. So if i'm down too far, i'm going to graduate i'm going to work into this, the bottom section and what that's going to do is it's going to create a hole. So i really want to make sure that i'm not going to do that so again. Up straight out from the root all the way back, i want to watch that length fall out if it doesn't just take it out and then slowly a little bit at a time work your way down to yourself. So again what you can see happening. You can see the flatness being created, but she still got hair right, so she would still feel a little something in here. It won't be like gone it's not about cutting cutting it so short that she feels like she's, got a massive undercut. Okay same thing now, this is where i would definitely be aware, especially on a mannequin, because they've got literally no hair, so for us to keep that beefiness in the line, and i think we might have done this the last time you could take a very, very Thin slither of hair underneath and maybe just take that out of the game and tuck it behind her ear. It just gives us a bit of a safety net. I would prefer to have a safety net and be able to detail and cut it off. If i need to later once dry or if it's too heavy, as opposed to oh crap, she's, got a hole in her head because it's not making paper. So we we're on four and we're working into three now. What i did here was kind of hard to do it visually the third and fourth section. What i'm going to do is i'm going to actually, instead of bringing it back to behind the ear which i am going to do, or what i'm going to do. Is i'm going to lift up and create a little bit more of a concave here again, just to kind of slim down the front and kind of create a little bit more texture? It'S not something that you have to do, but it's something that could be a little bit more fun nick is driving me crazy. How do you tell your boss to stop making so much noise? Stop me until we're done. Oh my god, you're killing me do. I go and yell at him. Yes yell at him. Okay, where should i position? Okay, you can just be on that unfair, nick you're killing me, i think, he's listening to like a podcast. So what i'm going to do is i want to now change finger positions and i'm just going to come above my fingers again. We left her a little bit of a little bit of hair on the bottom, so we have a little bit of wiggle room right here, same thing again, working back to behind the ear and then just rotating the hair up just a little bit again. It'S just going to make it a little bit, slimmer, all the way back again right to the back of the ear. The back of the area is going to work, give us a squareness, so square here corner and then we're here corner, so they meet. Sometimes there might be a little bit of weight in the very back of the ear. If it is that's fine, you can always go in when it's dry. I would definitely ideally do it when it's dry, it's much easier to see a little bit of hair than it is when it's wet. It looks much clumpier. So you'll tend to cut a lot more off now in the front here they have the mannequins again. Have a lot of hair in the front, but we had discussed that we're going to comb that out we're going to cut that out so again. There'S our line. You can see it our heaviness, so our fingers are going to come right to it and then just cut. So again, i'm going to work this back, but i'm not already concerned about it because i'm going to carve it out with a razor in the front. But i wouldn't mind doing just kind of creating the shape for now. Okay, let's see, did we screw it up? Perfect, hey, you know. Sometimes, when you have to perform you just don't you know so i mean you know when i would look at this. I'D be like oh crap, i cut a hole in there, but here's the thing the mannequin head because of the hairline when this dries. This is going to come in shorter anyway, and i know i can tell because it's flipping forward so you're the naked eye or somebody that doesn't have a lot of experience will look at and go. Oh crap, i have a hole and then they cut this shorter and then it's this cat and mouse game and you're trying to figure it out and the truth of the matter is, is that when you pull it down, you actually don't have a hole. It'S all the way through that line is nice and clean. It'S also something that happens a lot when you blow dry hair people. Do they make this mistake all day long, especially on this haircut. They blow dry it. The back, looks great, it's nice and clean. They get to the side, they blow dry and they blow dry it going forward towards your face, so it curves it up, so it also makes it look like you've got a roundness to it. You know so it's really important when you're blow drying above is to kind of bring it down a little bit more, just very slightly over directly back because most people dry it straight down and then it automatically curves forward. So just a it's a big detail, but it's really important to kind of keep that in your mind. Okay, second side same thing now for ease i'm going to flip over my fingers. It'S not always easiest to do this, but i'm going to do it just for camera. No, i think it's better. If you start inside, maybe yeah. Is that better yeah actually is it or is it not which is better? You guys tell me we go with this way. This feels pretty good yeah. This feels pretty good whatever yeah, whatever i think we can. This looks good. Okay, yeah this for people that are right-handed. You really have to make sure that your elbow is high. The minute you drop this down it's over right, so you're going to have two sides that are going to be completely different, so it's palm to palm straight out from the root again. My eye goes to the length when i go to here. I will flip and go over the fingers, because it's just easier for me, if you're tall, you might have a little bit more wiggle room working all the way through each section, roll it into your prius wow it's on here. I know we didn't turn the ac on because it makes a lot of noise, so we didn't think you would uh be able to hear us, but we got nick anyway. So they're, like i'm gon na, be melting in like five minutes and we have a neck package. You can hear if you hear him pounding he's like so what happens here generally is people are like. I can't do this because your body is in the way. So what you want to do, if you ever encounter that it happens, a lot? What you need to do is you need to get your mid part of your body and you just need to move it out of the way. Did all the light bulbs just go off in everybody's head? I don't know, i can't do this and it's like all you have to do is like open up your body, get yourself out of the way and allow yourself to get and to do the haircut. So you just have to twerk it back carmel, that's! Basically what you're saying it's a nice clean shape! You see how it's starting to look slightly graduated, even though it's not technically cut that way again because the roundness of the head. So this is where it keeps it very, pretty and very sexy on a woman, it's not flat like a man's square shape. It has that curve to it. Okay, working the last section there right around the back here, i'm going to over direct again this time. I'M going to flip my fingers it's too hard for me to do it the other way. So again. Looking at the bottom, i need to make sure that that length is coming right out and then i'm going to work up. I can always work back down just to make sure just in case there's a little bit another. You know you might get that little tiny bit of hair. It'S not a whole lot, but it might make that little bit of a difference. That'S why they pay you. The big box, that's why they gave me the big box. Okay. Now, let's do the same as the other side. Just too much right. There just take a sliver of hair, i'm just going to comb it right behind. Here, don't get caught up with it too much! It'S kind of, oh, my god, i'm saying that and i'm doing the exact opposite. Okay, so there's our section so working forward, i'm gon na bring it back, can't see my section it's too thick. So again, lifting right up body position still can't see my guide see even the pros screw it up there we go okay, there's our guide right here, so again making sure that this hair comes out of the game. Any questions, no nothing so far, everybody's being exceptionally quiet, i think, is on hi noah again all the way. Through again, i have a little bit of a buffer underneath. So i'm not overly concerned, you know as you're working towards the face. The hair. That'S coming off is a lot less because we keep over directing it. So now we're down to a little little nugget, and then we have our little bit of a buffer underneath. Okay, so that's the back and the sides. Okay, so i'll do a quick cross check. It'S a cross check. It'S not a cross re-cut, so you don't want to cut it. If there's more than like a 16th of an inch, it's really not ideal. You want to take it in the same format, so we worked this way now we're just going to work up the head, but that doesn't mean you take it and you cut it down or you check you don't check at a 45, you check at a 90. So it's again straight out so you're in the exact same position, you're just coming at it from a different perspective, we're going to work up and just see like these things here you know it's a very small amount of hair, but what it does is it just Kind of really makes sure that you tie everything together really quickly. It also, you know, allows you to see if there's any inconsistencies, which is really what it's ideal for like right there right, you see that yeah. She gives me a headbutt, so i mean i left it a little bit heavier here. So all i have to do is just really quickly go back in and just work that down and it's right here. So what i did was just so you guys know. I must have dropped my hand just a little bit, so i wasn't like dead dead square. I must have like, given a little bit more leeway on the way down, so i'm just going to come back in it's right there. It'S not a lot of hair, but it's enough. So we have a question: hi. Are you layering, the parallel to the ground, the side? Yeah? Okay, okay, okay, top yay yay? How we doing on time? Oh good huh not really we're at the top yeah we're at the top of the the client. Here i wanted to draw her, so we could see her. Maybe i will we might. We could always just do a dry and then just post the after photos. Yeah. That'S true, if you want - or i can just stop talking and hurry up - that's also an option all right so yeah over here now we're on the top panel here, okay, so each section now we're going to work our way around the head first panel is going To be brought down to our line, we can decide where that's going to be. Do we want to maybe leave it longer than the length that we've cut, underneath that's a possibility that might be cute um. I think that would be really cute. If she had curly hair, you could flatten the shape out of the back drop, the top keep it longer. So it has a little bit more of an expansion. That would also work, and the key here and here is that you have to work all the way around so you're not staying in one position. Each time you take a section, you move, so it's kind of like a shimmy around the head. We'D always talked about like working behind the head and working square to the head, and now what we're going to do is we're going to work our body around it just makes it so much easier when you're doing a round shape to move around the head. So i'm going to take a curved section. I have my razor ready to rock and roll. Let'S see do i have enough. We have another question: why wouldn't you just take off extra hair in the cross check, there's no need to take off extra hair. If you do it right, the first time all you're really doing is dusting it that's the idea of the consistency in about of the classics. If you don't understand the classics, that's when you start doing having to do more haircuts. The idea is to get it right. The first time and then tweak it at the end, if you need, if you keep cutting it, you end up spending like an hour and a half doing a haircut, because you you're trying to fix it all the time. So there's no real need for that. You'Re. Better off spending time mastering the technique and mastering this the the classic shapes then to do four haircuts. I don't want to do four haircuts in anybody. You'D like to get in. I choose a strong haircut. I like to do the blow dry detail it and peace out peace out. Good luck, bye, okay! So our line is underneath we're right here. We can decide that in a second, so right now what i'm going to do, i'm just going to work some of that down. Okay! So now i can decide this is my first panel. Are you over me? I am 100 percent over here, okay, so i'm gon na work to my length right now so again, air before hair and working around stop drop there take up the next section shimmy your body over. Can you just do that? Shimmy real quick? So we started here. First section second section and what you do is you're working around the head, so it automatically puts you in the right spot. If i stay here on a round shape, i'm going to bring everything to me because it's easier so i'm going to have a lot of heaviness in the back. I'M not really trying to achieve that. So again, i'm and i'm also not trying to follow the guide from the underneath i'm trying to start a new one. So whatever you see is going on the bottom you're, basically just going to ignore it again shimmy around what you'll also notice is i'm dipping just a little bit and i'm opening the razor, because i really want to create a lot of texture and then dropping down. Just a little bit more, i don't mind if some of this hair kind of hangs over the undercut that we've already created because you get the beefiness and then you get the light areas too. Okay - okay next section so curved section around the head, she's a little wobbly for me. So let's stabilize her there's our haircut underneath now, i'm going to elevate this just a little bit. If i keep it down and i keep a closed blade, it's going to be really heavy. On top, i want to kind of lighten up the shape a little bit so using the skinny side of the comb coming straight down and then really opening up the blade. What you really want to do is you want to stay on the hair and try to hit every single piece of hair using a razor is really uh. It'S like a signature, everybody does it a little bit differently. The bases are always the same. How you handle it, how you open it, how you put in your razor, but when it comes to actually using the tool everybody's a little bit different, i would normally consider myself a fairly uh heavy-handed person, and i feel with this. You really have to lighten up the load, a bit which is good now again, as you can see right around the cranner. You'Ve got a lot of thick hair, so we can definitely go in and take out that take the bulk out of there because you can see it already. It'S just like dense. So normally i would say once you get to the top of the hair close it down a little bit close the blade down use more of a closed blade just so it has a little bit more weight to it. Just on that very front, the very top section, but with her hair they're so dense in here, you can really kind of go to town on it and honestly, it's a mannequin, especially if you're learning it's a great way to learn, because if you screw it up It doesn't really matter she doesn't care, you paid her, just remember that and they're expensive yeah. So if you want to get a mannequin make sure that you do maybe like the classics right, so i would go onto the erosio website and um the oh, my god. The subscription and what it is is it will give you all of the classics, and you can work your way through all of the classics with one mannequin head, so you'll be able to get long layer you'll be able to get bobs um scissor bob graduated razor Bob, i'm sorry scissor, bob god. I just went blank. It'S okay, scissor bob scissor, layered ball, scissor graduated bob you're working and talking and we're doing great. Okay, it's like chewing and walking right. Can you chew and walk? I'M like i'm a woman? Of course we can do that: okay, okay, so next section, sorry next side, there we go perfect. Okay! So again a little bit of my i'm going to keep the elevation a little bit lower here. Just on the first section, i can remove the weight by the openness of the blade. I do want to keep the length to cover what we've done underneath here. If i lift it up too high and then i open the blade she's going to have no hair here, so i really want to make sure that we've got. I don't want a whole lot of length there, but i definitely want something to kind of fall over. So second section i'm going to have a little shimmy, so working my way around again consistency in the razor. It'S really important, so working my way through, i might run out of hair now. Also, on your left hand, with the razor don't hold the hair too too too tight give it a little place it in your fingers, but don't hold it too tight. If you hold it too tight when the razor hits it, it kind of like hits it very heavily where, if you relax the tension on your left hand, it really kind of allows the razor to kind of flow through the haircut, it's a little bit easier. It'S also easier on your hands. When you start razoring you'll generally be on your fingers, you tend to get a lot of cramping because you're kind of holding on to the hair so tie because you're afraid of your life that you're going to lose it or cut yourself or whatever yeah. There'S a whole slew of things that could go wrong. You know, so i understand why people do it, but it's very counterproductive. So if you can get used to not holding the hair so tight, it really allows you to get the razor through the hair a little bit easier. So we just have a question here. Would you tell your client how to blow dry it at home? The way you describe directing from the front back instead of straight down yeah, i mean, i think, um, i think a part of or service is educating your client. You know if you do a haircut and she doesn't know how to do it. Then you've done a shitty haircut. She doesn't know that it's a great haircut. She just knows that she can't handle it. So it's really important to educate your client, it's important to educate her on what to use you know. Is she using you know store-bought detergent for her hair? Is she, after spending four hundred dollars on her color and now she's, going to strip it when she gets on because she's using a cheap shampoo? You know i would be really frustrated if i was a client and i spent a lot of money on a product, whether it's color or cut, and i didn't know how to deal with it at home. So for me, when i deal with um, when i do my clients i'll get my products i'll put them on the station and i'll show them exactly how much i'm using some of them take a video. So they have a concept because some people just aren't good. That'S a great idea yeah to have your client like video, the steps i'm like okay. This is what i'm doing i'm going to use this first, i'm going to use the second. Sometimes we cocktail them, which is mixing them together, which is definitely a fun thing to do. It'S not necessary, but you know some people just like it is there anything else. You would tell her to do with this cut as in i'm guessing. Is there anything else? You would tell her to do with this cut, as in like anything in particular, for this cut that styling would require. I would tell her to go to blaine and have her color down. I think you just made blaine somebody. Thank you so much. Well, i mean you know again: it's a complete image right. If you do this haircut on somebody with really dark hair, you know it might look a little heavy. Maybe if you send her up to the color department, you know, and they put in some fun painting pieces, it's going to give it a little bit more texture and a little bit more interesting. You know so it also that also keeps the client a little bit more within the original brand or whatever your brand is whatever company you work for you know, so the client feels that she's taken care of top to bottom, but i would teach her. I would teach her how to do it wavy if she has texture. I would also teach her how to do it straight now. I'M not a huge fan of spending 15 hours blow drying hair. I prefer to just kind of power through it and then just get a flat iron. You know, if that's how they're going to do it, i don't think clients are going to sit there for 45 minutes and blow dry their own hair. I know let me rephrase that my clients want to do that ever they were like. I need. I got eight minutes, so i have to come up with a haircut, that's pretty and that they can do themselves in eight minutes and i think it's important because i don't want to spend two hours doing my hair right. So you know how do they prep? I'M a big believer in prepping, so you get into the morning. You know you get into the shower in the morning wash your hair come out like i comb my hair flat to my head and then i go about my morning and then it's pretty much done. I might need to blast it really quickly for a couple of seconds here and there, but and i'll teach my clients how to do that, and they love that. So it's really important to kind of give them a little bit more education, i'm going to change the parting on her, because this is not cute with the center part. I really enjoy how this is looking like. I really love this. You see. Here'S the font now right, like center section kind of dorky right i mean it could work totally totally for me personally, i would hate it so now you've got your shape and your general shape. What are you going to do with that? Now we're going to destroy it, that's what we're going to do so you can kind of come around and kind of see what's happening now. What we didn't do is we didn't do our piece underneath right? That'S why it's really heavy here right. You can kind of see that right, yeah, so we're going to come under i'm just going to take that section out. It'S way too thick just come back in okay tilt her away from you. This is where your hands become really important, because if she moves you've, given her a nose job see how difficult this will be yeah, it's like a whole new, it's a whole new learning curve. So, thanks to my sister and her friend pauline for my masks, they made them and shipped them from ireland. I would say this is pandemic chic. It is now yeah. Isn'T she cute look at her all right, so i think we'll go from the bang area, the fringe area and work our way down to the line. But what i'm going to do is i'm going to hold my fingers way away from the line and i'm just really going to open up that blade and take all of that hair out. Okay. Well, it's definitely not as bad as i thought it was going to be with her having a mask. So that's good all the way through they have a lot of hair on the front of their head mannequins. So i'm really not intimidated by the amount of hair. I'M just going to go for it live video, john thanks screaming in the back screaming all right. So now here's where you can have a bit of fun. Maybe we could take this out so again, fingers keep your fingers straight generally. What i'll do is i'll, maybe put my ring finger on her face just for a buffer if she's a wiggly person, you know those clients are just like or she's talking a lot. Oh yeah tell her to stop moving and i will say it just like that. Just by like listen, i've really sharp blade. I'M going to be working really close to your face. Just keep your head still yeah and they were like why and i'm like, because i'm going to give you a nose joke if you don't and then they're like. Oh okay, so you have to make it important to make sure that they understand yeah so again, working now, i'm just going to work all the way down. I'M sliding my fingers as i work towards her face or her chin all the way through all the way. Through all the way, through move it around a little bit see how it's looking, you still have a corner. Awesome god, don't you hate when you cut the corner off damn, but i am going to lighten it. Okay, let's see how this is looking better yeah. You see, you can see it from the other side right. You know where you come from the back. You know. You'Ve got a cute little thing going on here. You can see her cheekbone, which is obviously ideal to get that hair out of the way, and you can see here that it's just heavy. So the concept is a good idea. It doesn't always work and that's when you can change it and detail up at the end. So let's just do the same thing. On the other side. Oh 12 o'clock. Oh wow, oh wow! I know we can go a few minutes over, so i'm not sweating. But what i think we'll do is i'll dry her and then we'll uh post a photo cute good lord. That hour went really quick time flies when you're having fun that's right, baby, so again, working all the way to the corner. You can over direct this here. If you wish working from the fringe area open blade, see all the bulk that i'm taking out so i'm coming down to my fingers, so i'm still keeping a lot of that length here, but i'm getting rid of all of that bulk and the interior good lord. I hope you guys can't hear that you think they can hear it. I don't think so again, last section open, open, open, open, open what you don't want to do. Is you don't want to mow through it? You know all you're really doing is creating a rough line which really defeats the purpose, because you could just do that with a scissor. So let's bring her back up and see her see. For me, i was just going to freehand it now, just a little bit of weight. She'S cute, she is cute, so just come in and take some pieces out, but you know the strength of the shape has been put in there now. What you're doing is you're detailing like if you were to uh, you know, use it thinning, shears or if you were to texturize, but what it does is it allows you to kind of create so much more. This is the part that i think the clients also like to see the most too oh yeah, but this is when it comes live, yeah right, it's like otherwise, it's just another basic boring haircut um we had a question. Are you using the end of the blade? I'M using the tip of the blade, so probably the first quarter inch, okay and really because it's i'm so close to her face. You know i can get the heel of the blade away from her and then just wiggle it down. And then, if it's heavy, you can also come in because we'd already cut her bangs. You know you can go in and chop up some of these and make it a little bit rougher. You know. Sometimes you don't want it to be pretty.


Comments
Heather G: Awesome technical and result! Thank you for sharing
ilia Bochdanovich: It was useful to see technique✨tank you ✨
Rain: WOuld probably be a good video if we could hear.
PrincessAloeVera: Mask on a manikin. Just NO.