Michelle Dockery Haircut Tutorial - Short Layered Bob - Thesalonguy
- Posted on 13 March, 2014
- Bob Hairstyles
- By Anonymous
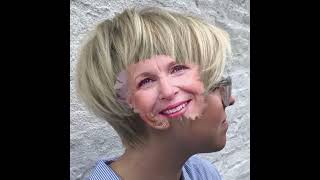
Please enjoy this haircut tutorial of Actress Michelle Dockery.
Michelle Suzanne Dockery is a Golden Globe- and Emmy-nominated English actress and singer. She is best known for her role as Lady Mary Crawley in the ITV drama series Downton Abbey.
SUBSCRIBE: http://goo.gl/aWSkjE
Mannequin Emma from:
http://www.hairartproducts.com
With 20+ years of experience as a hairstylist and media personality, Stephen Marinaro, a.k.a. TheSalonGuy, focuses on bringing fashion, beauty and entertainment content to millions of people through TV, radio, print and the web. Whether he is offering style advice or chatting with stars on the red carpet, Stephen lives by the values of professionalism, respect, and passion for his work.
Since entering the beauty industry in 1992, Stephen wanted to give back to his community in different ways. After serving the public and protecting our families for six years as a law enforcement officer and Firefighter, Stephen decided to forge ahead with a new career path that combined his first loves: Beauty and Technology. Stephen brought his core family values, respect and an overwhelming sense of dignity with him during his transition. Not only is Stephen a mentor to millions of viewers through television and radio, he is also the founder of salonsearch.com, an innovative online directory for salon clients and professionals.
Stephen's YouTube channel, www.youtube.com/TheSalonGuy, features styling tutorials and event coverage. His channel surpassed the 2.5 million views mark, and averages an astounding 300,000+ hits per month.
Not only has Stephen hosted his own radian show, he has also interviews with an impressive list of celebrities, including Sophia Vergara, Alyssa Milano, Regis Philbin, Steve Buscemi, Terrence Jenkins, Pamela Anderson, Daisy Fuentes, Michelle Rodriguez, Dita Von Teese, Nick Cannon, Frederic Fekkai, Kelly Cutrone, Thomas Jane of the hit HBO series Hung, Twilight's Chaske Spencer, Smash's Megan Hilty, and Jenna Dewan-Tatum, among many others.
Stephen is currently signed to Rightster, the #1 news content providers on the web. He was also cast by eHow as an expert, for a 13-episode series on hair and grooming tips. He's chatted with and interviewed cast members of several shows including How Do I Look?, What Not to Wear, The Real Housewives of New Jersey, Real Housewives of New York, Cake Boss, Jersey Shore as well as covering red carpet events and fashion shows that include the Oscars and Mercedes-Benz Fashion Week NYC. Stephen has appeared on Style Networks hit show, Jerseylicious on Season 4 and has worked with other networks such as MTV and BRAVO.
Stephen is also an entrepreneur who helps businesses through consulting, marketing, and media and event production. He has worked with brands and designers such as Dior, L'Oreal, Paul Mitchell, Zang Toi, Rachel Roy, Emiliani, DePasquale, Nike Communications, The Art of Shaving, Beauty Press, Youthful 8, Malan Breton and Ted Gibson.
Whether Stephen is working in front of the camera or behind the scenes, one thing is certain: TheSalonGuy brings a unique blend of creativity, experience and enthusiasm to every project.
Follow me:
http://www.twitter.com@TheSalonGuy
http://www.facebook.com/thesalonguy
Hey everyone Steve in a salon guy here and today I have a special request: haircutting tutorial and the request was Michelle: Dockery who's, an amazing actress and she's got a very cute and adorable mid-length bob layered haircut. This is a very popular haircut, seeing a lot of celebrities kind of a longer sweeping bag into a mid-length Bob shape very cute, very durable, and this was requested by a Facebook fan. So here we go, let's get started alright, so the first thing we're going to do is we're going to establish our base length now, Michelle's hair I'd say, is probably around here, which in the front it angles around to probably about just below the chin. So what we're going to do is we're going to establish our length - and I like to do this by simply using the comb. Only and remember this line is going to be traveling around the head shape and throughout the base. So once you cut this first section, this is pretty much your base, so, let's lock in our comb using no tension all right. I'Ve got my ideal base here and we're going to come in lay the comb against the neck and we're going to cut straight across now. I'M going to do this for the next couple of sections and I'm going to do this as to establish the length and then we're actually going to start to layer. The hair, once we get to about here so about half way through, and I just want to show you how things should be looking at this point again, I'm simply just bringing down the length and cutting the base line here and everything is being held with. Really. No tension with my hands, I'm just simply using the comb, so I just want to make sure you guys are pretty much on track here. Comb everything straight down again come in with the comb as pretty much like your ruler and you're, following where you left off, because everything should pretty much be straight across. You should be able to see your guide line very very easily and you're, just following the same pattern that you did threat the whole rest of what you cut so again, we're going to continue this until we get into the sides. Ah, so we have ever complete one length around to the sides, then we're going to angle the front and then we'll start layering when you're in the salon. You want to be quick, but you want to be efficient. You want to make sure everything is precise. So what I'm doing here is I'm taking pretty much two sections on the side. Here'S the guide from before you can see it again use your comb as a ruler and we're going to cut down just slightly on a little bit of an angle just to be on the safe side. Okay, because you want to make sure you're it's better to come down this way, all right and be safe, then to cut it too short and you're creating a hole. So now that I see that I'm safe, I can bring this up a little bit. I'M just going to go or back over this again and reestablish and cut the line straight across now. Remember, since we are cutting this up anyway, all right, we are going to be angling us up so again now we can bring down the top section here, and this is going to be our final piece through out the side here, all right following our guide, just Like that, coming in to the front using just our comb now when you go into the into here, now we're going to be cutting this on an angle, but if you do want to leave this a bit longer, just comb this back. Alright, if you want to make sure it's even it's better to comb it back, because when you, if you cut it straight across from this point, it usually ends up being shorter. So this is a safe, safe little trick to make sure that you don't cut this because what happens if this goes forward, it's all going to be gone so there there. You have the front piece and see the camo way over here, but when you bring this back all the way like this there, you can see it's all pretty much even on one length, but we are going to cut this shorter in the front now, all right. So now we're ready to work our angle into the front here like michelle, has so what we're going to do is pretty much pick up where we left our guide, okay, which is down and through here and now we're going to work our way up using our Hands and we're going to be angling up this way, okay, cutting up - and this is going to allow for us to create a angle and a shorter fringe throughout the front here, when you get to the very very front, what you also can do is create your Own little section in through here by creating a piece right in the front as your guide, which is like this right here, then you can use that to work in the angle going in through the sides and the corners here. This way you have your established length and it gives you a little bit of an easier guide to cut into okay. So now we've got this established and if you now you have this you're safe, you can actually even angle this up, even more, which we'll do right through out the front here and as you notice, I'm chipping into it with my thumb here. Okay, I'm not cutting it straight straight across I'm not just kind of hacking right into it. I'M just using my thumb - and I'm just kind of working this in so now we'll be able to create this piece right in through here pretty much almost it's like exactly how michelle has her hair see that look at that. This is pretty much it right here. So now we're going to start to layer, the top and the back now for the back we've since we've established our length, you really want to create you know minimal layering, so we're going to hold everything kind of working straight out from the head shape, as so. Our first section in the back, which we're layering i'm going to take right down through the middle and we're going to cut it I'd, say about an inch off the length. Okay, now we're coming down into here. Here'S our guide, here's the hair that needs to be cuts coming straight out and we're going to work down in through the bottom section which not too much is going to be cut off because we don't want to cut too much off and all the way into The bottom there you have it - and this is the whole first section here - so we're going to brush this out of the way. Now now we're going to move to our next section, slightly off-center again bring everything straight out from the head. There'S our guide drop this down, pulling it straight out again, you can see your guide and we're just basically working from the top of the head all the way down and we're just cutting off what excess weight that needs to come off. Just for this to have a nice flow, so I'm going to continue this all the way throughout the back here, bring everything straight back this way and what we're going to do then, after we bring it all straight back out this way, I'm going to then work In through the top section, alright look that it's a perfectly straight line, see that now what we've done is we created layers, but there's literally no lines of demarcation or any sort of steps or anything, but you can see the layers look at that see where they Fall so they're falling in a place where you can actually blow dry this under you can flip it out. You can give it a lot of movements, and this is really a crew. A really good way, as far as creating a nice shape is by holding everything. Just straight out from the head, keeping it simple and just following the natural head shape. So now we're done with the back I'm going to work in through the top alright. So we've got our back section done here, which we created from the from the back of the head. Now, what we're going to do is we're going to create our guide thread, the top, let all the hair fall out, hold it straight up from the head and now what we're doing is we're creating and following the head shape, I'm just going to do this all Throughout the back here, where I connect the top again, the hair is going to fall out, go to where it stops falling out of your hand and that's where you're going to create and blend the two in. If you took this and held it straight up, you're going to create a harsh line throughout the bottom. So when you, when you layer - and you blend it this way by following the head - shape letting the hair that's not supposed to be cut, fall out of your hand, then you're going to have a much softer line. Okay! So now that we've got that we can start to move forward this way. So let's take some horizontal section throughout the top all right and now we should see a guide, all right, there's our guide and we're going to cut it straight across we're going to work straight across to the very very front. So at some point, there's not going to be much hair. That needs to come off because we already created our front angle, which is good, because that means that we've done the work ahead of time. So it's always best when you don't have to cut anything because you've already done the work, all right so holding it straight up, and here we go last section - will bring us back and you'll be able to see. Nothing needs to come off like that. Okay. So what I want to do now, just to make sure this is a little trick here to make sure that we're right on track here and we're pretty much in alignment. Okay, here is where we can angle this coming shorter to longer and just to see our balance. Alright, if you take a piece right down the middle or right kind of near where your your heart is, which hers is on the side here and you hold it straight up and you could see what needs to be cut, and then you cut it like that. Alright, that tells you that you're right on line with everything else, alright. So now that the top is done and now it's time to work into the sides. Okay and here's. What we're just simply going to follow the head, shape and cut everything straight out from the head. Not much is going to really need to be cut here, because this isn't too too heavily layered, but it's layered enough that it's going to give you a great shape. So we're just following the head shape around working from the corners throughout the bottom. Holding it straight out, you don't want to go too low and start cutting the bottom, because you're going to start to cut your length and you're going to disrupt the sharp nice line. That you've created by using just your comb so as you can see, I'm just working to where the bottom is here. Okay and you'll see your you'll see the length coming in throughout the side here all right now we're working into the into the sides. Again, we've got the part there there. It is. The front is angled we're just going to comb this straight out. There shouldn't be much to cut just softening up that corner and there we go. This sides completely done all right, as you can see, it's really starting to take shape. We'Re going to do this again on the other side here now, when you're working on the other side, what you need to do is take into consideration, if you, if you stand on this side and angle, everything up like this all right, you're gon na you're, going To leave quite a bit of length here because you're bringing it way up, but if you come around this way, okay on this side - and you bring it straight up. Alright, now you're giving yourself a lot more of an angle to cut on okay and you're, going to see more of what needs to be cut so again we're following the head shape. There see it now. I can see more length coming. I can see more. What needs to be cut because I'm now working around the head shape better. Alright, I'm just going to continue to do the same thing. I did on the other side, cutting off the corners rounding everything out and then we'll be pretty much done with the haircut. Alright, look at this. This is gorgeous alright, and not only is the haircut gorgeous, but look at this mannequin. Okay, look at that! This is a hundred percent imported virgin hair, and this is the Emma manikin, which is the kind of celebrity mannequin from hair arts. If you go to hair art products, calm, you can order the mannequins from there or call the one hundred number ask for Erica and tell them that the salon guy sent you and you can get this mannequin. This mannequin literally, is the best mannequin. You could possibly use if you're a professional hair, stylist or, if you're, looking just to practice, even if you're, not a hairstylist. This is unprocessed virgin hair. So what I'm going to do is going to apply a little bit of smoothing product to this and then we're going to blow-dry it alright. So between the combination of the Onix, I use a blow dryer. Also, this is the itec brush from her art. Just got these in cyan ik ionic, I'm sorry anti-static - and this is incredible. This brush alright gives a lot a lot of tension to the hair. You can really get through it really nicely with the brush, but this is what I've done it. Blow-Dried is all forward blow dried oil under now. What happens? Look at this when you bring it back it all kind of falls into place. Alright, when you break it when you kind of rake this all back like that. Alright and this you can kind of tuck back this way as you've seen she has it a little bit tuck back and then this kind of just sweeps over you can Flatiron the whole thing if you want alright, but this is pretty much the look here. I think it's gorgeous very, very elegant, so you can see it all kind of worked its way around this way. I blow dry this all under okay. This will look differently. If I were to you know flip it out. If I were to create you know some waves in it you you can really have a lot of fun with it. Here'S one look which you kind of have seen her wearing, where it's kind of just tucked back a little bit this way and slicked back, but I think it's a gorgeous gorgeous shape and there you pretty much have it so thanks guys for watching on my tutorial. Thanks for the requests, keep them coming and I'll see you guys soon with more toils from the salon. Guy


Comments
Laura Jayne: This is gorgeous! I'm so happy I found your channel. I'm in beauty school and my first day actually taking clients is tomorrow, and because of your videos I feel so much more confident. Thanks! :)
Genifer Price: Lovely, your videos are always so helpful!:)
Александра Фед: Класс!!! Очень красиво!!!! :)))))
VITO NITTI: Great Hair cuts and Styles!Thanks for all the great tips Salon Guy
Mary Saputo: Love this cut! Greatly admire your videos! In all of your travels, can you recommend a reputable salon and/or stylist in the St. Louis area? Thanks for any suggestions that you may have!
Varrak - growing authentic you : Thanks for the great tutorial! Can you please do a tutorial for curly hair haircut? Thx :-)
Ruben Bruno: Muy padre :)
Shenaz Dewani: I alike all your videos, they teach us all the haircuts precisely. In this video when you come from the back to the front we cannot see the mannequin, only your hands and hence could not understand how you are connecting the front and the back. Please take note of my request in the future. You are doing a great job, Thanks
BrightBlue: What a soft, "airy," bob! :-)
R J: Can you do a long layered haircut with face framing layers ? Like Victoria's Secret
steffers841: do you have any videos on perms or body waves? those are my fave!
Arlene Fazio: great tutorial
Kristyn Starling: Can you do a Jennifer Lopez celebrity inspired haircut/bangs tutorial
Ariana Polk: Can u do a tutorial on how to cut curly hair
peter huang: Good!!!
D o g g y: The mannequin looked better than the picture!
Ariana Polk: Can u do a tutorial on how to cut curly hair
steffers841: Is the one side supposed to be longer than the other? It looked uneven.
prem sharma: Ur the best
safa nour: merci
audrey_playzblox921 Oof noob: Couldn’t see some important parts!