How To: Braided Wig Tutorial/Knotless Cornrows
- Posted on 30 December, 2021
- Braids Hairstyles
- By Anonymous
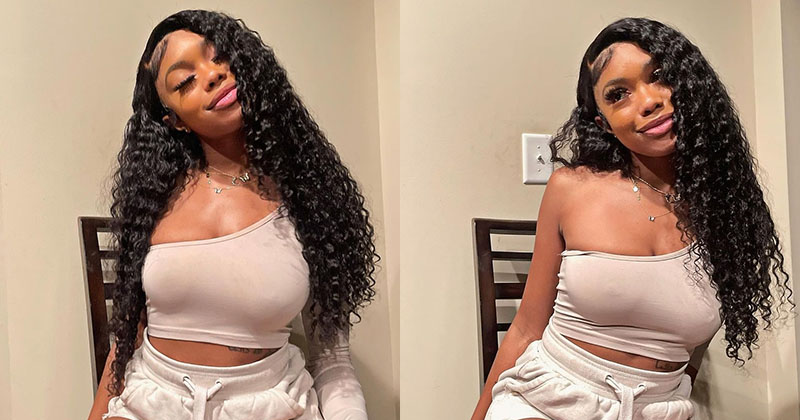
How to: Braided wig tutorial/knotless Cornrows, using left over expression ultra braids hair extension to make this beautiful goddess braids wig cap with cute bouncing curls, using frontal hair makes it easier, this diy wig is very easy to install not heavy when you wear it, just follow the beginners friendly wig cap tutorial step by step to create that perfect wig of your choice.
Feel free to leave any suggestions or ideas in the comment section below, am also here to learn from you, I would love to answer your questions if any.
Please give me a thumb up (LIKE ) if you like any of my video.
For new videos updates
Press on the Red ( SUBSCRIBE BUTTON ) below
Turn on the ( BELL ) to get all notification from my next video
Please support my other Channel by ( SUBSCRIBING ) .. thank you.
My Cooking Channel....
https://www.youtube.com/channel/UC33-z... ✅
Items needed to make this wig are.....
1 1/2 pack Expression Ultra braids colour 4 ( use any other colour of your choice) cut into 4 parts
Adjustable wig cap
Flexi rods
Hair clips
13x6 Frontal ( ear to ear )
Hair spray or water
Hot water to activate curls
Needle and thread for sawing
Shine n jam gel
Beeswax hair cream
Scissor for trimming
Rattle comb, brush and wide tooth comb
Got 2b hair spray or any other strong hold spray
Below are lists of my previous videos, feel free to check them out.......
Christmas Market in Trier Germany 2021
I Tried Onions Juice For 6 months on my Hair
DIY: braided wig cap/ NO TENSION / EASY
#How I finally revamp my old wig to new
Remove old glue in less than 3 minutes from lace wig
MY SIMPLE EASY PUNKY HAIRSTYLE
Finally got MONETIZED AFTER 2 DAYS + Tips and Tricks
HOW TO CRISS CROSS ONE SIDED BRAIDS RUBBER BAND METHOD ( AMINA HAIR )
VERY DETAILED BRAIDED ZIG ZAG WIG CAP / BRAIDED CORNROW
NO CLOSURE NO FRONTAL KINKY STRAIGHT HAIR BUNDLES / EASY TO INSTALL
Track: Syn Cole - Time [NCS Release]
Music provided by NoCopyrightSounds.
Watch: https://youtu.be/XDNFAujgJb0
Free Download / Stream: http://ncs.io/SCTime
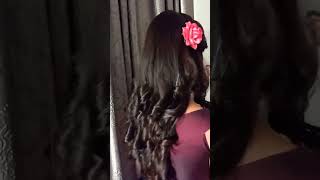
Hey pretties: what's up you welcome back again to my channel? My name is lady sharon. Thanks for stopping by to check out today's video and if you're new to my channel, you are welcome and once again merry christmas to every one of you back home. So in today's video guys i'll be sharing with you all how i made my beautiful, pretty and cute week, i'm going to do this, i'm using my normal, regular expression braid. So i just cut the hair by folding it twice and then go ahead and stretch out the end of the hair and, after stretching out the end i'll, be using my white tooth comb to just detangle the hair okay. So while i was dangling the hair just make sure to just wrap the hair, just like so around your fingers. That way, you don't have too much of hair loss. Okay, so i also did the same with the other side. So after detangling, the hair with the white it comes out then go ahead and apply a little bit of my blue ice cream, okay, which is also called the petroleum jelly. Just rub it in my palm and then rub it in my my hair, okay. So this will just help to detangle the hair like to smoothen the hair and tangle free during the the braiding process or the controlling process. So right now it's time for me to go ahead and let my adjustable wig cap into my mana key hair, just like so and to make sure it doesn't slide off the mannequin head i'll, be using my tipping just to secure it okay. So this is my frontal hair which i'll be using, which is the 13 times 6 human hair? Okay. So if you don't have this just go ahead and check out my other old video just to see how to make a wake up without a frontal, okay and to make sure it is properly secured to my wake up, i'm also going to be using my tp To just secure it to my money, key cap, so right now, it's time for me to just use my hairspray to just spread the hair. That way all the hair strand is laying into one direction. Okay, if you don't have a hairspray, you can also use water to do this. So after spraying, the hair i'll be using my comb to just comb everything to the front. You can see how everything just laying to one direction: okay, so i'm using my hair clip to just hold it right there, because i'll be using my needle and try to just sew this together. Okay, so i'll be sewing it from here to here, which is across the crown to the other side of the ear okay. So when you're sewing, it make sure to wrap the thread around the needle twice that way it is properly tight and secure. So i'll be doing this until i get to the end of the hair guys. So after doing this i'll be moving to the next, which is to start crocheting the hair on my wig up. So here is my crochet hook, so i just grab my medium sized hair and then place it in my crochet hook. Then pull it out and use my hand to just pull out the hair just like so and then i'm done crocheting the hair. Okay. So i'll be working just like this all the way to the crown okay, so when you're working at the back side of the hair make sure to space it like two to three centimeters apart, because you don't want it too crowded at the back of the hair. Okay, so at the crown of the head, this is how i did it. I just uh give it a space like one centimeters apart that way: it's not too space. Okay, that, like you, don't have too much of space at that point. Okay also make sure to reduce the hair strand. You are using at the crown. Okay, you don't want it too much of volume or too heavy at the crown area, yes guys. So this is how i did it so now it's time for me to just go ahead and change my crochet hook into my crochet ventilating hook. Okay, so this will help to make everything look natural, because i'll be picking a little bit of the hair, like everything is just going to look like it's growing out from my own hair. Okay, like it's not you cannot really tell that this is a weak cup. So make sure you're not picking too much when you are doing this just take your time and be patient, and definitely you will get through doing this. Okay, so i'll continue doing this until i get to the end of crocheting everything you are seeing on the crown area, so after crocheting all the hair into the wig cap, it's time for me to just go ahead and then start to brush that, and you can See how tangled the hair is? It'S not really nice and it's not smooth, rather okay, so i'll, be uh, combing or brushing the section of the hair, because i don't want to just go ahead and comb everything one time. Okay, so i'll be sectioning. The hair like three times and then start to brush the hair, just like this, so you can see how smooth the hair is looking after brushing the hair, so after brushing the hair, i would then go ahead and pick like three crochet hair and then get my Flex, rod and then wrap the hair around the flex rod just like this. Okay. So after wrapping the hair around the flex rod, i would then go ahead and then bend the end of it. That way, it's going to just secure the hair, like it's not going to make the hair to unwrap okay, so be doing this with the rest of the hair. So at the point when i was wrapping the hair, my flex rod wasn't enough. So i just work with the the amount of the flex rod i'm having and then dip that in water first and then continue with the rest of the hair. Okay, so guys this is the amount of the flex rod. I have so right now i'll be taking it off from the manager. Here then go ahead and place it in my bowl and then pour hot water over it. Okay, just like so make sure the hot water you're using is really really hot, like hundred percent boiling water, okay, so the hot water will just help to activate the coils in the flex rod and also make sure you're not leaving this more than two minutes. Just two minutes is enough to to do this. Okay, so after doing this i'll be placing it in my tower just to drip out the excess of water just to hold it right there, okay, so and then go ahead and unravel the the hair. You can see the coils how beautiful, because they are looking, they are really looking really really beautiful. Guys. Yes, and now, when i was doing this, i was really really like wow. This is so beautiful and pretty yeah. So after doing this, i would then go ahead and spray. My coins, yes just spread the curse, just to fix the coils in place because i'll be working with the rest of the hair. I don't want the coils to just like straighten when i'm working with the rest of the okay, so right now i'll be using my uh, the same flex rod i use for the downside of the hair to on the crown area. So right now, after uh dipping it i'll activating it in hot water, i'm just unraveling the last one right here and then go ahead and then show you guys how i make my external coils, which i'll be using to make my goddess braid later run. So to do this i'll also be using the same method that i use with the the wig, so i'm just wrapping it just like this around the flex right and then do the same thing with the other side. Then bend the end just to secure the the braid on it. Okay, so if you notice this hair was kind of longer than the the one i used in making the weaker. So this is just i cut this one into three part. This is my a leftover. A braid, the one i previously used to make my wig up. Okay, so don't worry just use whatever you have so in total i used about uh one pack and i have to make this wake up, so i'm just placing this uh into the bowl just like so and then once again pour in my hot water leave it For two minutes for the course to activate and then go ahead and remove it from the hot water place it in my towel, while using my towel to just like dump me just to remove any excess water from the from the hair care before unraveling it. So this is how i make my wig. This is how i make my coils. Everything is simple and easy. Okay, so if you don't give it a try, you don't know how to make it okay. So if you want to make this recap, just go ahead and buy the extension and then try to make something for yourself: okay, so after unraveling the quest i'll be uh separating the cord. Just like it's okay, you can see how i'm using my fingers to like coil the hair. So if you don't want to coil it with your finger, you can just dip it in the cold water and then everything is just going to bounce back into the original coil shape. Okay, so right now it's time for me to go ahead and start controlling the the front of the hair. So to do this, i'm using my raw to comb to just uh pat it at that area and then go ahead and apply a little bit of my shine and jump uh gel just to hold it a little bit. Okay, because um, because this frontal hair is a kind of slippery and i need something to just hold it firmly, while i'm controlling the hair okay. So before i control, i normally use my rattle comb to just uh, pat a little bit of the hair in front and then once again, i separated like divide it into two just like this and then make sure it is uh straight: okay, yeah the straight. The better yes, so i will start by uh uh controlling a little bit of the head, the one i separated then in front. I would just call really like separate it into three just a little bit and then start to place the extension on it. Okay, so after placing the extraction on it, i'll be controlling it like twice and then go ahead again and start adding more of the essentials, so you can see how i'm doing it, i'm not holding everything together like i made the extension i'm just leaving. One extension aside and then um control the other one before adding it okay, so this will just help to create the illusion of not like you're, not having extension there. Okay, everything's just going to look like natural from your own hair, unlike the normal uh gon na within style, where you see the the cross strand of the hair across the the the cornrows okay. So this is not like that. This is just like hidden. Okay, just follow this step. I just make sure everything is really in details, so you can really see what i'm doing and if you have any question regarding to this hair or this video. Let me know in the comment section: okay, friends. Yes, i hope i i'm able to uh teach you how what you need to know about this uh step, i'm making right now. Okay, so you can see for this cornrow guys. I just i added like a three to four uh braid, okay and then start to brady, because i don't want the braid to be really really big. I just wanted everything to be really uh like a medium size. Okay, so why i'm curling it? You can see. I'M picking the hair from the side by side, like i pick from this side and again i'll, be picking from the other side as okay and then continue controlling the hair until i get to the the end of the hair. So, after getting to the end, i would then go ahead and then braid the hair a little longer like a four to five centimeters, okay, before adding my external choice. Yes, i call this external chords because i didn't make the course direct from the wake up. Instead, i made it with a flex rod and then start adding it to the to the bread okay. So this is this uh the method i also use in making my goddess bread. If you watch my other video, which i made my goddess bread for myself, so i use the same method to make those uh goddess. Okay. So if you haven't seen my video feel free to check out my goddess, bread, video, you will see how i did it. Yes, so then continue uh braiding this hair, leaving about four centimeter, like i said apart and then start braiding, okay, so before i get to the tip i'll, be adding more coins to the braid, just like so, and then continue. So when i get to the end of the braid, i would then separate the hair a little bit and then use it to just tie it. Okay right there just to secure it properly. So this is how i'm going to be braiding or controlling all the the rest of the front guys. Yes, so after uh, braiding or curling, everything here is the hair. You can see what i said before the sideways coil is kind of longer, so i still have a little bit of work to be done so i'll, be using my scissors to trim the length just to fit in properly with the other ones. Okay, so after trimming, the hair, you still notice the uh, the middle part of the hair is kind of shorter, so i'll be dipping my fingers in water and then use it to stretch out the middle part. That way everything is going to be of equal size. Okay, yeah so after doing that, it's time for me to start adding my hair accessories to the hair, this is just help to make everything look more cute guys. Yes, everything is going to look really really pretty, so i also go ahead to also add my elastic. Strap at the inside of the wig cap, this will just help to secure it properly to your head when you're wearing the wig up, and also it's really really adjustable. You can reduce the the tightness of the hair like if you don't want it too tight. You can see i got this from from ebay, okay, you can also get this from amazon or aliexpress just check it out, and you find it. It'S really really cheap and affordable. Okay guys. So this is my beautiful wake up, guys, i'm loving it and i'm rocking it already. You can see how beautiful you can see how pretty you can see how cute this wig is looking or more guys. Yes, it's really looking so beautiful guys. I cannot express it and, above all, is not heavy, because i use just one pack and a half so to do this. I bought one pack and i have half pack already in the house. Okay, so if you're buying make sure to buy two packs to make, this is very, very good and you will definitely love it. Okay, so for this tie you can just tie it as a ponytail. You can slide it like um, a high front just like so, or bring everything to the front and then leave a little bit at the back. Just tie the way you want to have it: okay, yeah. You can see the coils how they are bouncing. This really look like a human hair doesn't look like a synthetic hair at all. Yes, so this is me this is my hair. This is my wig. What do you think about my hairstyle? What do you think about my recap? Let me know in the comment section below, if you like this video, if you like this tutorial, also give me a thumbs up like my video subscribe to my channel, if you haven't done so, okay like if you want to see more from me, don't forget to Hit that red subscribe button and then turn on the bell at the end of this video, for you to get my next new video notification. So thank you once again, everyone. I really appreciate your time and i will see you on my next one: take care and have a nice day bye, guys you

Comments
LADY SHARON: Wig can easily be style to any direction, not heavy and very comfortable to wear, love it.