Let'S Do This Hair! | Knotless Braids Tutorial For Beginners
- Posted on 27 July, 2021
- Braids Hairstyles
- By Anonymous
My website: https://www.skbeauty.co/
My business instagram: https://www.instagram.com/skbeautyco/
My personal instagram: https://www.instagram.com/slaeigh.kay/...
Want to send me something?
P.O. Box 562
Conley, Ga 30288
#knotlessbraids #knotlessbraidsforbeginners
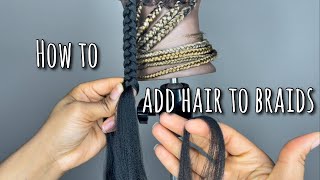
What'S up y'all welcome back to my channel, so we're starting off with freshly blow-dried hair and my hair desperately needed some love and attention. So i definitely went ahead and did a little trim. I am not the professional, so i don't go crazy. I just try to make sure everything is even um. I do have a separate video um on how i trim my hair and i will link it below if you guys are interested but pretty much. These are the results. I just try to make sure everything is even i don't try to get in there, because my hair is not pressed out or anything, but now i'm going to be showing you guys. This was my first time using this little weaving thing. I don't know what to call it for real, so i'm gon na put it on the screen, but this came in handy y'all. This makes the process so much faster and i paid 14.99 for it at my local beauty supply store. Now my sister did help me out and she parted my hair. If i would have parted my hair myself, it would have took me a lot longer, so she definitely came through and helped me out and parted my hair, but this is definitely possible to do on your own but y'all. I did that one time now. I did it twice um since i've been braiding, my own hair and let me tell you it adds on an extra two hours to the process, yeah so um. Yes, i had to go in and fix my middle part. I don't know what had happened. I think other hand got lost under my head because i had to go to work and come back and uh finish it but yeah. I had to get my middle part straight and now i'm going to be applying the 24 hour edge, tamer braid formula to my hair before i go in and start adding braiding hair y'all. This is amazing. I used to use um the other jam, but it doesn't really hold my hair. Like my, if you could tell my i have 4c hair, so i need a little extra. I need a little extra whip behind it. So, basically, i'm going to explain knotless braids in the most simple way possible because i'm still a beginner y'all. So, basically, you want to start braiding your own hair first and then grab a piece and lock it between your index finger and your um rest of your fingers just like that, and you just want to add it to the family. You know what i'm saying like you know how you bring a cousin over and you like, go ahead and get you something to eat. Don'T worry about it. You know what i'm saying: go: go talk to your cousins, but they you know they really ain't related, but they're gon na be your cousin. Today, that's how it is so again, like i said you just lock it between your thumb and your index finger and hold it with the rest of your hands and then just add them to the cookout. You know what i'm saying: that's the really the best way. I can explain it and then you want to just keep gripping it and adding it and blending it to the family. Add them to the games come on cuz. You know what i'm saying like: that's just how it goes, so you just want to keep adding and keep adding until you're satisfied with the the width and the length, because you keep adding onto the length to make sure that the braid is as long as you Would like it to be, and i try to go ahead and, like start off small with very small pieces and then, as the braid gets longer, i add a little bit more hair a little bit more hair a little bit more hair just so it can all Flow together and i'm going to keep giving you guys examples throughout this, this video. This will not be the only braid that you'll see so no worries keep watching. So let me tell you about my best friend. This is the phenotech braid, rack and y'all is no assembly required. All you do is pop it out. It'S ready to go straight out the box and you just loop, the hair onto each thing, and it literally is lifesaver if you're not braiding, with this, what you're doing okay! So now i'm halfway done with the hair like magic and what i did not mention to y'all before is on each braid each section. I apply oil to my ends because y'all i'm trying my best to grab my hair out as long as it could possibly get and i'll be neglecting my ends, which is going down this process, and you know you only get your hair is only as long as The length i'm sorry as the ends that you retain, so i try to make sure i'm consistent with that, and i just want to show y'all how that edge. Tamer really transforms my hair, my 4c hair so, like i said before, you want to just start braiding. Your own hair, but don't go too far down you just want to go ahead and separate those three, those three parts and braid it like one time and then you want to separate one end, grab a piece make sure it's small add that thing to the family Make sure this goes with both sides cross over separate the other part, so that you can lay it in there boom lay it in there like that boom boom. Then you want to braid again and you keep doing that and you keep doing that until you've had enough hair to your liking and, like i said, if you want those real long, booty lens knotless braids, you keep adding hair until you see it to your butt, You know what i'm saying: it's literally that simple but um. Sometimes it can get a little confusing because you don't know what hand is doing what. So you just want to make sure that you remember where your fingers are. I know that may sound a little crazy, but please remember where your fingers are, so you don't get the hairs crossed up looped up and then you have to take it all down, because it's unraveling and you got to start again. You just stay focused and try not to think about it too much, because sometimes when you're braiding your own hair, you can just get too caught up into. I can't do this, or this is just too much or because it does get a little stressful, especially when you're doing this at 5 30 in the morning like i was right before you got ta even go to work so yeah just try to stay patient and Remember that you are saving yourself almost two hundred dollars: okay, because this whole hairstyle, including the braiding ring, cost me sixty dollars. So i saved myself two hundred dollars, so i just kept keeping that in mind that i got a whole 200 in my pocket and yeah. So sometimes you just got ta think about it like that and stay patient keep your eyes on press okay. So now i'm just showing you guys that the concept is still the same. Even when you get down to the shaft of the braid um, you just add, and it's actually a lot easier once you get to this point. You just add the hair in between your fingers boom and then just continue to braid on after you've added that piece to the family, and you keep going all the way like. I said if you want booty length, if you want needles, if you want ankle, you just keep doing that until you reach the body part that you want your braids to stop it. That'S the secret and now we're working on our last braid. I love y'all. The stand is long for real working on your last braid, and this is my favorite brush. I got this from my local beauty supply store and, like i said, i just apply the oil once again and boom like magic, go all the way down. I wish it was this fast and real. Like y'all took me a day and a half, i did the back part before work. I went to work with a hat on, came back home finished the top part and was ready for war. I was ready for that action baby. I had places to be people to see. Okay but, like i said, thank you guys so much for watching. I love you guys so much, and this is before i dip my hair. I dipped it later on but, like i said, thank you all so much and don't forget to like comment and subscribe love. You


Comments
Andy Appleseed: Your braids came out perfect good job ❤️