Thinning Edges? Yes You Can Still Get Knotless Box Braids !
- Posted on 08 June, 2021
- Braids Hairstyles
- By Anonymous
#knotlessboxbraids
#knotlessboxbraidsonthinedges
Social Media
* Facebook : londoncurlstyles
* Instagram: @thelondontayy
* Business only email : [email protected]
-----------------------------------------------
Location: US -Columbia, SC
Link to hair used:
I used 2 jumbo pack of Braiding hair: Color number 1b: https://amzn.to/2QM4te2
I used 6 bundles of braided hair total
It took me 5.5 hours
————————-
Products used in this video:
Shine n jam https://amzn.to/3fhETHt
Mousse for the setting the braids: https://amzn.to/3ucAfi4
Style Factor Edge control: https://amzn.to/34flSPq
Wrap strips:
****Most used products ::
Lotta body mousse Https://amzn.to/3gXFI5Y
Shine n jam : https://amzn.to/304oKw9
Braiding rack : https://amzn.to/30G50PR
——————————————
❤️Related videos you may enjoy ❤️
Knotless braids on 4c hair
Knotless braids on 2 inch hair
Left handed tutorial on small Knotless braids
————————————
Camera I use : Canon t5i with standard lenses
Lighting : Box lights
Editing software : iMovie
---------------------------------
Music
-------------------
music
Music by Ryan Little - Sweet Relief - https://thmatc.co/?l=F289D370
——————-
keywords
knotless box braids,medium knotless box braids,medium midback knotless box braids,knotless box braids on transitioning hair,knotless braids on transitioning hair,knotless box braids medium,knotless box braids on 4c hair,knotless box braids tutorial,medium knotless box braids tutorial,medium knotless box braids styles,medium knotless box braids parting,medium knotless box braids on short hair,medium knotless box braids dopeaxxpana,medium knotless box braids on yourself thin edges,how to box braids for beginners,knotless box braids,box braids on thin edges,how to box braids on short hair,small box braids on thin edges,big box braids on thin edges,jumbo box braids on thin edges,knotless box braids on thin edges,jumbo knotless box braids on thin edges,how to knotless box braids,small box braids tutorial,small box braids knotless
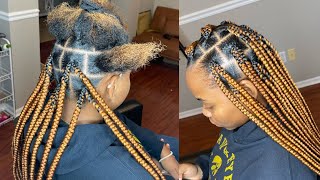
Hey y'all, what's up welcome back to my channel, this is london tay coming to you today with another video in today's video. This is her first time getting braids. She always wear wigs and frontal installs. Okay and with the frontal install she stated that she was real. Like in a rush, you know what i'm saying to take a frontal off, so it did pull out some of her edges. So i'm going to give you guys a tutorial on how to do knotless braids on thinner edges. It'S not they're, not bald. Edges are not balls, they're, just a little thinner. So if you guys are interested in seeing how i do this tutorial, then go ahead and continue watching and guys. I don't want to hear any negative comments like. Oh you shouldn't get braids. If your hair is thin, you should let it grow back. Let people just get what they want to get. Okay, the hair will grow back, it's gon na be okay. I don't braid tight. These are knotless. It'S okay! It'S not a lot of hair on one little strand, they're small, so we good okay, just to let you guys know just got ta give a disclaimer for all the haters out there. You know they'll be lurking in these comments. They'Ll be looking for these videos. They'Ll be ready to spread some hate; okay, okay, so in this video i'm going to just start off with the hair kind of halfway done. So let me just go ahead and explain you guys what i'm doing what i'm using etc. So i'm using the shine and jam magic fingers that is in the red container. It is still the shine and jam, but it is in the red container. Okay, also, when it comes to these braids, i like to start off parting everything, horizontal meaning from left to right, okay, so at the bottom i part from left to right, i'm usually, but whenever you get to light from the nape of the neck, from where the Back of the hair starts all the way up to the bottom of the ear from those mini rolls. I have three rows: okay, three rows from ear to the nape of the neck and then so far. I have two more rows above that and that reaches the eyebrows. So so far i have five rows that i've already done, and that is how i part from ear at that moment once i do those five rows for these small box braids and then i'm going to start to part differently. So i have that section of hair at the top like that and um yeah, so that section, the top, as you see that's already kind of in that bun. That is a section that i'm going to part um in the middle of her forehead and have a middle part. That is how i section out all of my hair, so right here, i'm just still continuing um one more row from ear to ear. Okay, so, like i stated, i had five rows beneath that here. Right here is my sixth row. Okay, so i end up doing six rows in total when it came to this style um not in total, but in total for the ear to ear rows. Okay, so yeah, so once i do those rows, then, after after that, i'm going to split like i said, i'm going to split her down the middle and i like to just part above her nose wherever the center. Her nose is. That is where i like to line up and that's exactly where the center her forehead is so i'll part from ear to ear. And then i do one. The left side of the the part, the middle part and i'll do the right side of the middle part, and that is how i do the braids all right. So, okay, so right here, i'm going to show you guys how i'm going to add the hair. So i am parting out the section i want i'm applying the shine, i'm applying this shine and jam on the roots and smoothing it out, it's very important to apply it and then smooth it. So once i do that, i'm going to start to braid. So i'm just going to start the braid off like i would do a normal plait, i'm going to split it in three sections, start one little row and then pull the hair tightly to grip it good and then i'm going to pull one strand of hair inside Of it, i'm going to put that under my finger and i'm going to use my other finger to kind of lay the hair in place as i'm braiding, okay, so um as when i'm starting off the knotless braids. I like to split you see, i just split the braid and braiding hair in half, so i like to braid one side at a time to me that gives it the most seamless look the most flawless look when it comes to starting off okay, i don't do That the whole time, but for the most part, it's easy for me because it gives it a seamless, look, okay and it helps you not have to be so particular with this exact size of the braiding hair, okay, so yeah, and then i'll just keep on doing That until i'm done adding hair and i'm getting the length that i want and the thickness that i want when i get the length that i want and the thickness that i want, which is basically comparing it to another braid beside it, i stop adding hair and Then i just continue braiding down very, very simple um in order to tuck the hair you're going to put that shining jam on the hair on the ends as well, comb that through and then just keep braiding. Okay, that is also very important. Applying the product. That'S going to keep that your client's natural hair, tucked away inside of the braid okay guys. So when you get into the thinner areas like her edges, like a client edges, that may be just a little thinner edges from previous style you're, going to kind of do the same concept but you're going to be very, very, very, very light-handed and gentle secure. But not tight, okay, so i'm doing it very very slowly. I'M going to get one of my other fingers to hold the other half of the braiding hair in place, while i braid the other half in and i'm just going to kind of. Add that in later, the key is to stay close to the roots so that, when nothing slips down and that way, you're not pulling too hard. Okay, the key is to make it flat, put the braiding hair and put the braid and braid the hair close to the head. So that way, you not have any tension. That'S pulling down or out. Okay, keep every everything close and in place and flat to the head. So that way, you're not having any extra tension. Then you need. Okay, things are not going to make her hair come out. Once i stayed again, a lot of people feel like whenever a client has thinner edges or something like that, and that the tension is going to pull out the edges. The only way that really really matters if the person has traction alopecia, which is basically loss of hair due to braids, okay, my client does not get braids, she gets sew ins and she gets wig and stalls so a braid um, a braid style in her hair. Here and there, especially as i start growing now and knotless, that's like the perfect type of style that you can get to even just grow out her edges and you guys can see. I'M not even braiding her edges up her edges are still being left out. It'S just thinner and i'm just braiding her hair, so i'm not even braiding any edges, so we're just going to lay those edges that she that's not too too thin. Now i'm going to lay those edges separately after i'm done with the style okay. So i did six rows from ear to ear. Now i'm about to do the rose muscle vertical and i'm just going to start off with the back of the hair at the top of that bun area that i'll stay in i'm going to do a horizontal row right there and then, after that, i'm just going To part the hair down the middle and do the rest of the braids that way, um coming from the middle of the hair, so this is just that little back row. It'S going to be like three braids in the back of that row and that's just going to kind of lay on top of the back braids, the other. The rose that i did previously just to kind of fill in some gappy areas of maybe some sparse areas to make it a little bit more: fuller, okay, so, okay, so um. So now that i did the bottom half of the braids, i did everything from ear to ear, and then i did those closure braids in the middle of the head, which is the crown of the head. I am now going to work on the braids coming down from the middle part, so in total i end up doing five rows on the left side of the part and five rows on the right side of the part. So three of the rows are already done. So that leaves two basically half rows left on this left hand side i did not start on yeah. I already did actually already did the right side. So all i have left is the two small rows on the left side to do um it's, but the best bet is to do a brick, laying motion, brick, laying pattern and that's basically doing the squares or doing parts in between the spaces of the last parts. Under that row, okay, so that way, the new braids can fall in between the old braids fall in between the spaces of the o braids and just give it a fuller look. So these are my small lower back now everybody always ask about the boxing. The box part sizing, do you do fuller, braids? If you request it, i can do fuller longer braids, but most people actually like it like this, because it's lightweight and it looks the most natural, so it works for me and it works for my clients as well. I miss the summertime, so you guys are definitely going to get a lot a lot, a lot of braid tutorials, okay, so yeah guys. So basically, i'm going to split the other box into maybe two or three or more boxes, and then i have that last row to go after i'm done. You guys always know that i dip the ends in warm or hot water and just kind of get those ends to stick together because it is kanekalon hair and whenever you dip it in hot water, they bond with each other, which is why you don't have those Straggly pieces anymore, once you basically dip the ends, because it's sealed once you dip it into a hot liquid, alright, so yeah guys. So that's basically um my tutorial on how i do knotless box braids on thinner edges. These are my small lower back length. She also has very fine hair, so i didn't need so many so much hair um too much anyway um. I just kind of wanted the braids to fall in line with how thick or how thin my client's hair is all right. So i hope you guys enjoyed this tutorial. I have plenty more coming make sure you guys like comment and subscribe, and your girl will talk to y'all later love, y'all, bye, so foreign, so you
Comments
London Tayy: 4:29 up close braiding 7:34 braiding edges tips
90’s R&B Lover: I'm glad you mentioned the people who tell us not to wear braids with thin edges. As you said, if done right, there is no tension. I have learned how to braid my edges like this❤️
Ya Lotus: I am so in love with knotless braids. They look good on everybody! And you're right, with proper edges grow.
Chaka Starkes: You did an amazing job! Thanks for sharing your technique! It came out beautiful
Mrs. Adriann: I'm sure everyone has an opinion about installing braids with thin edges but that's exactly why im here! I have sort of a receding hairline (thanks parents!! ♀) so my hairline is like an M. I appreciate your video and wish you were near me but I will do my best to self install.
Jillene Hall: Very neatly braided and beautiful.
Jessica Peters: Although the client had thinning edges, how long did the braids last the client?
Naturalash: I love this video my edges are thinning and was just looking for a video to see if I can still get this style
LaDawn Moore: Beautifully done! I usually get regular box, but I wan to try the knot less braids
Karon Hamilton: Looms so neat! How many packs did you use?
Kandace Toney: What is different about this shine jam? What makes it better ? I can't use the other one they last about 30 min then turns into grease here in Florida. So just trying to see if its worth the try. Thanks!
Kandace Toney: Love these ❤❤
akairi yahiko: Incorrect. If you continue to put so much tension on your edges, eventually they will never grow back. Traction alopecia is not a joke. I know because I’m a victim of this. No hating here. Just stating facts
Avantra Patton: With thinner edges can you still put the braids into buns or will that put too much strain on the edges?
aliyah collins: she look like she was telling a good story @ 10:13. thanks for the video !!
Bombshell _: Which is easier on edges? Knotless or box braids?
Jodi Houston: I need this hairstyle! Where are you based?
Miss Amanda: Nice
deseraymiles87:
Chasity Waters: Are you in Atlanta? Can I book you?