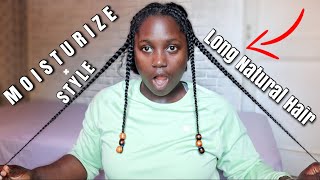
How To Double Crochet Braid Protective Style Tutorial. Two Methods
- Posted on 01 January, 2021
- Braids Hairstyles
- By Anonymous
Wats up yall! Welcome back. I finally got around to recording and editing this tutorial for this protective style. Social Media went crazy over this reel so here it is!
I hope the video is helpful. Leave your questions for me below!
The hair that I used for the Feed In Technique
Bobbi Boss J Body wave 28" King 3x
I used 1.5 bundles per braids
The hair that I used for the Crochet Technique
Mayde Africana 6x
I used 2 bundles per braid
Let me know if you have questions!
Thanks for watching!
Instagram : AmsRenee http://instagram.com/amsrenee
Twitter: AmsRenee https://twitter.com/AmsRenee
Of course, i had to start this video off with the real that gave me so many requests to do a full tutorial on this look and then, of course, i also wanted to give recognition to the stylist and the inspiration for the hairstyle in the first place. I saw the style months and months and months ago and i saved it on instagram, because i knew i was going to try to recreate the look. So i just wanted to give this stylus props because she did that and she inspired me. So i'm going to show you two different techniques that you can do to achieve this style and for each technique. I used a different type of hair and that's just to show versatility and blendability based off of what type of hair you use. I also am going to be going into my eco styler gel the black, castor oil and flax seed, and then i'm going to use this shining jam magic fingers for braiding. So the first part of this tutorial, i'm just going to speed right through it, because it's just the parting and the anchor braids of the style, and this part of the tutorial is pretty self-explanatory. You basically just want to get your parts and your pieces as neat and as even as possible, and, of course, if you're doing this on yourself, which most likely you will be you're not going to do it perfect. So just don't stress about it. Just do your best and then the other thing that i want to point out is when you are doing your anchor braids down the middle. You want to be very aware of how tight you're doing the braids, because, if you're going to be going in with that crochet needle, if your braids are super super tight, it can be very difficult to pull that crochet needle through. So just keep that in mind. So you're going to have your two neat braids on the side and your ankle, brace going down the middle. This is going to be the foundation of the style and then you're just going to braid the ends of the braids and the back all the way down to the end, and once you get it braided all the way down to end you're going to kind of Tuck it inside itself, in the back like so so now we're going to get into the two different techniques that you can do. So i did a feed in method and i did a crochet method for the feed in method which is going to give you a more sleek look. I used the bobbi boss, hair body wave for the crochet method, which is going to give you a more natural. More blendable look. I used the made africana. So just keep these in mind when i show you the techniques side by side, so both techniques are going to start exactly the same you're going to begin by feeding through a piece of hair with the crochet needle. If you are going to be doing the feed-in method, as you see on the left, you are going to start a braid with that piece of hair that you crocheted in and then you're going to begin to feed in hair to make that braid bigger. If you are doing the crochet method that you see on the right, you are going to continue to crochet pieces of hair onto your anchor braid until you get about midway to your anchor braid. So, with the bobbi boss, hair that you see on the left, i used one and a half bundles per braid for this technique and with the africana hair that you see on the right, i used two bundles out of the pack per braid for that technique. So, with the crochet method, you are going to begin to braid that hair, that you crochet in all the way down to the end of the braid, and you are going to do the same exact thing. If you did the feed in method as well. Now we are going to pull out the needle and thread for the feed-in method. You are going to begin to sew down your braid onto your anchor braid if you are doing the crochet method at this point, the only thing you need to be doing is fluffing. Your braids out, then, once you finish, fluffing, you are going to sew the remainder of your braid onto your anchor braid. So at this point we should all be on the same page. If you did the feeding method, you should be continuing to sew. If you did the crochet method, you should be starting to sew the rest of your braid onto the anchor braid you're, going to continue to sew all the way down until you get to the end of the anchor braid and then you're just going to knot. It off and do the same thing on the other side, so i want to point out if you're doing the crochet method, you can most definitely crochet your hair all the way down your anchor braid. I just don't like to do it that way, but, like i said it's personal preference, i feel like it's extra work, but some people may feel like the sewing is extra work. So just do what works best for you. So if you did the feed in method, this is where you are going to start to pull apart your braid, to give it that fluffy butterfly, look and the way that i do this is i just pull in opposite directions on each piece of the braid. So once you have both braids sewn down and fluffed out you're going to take the ends of those two braids and you're going to twist them together and then you're going to tuck the end of the twist inside that tuck of your anchor braids and then for The very last step you are going to sew all of that together to make sure everything is nice and secure. You are going to be sewing the end of your braids onto the end of your anchor braids. So once you finish sewing, that is the last piece to complete the look. I just add a little baby hair, maybe fluff out my braids a little bit more and then you get the final look. So i wanted to put the final look of both techniques side by side, so you can really get a good look at how using different hair and how much hair you use can play a role in the overall ending look of the style. But that is pretty much it. I really hope you guys enjoyed this tutorial and that it wasn't too confusing for you, but of course leave your questions and comments below and as always, thank you so much so much for watching.


Comments
EboniTrenae_: You explained this so well! I love how you gave a side by side with different options.
TheShift: I got HELLA compliments off this style last week! More styles like this please
Healthy Kyla: Girl, you make this look so easy! Love it!
msmommatoni: Thank you for this video! I've been trying to find a different method instead of a lot of braids on my head. I can work with this. It looks real simple to do and that's what I'm looking for. Simple and easy! Thank you ❤️
Ansonia King-Richardson: Thank you, I did my hair like this but I added a frontal for my edges and it came out nicely❣️ I did the crochet method, you explained very well Love ❤️ it
Karpat Rice: I saw you on Instagram with this look and I must say it is Absolutely Beautiful! I must give this a go as I am looking for a new hairstyle that won't take 8 to 10 hours! Lol! Great job!
Keeta88 Chanel Midwest: You did a great job sis!!! You made this look sooo easy! Thank you!
Reshonda LaBerth: OMG! I looooove this! I CANNOT wait to try it! Super cute
PLUSH Stanley: This was video was EVERYTHING. 2 side by side options of the same style. I loved how easy to follow this was and the style turned out beautifully. Thank you for this amazing and beginner friendly tutorial.
Tara Bryant: This was MASTERFULLY and BEAUTIFULLY DONE!! Between giving credit at the beginning to the side by side tutorial of different methods to the results. I will DEFINITELY be trying this as it's a perfect protective style. Thank you so much!!! Instant subscriber!
Suckafree JB: Great Tutorial!! I saw that IG video as well and knew this was my next style. I’ll be attempting it this evening lol
Neme: Am definitely trying this style, looks so beautiful I
Tori Butler: Thank you for this style. I did a version of it and I’ve received lots of compliments.
ksanae: Beautiful! Absolutely OBSESSED, I want my hair like this
Sheila Morgan: Thank you for one of my summer looks♀️
Dajah Wilson: Love it. You made it so simple!
Angie Boyd: Beautiful job and great explanation. I'm a stylist and my client wants me to try this out on them!
Michelle Bailey: Both ways came out so nice. Great video ❤️
Phenomenally: Thanks for giving the original stylist her props! Classy ❤️
tracie weeks: I love this. You did a amazing job. I have to try this
Ivy Jones: That style is so beautiful. So easy ro do.
Tanya Anderson: Yaaasssss!! I've been waiting/hoping for this video!! Thank you!! Great video and explanation!! Oh and gorgeous style!!
LoveDimplesNYC: all i can say is wow! you look so pretty and i enjoyed your clear explanation of how it is done. I will definitely try this look.
At this moment: Looks Amazing you really have skill and made it look so easy!
Tikorya: Beautiful sis! Thank you so much for teaching us with yo cute self!
K E M: Great job nicely executed you gave very good details beautiful style
MissyRN MissyRN: Beautiful style. Love it
Ali B: I have been wanting to try this for the longest since I seen it! Thank youuuu
Lenekka Portis: This is absolutely beautiful!!! Thank you for sharing! You have a new subscriber!
Iscaria Dows: Thorough and relatable! You're very detailed and you saved me a trip to barber shop because the in between stage is a struggle
Kryztal Galvin: I have been waiting on this tutorial, I will be doing this hair style for next week. thank you
Lorraine Blake: Wow this is so pretty going to try this. Thanks. You are beautiful and wear the style well. Blessings. X
A. J.: I love how u gave props to your inspiration.
dREAM w/Shan: you did that!! So many styles I want to try
Ronita Reed: I absolutely love it!❤️❤️❤️
All Things Tayloured: I wore this style and loved it! Thanks for the inspo!
the_ShayeHunt: This video is amazing. Definitely about to try this on my channel. I like the crochet method but the bobbi boss hair. You just gained a subbie sis
Teina Mans: Recreated this look and added some gold hair jewelry. LOVE it❤❤
College Grad: happy new year sis!!!!!!!!! i love LOVE the intro, your hair is so beautiful!!! wishing you and the family health and hapiness.
Dorrana Stewart: Love this look thank you
Jackie Davis: Very informative the two different looks and two kinds of hair that was outstanding!! Sis You Did That
Meggans POETICAL Breeze: I simply love both looks but my fav is the one without the crochet hook...Thanks for the tutorial... I will be trying that look and putting a spin on the side braids ...
Shekiah Delaney: Thank you! I need something cute but fast and I think this is jt
Zula: How long can you keep this kind of hairstyle? I'm curious because of the gel
Luckie Wun: Your vid along with your explanation was not confusing at all...I will definitely be doing this style on my daughter...its quick, easy and beautiful
BamBamisMyHomie: Beautiful... I did this on my little girl's hair years ago (crochet way) and for some reason my braid on the left always come out neat but the right side horrible I'm right handed and can never do the right side good which is weird I'll do the sew in way next time. The sew in worked best when I did it on my head before. You explained it very well. Many blessings to you
Lita 09: This is so cute! Im trying this for my hospital clinicals. We have to have our hair up and braids and a big bun is getting heavy lol
Karleen Dove: Love it..so easy..
China Dall: I promise you the day I saw your Instagram tutorial I re-created the look and my husband thought it was so pretty !♥️
Amia Renee: So cute!! I love it
AskAnotherNatural: This is very ambitious for me but I am definitely going to try it. You explained it very nicely.
nefretiri69: Thank you for posting this…I love it
Nkel Morgan: Thank you! I didn't want to spend HOURS braiding my hair
Tymiria: UnREAL. Fabulous - I'm so in love.... Thank you for sharing! NEW Sub:)
Cierra Wright: Yeeess I was waiting for this , this was all over my Instagram definitely loved this !!!
Carmen Duncan: Loooove it. I'm going to try it.
Thelma Thabiso: Thank you so much the video...well explained☺☺☺
Bintu Toure: Beautiful ❤️
Lah lah Luv: Beautiful, definitely trying crochet method!!! Although the feed in method turned out So with the crochet method, I’m sure I can just Bobby pin it instead of sewing right?
Tim Scott: I JUST had this style done today!! The stylist worked off of your video snippet. Of course I’d find the full tutorial vid after my appointment. ♀️ She still did a good job just by watching the 30sec video over & over!
Lynette Bryant: : HAPPY NEW YEAR- "SIMPLY STUNNING" end results! Thanks for this AWESOME TUTORIAL!!! BE BLESSED and STAY SAFE!!!
Austin Petty: I’ve been waiting for this ! Question: for the crochet method, did you use the same size pieces of braiding hair or did you gradually make them thicker ?!
jo-islen horn: This is n very easy ❤️
Destinee Combs: Very beautiful
Angel Dripping melanin: Girl you the bomb thank you ❤
shycamgirl: I tried it I think I have to do it a couple times to perfect it Thanks for the tutorial and inspiration
Maureen Mposula: Thank you for showing how to do the sowing one.i did it once but it didn't look proper at the beginning because I didn't use the feeding method.
Jennifer Reed: That's so pretty great look
Paulina O.Yeboah: I love this braid
Cassandra Casey: Simply beautiful
BeOneWithHigherSelf: Beautiful!
Just Nathalie: This is so classy and beautiful
Adrienne Wilson: You did that!
Robyn Mears: I wish I would’ve watched the tutorial before just winging it, bc I was struggling w/ that hair tangling using the crochet methodI still received a lot of compliments but next time, I’ll use the feed in method.
Janes Book: I love this style!!!
La Shon Bailey: Gorgeous ❤️
Pleasantly Introverted: Love It!
AnnaNessa: This looks really pretty. How long would a style like this last?
Lyunea: She had me at "...we should all be on the same page..". Short & to the point.
Nicola Reid: Great job!
Maximilliana Francine: Wonderful and adaptable
Tanya Murphy: Really really cute
phyre123: I love this!
Naturally Plus: I love this!!!
Linda Hayes: Love this one
Val: TOO CUTE!!!
Tironna rexx Morriss: Now I can put all the extra hair my daughter didn't use to work for me
IAmVyntageNative: Love it
Lady Ree Patton: So PRETTY ,❤️❤️
Ebonee Winston: So pretty!
Nina C: Thanks sis.
Naturallyts_way: You are my hair fav! #flawless
Felicia P: I don’t know how you braided that hair without it slipping and tangling but I struggled for hours and ended up having to dump two packs of hair in the trash. I got one side done but had to change to a flat twist look since the braiding was too hard. Back to the beauty supply in the morning so I can do the other side.
London H: This is cute I need to pay you to do my wedding hair really cute tho
Wendy Wandick: Very pretty and happy new year
Nkel Morgan: How long does this take to do?
Chana Totton: Yes ma'am.. Cute I'd add some hair charms
Beautiful Queen: Beautiful
Alexis Wyatt: Happy New Year! LOVE THIS!!
Reva Dean: So pretty