How To Crochet With Braiding Hair | Half Up Half Down | Kanekalon Crochet Braids
- Posted on 20 December, 2020
- Braids Hairstyles
- By Anonymous
I decided to do a half up half down easy and CHEAP protective crochet hairstyle using braiding hair that cost only $1.99. This tutorial with show you step-by-step how to crochet with braiding hair. I want to start incorporating easier and cheaper protective styles on my channel and I decided that a half up half down crochet protective style with braiding hair would be best.
I did have a mishap with the edge control but I still wanted to publish this video to show the techniques used to achieve this crochet protective style with braiding hair.
Which crochet hairstyle or braiding hairstyle would you like to see next?
#CrochetBraids #BraidingHair #HalfUpHalfDown
0:00 Introduction
0:35 EPIC Pre-stretched Hair
0:59 How I Prepped My Hair For This Style
1:26 Parting Hair
1:50 Braiding My Hair
3:46 Size of the Braiding Hair I Will Use to Crochet
3:52 Crochet Tutorial with Braiding Hair
5:29 Invisible Crochet Method with Braiding Hair
7:44 Styling My Ponytail
8:39 Prepping My Braiding Hair
9:18 Attaching Braiding Hair to My Hair
10:26 Wrapping Ponytail with Gold String
11:36 Blow Dry Crochet With Braiding Hair
12:02 Straighten Crochet Hair
12:23 Comparison Between Blow Dry and Straighten Crochet Braiding Hair
13:08 Trim Crochet Hair
13:12 Outro and Follow Me on IG @SashieE.TV
Shop My Store: https://www.amazon.com/shop/sashieetv
Items Used:
Epic Prestretched Hair - Local Beauty Supply Store - 20 Inches - Color 1
Style Factor Edge Booster - https://amzn.to/3pe4C5L
SUBSCRIBE and turn on your NOTIFICATION BELL to help me achieve my goal!
https://www.youtube.com/sashieetv?sub_...
✨Current: 15310✨
✨Goal: 25000✨
New videos every Sunday, Thursday, and Friday at noon EST! ☺️
Equipment Used:
Camera: Canon Powershot G7 X Mark II - https://amzn.to/3fF5rPW
Lighting: Neewer Ring Light 18" - https://amzn.to/2XAf4Jh
Computer: MacBook Pro - https://amzn.to/30ubHpc
Backdrop: https://amzn.to/33vLDMd
Editing Software: Final Cut Pro
Previous Video: PASSION TWIST PROTECTIVE STYLE | NO RUBBER BAND & NO CROCHET | EASY STEP-BY-STEP TUTORIAL
https://www.youtube.com/watch?v=7GZQsR...
Business Email: [email protected]
Follow me on all my social media accounts
Instagram: SashieE.TV
Twitter: SashieeTV
Facebook: https://www.facebook.com/SashieETV
Tik Tok: SashieE.TV
Music by Epidemic Sounds
Song 1: Hiatus by King Sis
Keywords: crochet hair styles, crochet braids, how to crochet hair for beginners, crochet with natural hair, how to crochet hair without braids, best crochet hair, crochet synthetic hair, freetress crochet hair, crochet hair styles, crochet braids, how to crochet hair for beginners, crochet with natural hair, how to crochet hair without braids, best crochet hair, how to do crochet with braiding hair, braidless crochet with braiding hair, how to crochet with braiding hair detailed tutorial kanekalon crochet, crochet styles with braiding hair, crochet hairstyles with braiding hair, individual crochet box braids with braiding hair, crochet box braids with braiding hair, crochet with human braiding hair, crochet ponytail with braiding hair, can you crochet with braiding hair, crochet braids with braiding hair
FTC: Sashie E TV is a participant in affiliate marketing, including Amazon Services LLC Associate Program. This means that I may make a small commission if you purchase an item using some of the links listed above.
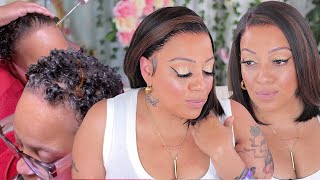
Hey y'all, It's your girl, Sashie E.. Welcome to my channel. In today's video. I am going to be doing a half up, half down protective style for you guys., So this style is going to be super duper, easy y'all and it's not going to be time consuming at all.. So for my channel, I want to start incorporating some easier protective styles and also some less time consuming protective styles, because I do understand that not a lot of you guys have six hours to do passion twist or four hours to do box braids.. I know you guys would really appreciate some easier, less time consuming styles, so that is what I am going to be doing today.. So I am going to be using this epic pre-stretched hair.. I picked this up from my local beauty supply store.. I always featured this hair on my channel because it is the cheapest hair at the beauty supply store.. So I paid $ 1.99 for this.. It is in the color 1 and it is 20 inches long.. So this is it., So I did blow dry my hair.. I had no reason to blow dry it y'all. I was just in the mood to blow dry it., So I just did a light, light light blow dry and I hopped in the shower. So it kind of curled back up but anyways. So I did a light blow dry and what I'm going to do y'all is I'm actually going to part my hair going this way. So I can have this part for my little ponytail.. Oh it's going to be so cute.. I'M going to have this part for the ponytail and then this part is going to be braided up for the crochet., Alright y'all.. So I am going to go ahead and start braiding, my hair.. I am going to be braiding it in a pattern like this. It'S like a snake pattern. I guess., So I'm just going to braid this way, braid that way, braid this way, braid that way, you guys will see it as I do it.. So, as you guys can see, the back of my hair is not perfect, and that is okay, it's perfectly okay, because we are actually going to cover that with the braiding hair.. So let's get started.. So, as I've shown you guys, this is the hair that I'm going to be using.. It'S Epic pre-stretched, hair, 20 inches.. So I'm just going to go ahead and separate the hair and then I'm going to start the crocheting process.. So I'm going to be doing about this size with the hair., Alright y'all., So I am going to take the crochet needle I'm going to insert it. Take the hair and roll it I'm going to attach it close. The hook pull it through and put it in and then we're going to do it one more time just so that we can double that knot. Y'all see that So perfect.! That'S it Just like that. You guys and we're just going to repeat it all over. We're going to take the hair we're going to roll it a little bit we're going to attach it we're going to close the latch hook, we're going to pull it through then we're going to open this Part and we're going to pull this through and pull it through again and then we're just going to tighten it., Let's see and I'm trying to space them out, y'all, because I don't want it to be too thick. I want it to be normal, so I'm spacing it out a little bit., Alright guys.! So for the last section here we're going to be doing the invisible method just so that we can hide the knots.. So we're going to insert the crochet hook we're going to take some hair we're going to roll it we're going to attach it to the hook. We'Re going to close the hook, we're going to pull the latch hook through, but now, instead of putting both pieces through we're only going to put one through and then we're going to put it through one more time and then we're going to tighten it.. So then, when it falls over you get that invisible look., You don't see the knot., So we're going to do the same thing. Again. We're going to insert the hook we're going to take a piece of hair we're going to roll the hair, we're going to put it in the latch hook, we're going to close the latch hook, we're going to pull it through and instead of putting both pieces Through we're only going to put one piece through and we're going to put it through one more time and then we're going to pull it to tighten it and then flip it over, and then you get that invisible knot.. So then we're going to do that. All for this section right here. For this section, I'm going to put the hair the pieces of hair a little bit closer to make sure that it covers everything., Alright guys.. So the back is almost done.. We still have to come back and do a few things to the back.. We do have to cut it.. Let me stand so you guys can see how the ends look. So yeah. We still do have to do a few things with the back, but yeah we're just going to go ahead and work on the ponytail section right now.. So I don't want my hair to get wavy. So I'm not going to be using a gel., I'm just going to go in with a little bit of my edge booster.. So I'm going to add maybe about this much.. So I'm just going to go ahead and I'm going to twist this down and put it in a really small bun. In this clip I decided to add another layer of edge booster to my hair, but you guys I did not brush it in so it did Cause a little bit of flaking, which you guys will see at the end, but after I got done filming, I did realize this and I added a layer of oil on top of it and the flakes did go away., Alright guys. So I am back.. So I am going to show you guys my hair., Alright perfect.. I had to add a little makeup here, because it was looking a little bit too light. So yeah. So what I'm going to do now is I'm going to split this braiding hair in half and we're going to make two ponytails. So we're going to just and pull it through. See perfect and then we're going to do the same for the other perfect. So we have two got two, So I'm just going to go ahead and I'm going to attach these two ponytails to my head.. So I have one coming this direction and then I have one going in the opposite: direction. Just in case, if the wind blows, you know we have coverage everywhere., So I'm actually going to take this hair and I'm just gon na wrap it at the base. Then we're to use a bobby pin to secure it.. Then I'm going to take another piece of hair and I'm going to wrap it, the opposite direction.. So I want the ponytail to be a little bit higher. So I'm going to use this to achieve that. Alright guys., So the ponytail is complete.. So last but not least, we are going to just do a light, blow-dry and a light flat iron just light just slightly.. You can leave it like this. If you want., I think it still looks really good, but I'm just going to do a light blow dry and then I'm going to trim it as well.. I'M actually going to stand up so that you guys can see like how the ends look.. So it does need a small trim, nothing crazy, just a light blow dryer, so stay tuned., Alright y'all! So I have my blow dryer right, here., I'm gon na put it on low heat and I'm just going to run it through the back.. So this is my nano titanium flat iron by Babyliss Pro., So I am going to go ahead and plug this in and I'm going to lightly flatten my hair.. So, as you guys can see, there is a difference between the two sides.. This side has been flat ironed and this side was just lightly blow dry. So if you want it to look fuller, you can definitely opt out of flat ironing, but if you guys want it to look sleeker, you can definitely run the flat iron through at your lowest setting.. My flat iron right now is at 300° Fahrenheit., Alright guys. So I am done flat, ironing my hair., So I'm going to turn around and show you guys how it looks. Can y'all believe this is Kanekalon hair like $ 1.99 braiding hair. It looks so good. You guys., I love it, and this was definitely a nice touch. Y'All., So I'm pretty much just cutting it straight across nothing, major., Alright guys. So I wanted to come back and show you all the final results of using $ 1.99 braiding hair to do crochet.. So this is my half up half down hairdo and it came out so well., So I wanted to give you guys a 360 so that you guys can see the entire look.. So, of course this is the front. This is the first side. The back has movement as well, you guys the other side and, of course, we're back at the front.. So if you guys enjoyed this video go ahead and give me a thumbs, up. Also y'all, don't forget to leave me a comment. Let me know which style you'd like to see me do next. Also don't forget to subscribe and turn on your notifications.. I post on Sundays, Thursdays and Fridays at noon. Eastern standard time and I'll see you guys in the next video. Bye.

Comments
Sashie E TV: Happy Sunday, Y’all! For this style, definitely use your favorite edge control. Mine flaked a little but it wasn’t nothing that a little jojoba oil couldn’t fix. If y’all have any questions, leave them below. I love you all!
MzDami: I'm still deciding on a Christmas look and this is easy enough for me to do it.
China Bran: A round of applause because you did that! Definitely added this video to my playlist and can’t wait to try! Thanks for the info! Beautiful job
Jas McQueen: I love gold string!! It adds a little flavor t any hairstyle! Also, i haven’t ever considered blow drying or flat ironing kanekalon hair! Very cute! That hair looks using it as crochet! I would’ve tangled the hair horribly lol
ItzJoyxo: You did very well, thanks for the idea.
Trisha Deniese: Would’ve been cute if done neater. I’m definitely going to try this style
TalesofaSunflower: This is such a cute style on you!!
Melanin Mish: Doing this for my bday thanks love ❤
Live Free With Queen : This is boom ...I love it
D T: ❤Simplicity ❤ looking great sus❤
Rebekah Powers: Great job!!
Enoabasi Harris: Absolutely stunning
Mood E Family: I never seen the two ponytails like that cool
Enoabasi Harris: So smooth n clean
Awesome cool kid: Beautiful job it looks good
Kaydian W: Very informative will def try
Rebekah Powers: Dang girl,you did that !
Antionette Kelley: Hello nice style. Have you ever did finger coils on your hair? I would like to see that. Thanks have a great day
jaye Robertson: Beautiful
MzDami: Yassss congratulations on 15k. Love you so much ❤❤
Rayshonda Cole-Burrell: How long did the hair last before it tangled?
Bumblebee: Do you think someone could do this style with flat twists?
Gayle Brown: Love it. Hope you have a Merry Christmas
Enoabasi Harris: It looks good you don't need to cut it
Enoabasi Harris: Nice
Bernadette Carty: I gave been following you for a while now.you hair has definitely grown.with this style though its obvious you are losing your edges..please dont let that happen.
Dee Tuphill: How your 1.99 braid took heat?
Lady Davida: You Are Amazing Looking Like Young MC Lyte & Monet, U Have A Blessed Great !! ♀️♀️✨✊
andy MetzSant: Oh yeah. Do you love me? ❤️