How To: Straight Crochet Braids Start To Finish With Kanekalon Hair
- Posted on 07 June, 2017
- Braids Hairstyles
- By Anonymous
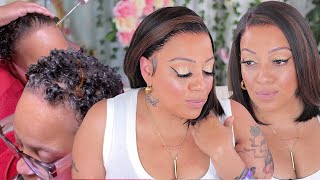
Hi guys! Today i'm going to be showing how I do crochet braids from start to finish on my sister Alexis. This will cover everything from the braid pattern, layers, spacing, blow drying, and straightening using kanekalon hair. I used the 100% kanekalon hair from sally beauty supply to do this hairstyle for $10! 4 packs, 2 in the color #1b and 2 in the color #6 were used with about a quarter of the 2nd pack of each color left over and I do cut the packs in half.
If you have any questions leave them down below in the comment sections and if you would like more details on certain steps there are links below dedicated to practically each step. Check out my Playlist dedicated to all things Crochet braids too! THANKS FOR WATCHING AND DON'T FORGET TO THUMBS UP AND SUBSCRIBE!!!
What would you like to see next? Remember to leave any video suggestions down below as well!
SUGGESTED LINKS:
Last video: https://youtu.be/0X21j7VWwX8
Braid Pattern: https://youtu.be/S9c4lozKczo
Layers: https://youtu.be/bp4339cb82M
Blow Drying: https://youtu.be/OJ7opdag4cg
Straightening info: https://youtu.be/LNafqPxR398
Straightening: https://youtu.be/7TY44xx0r28
Crochet Braids FAQS: https://youtu.be/Ud5fT3VrFJA
How to Curl: https://youtu.be/GsZPJlhbdQM
Social Media:
IG: @pinkprincess0626
SC: @sarah.davis0626
For business inquiries only:
Email [email protected]
Hi, I said I'm going to be showing you my process of doing crochet braids on my sister Alexis, so if you'd like to see the process and just keep on watching, so this is a braid pattern I like to use. I do sixteen that braids in the front of her head till about her ears, because her hair spider and my hair, I usually do 18 and then I do in anger, braids, which is that first braid right behind the 16 Bree. Can I do that going sideways? That'S what I just ran my finger along and then the rest of her hair. I breathed back and forth and in the exact - and I usually do that in three sections you don't have to, but that's just my preference for the braids don't get to six. So the next thing you want to do is you take each of the 16 braids in coils through the anger braids, and this I'm going to show you the close-up. If you don't know what I'm doing, I'm just lashing it through and pulling it through the hook. So that the braid goes through, the the 16 bridge goes through the incre braid, then this step is really important. If you want your to illuminate those gaps that you're going to have using straight hair and the two ends, I usually do those together just because those tends to slip out more so then. The next thing you want to do is just find a spot around halfway through those big zag breeze and then pull the rest of the braid through until that that little gap that the braids make and I'll show you once I finish doing this, what I mean By that, if that's not making any sense - and I usually do these like two or three at a time - just because it's faster and others point and doesn't really matter, because that whole back friction is going to get covered up and don't forget to take your loose End as well and crochet those up through this to that braid too, so, depending on how many ways and you have you - want to put them all to that one spot and then what you're going to want to do is start grading those across and try to Make this as flat as possible, because you don't want the six fingers so once I do that, I crochet that end through her hair until there's only about an inch of it poking through and then I take a rubber bed and I wrap it around there. Just so that stay secure and it doesn't slide through, and so that also when she goes to take crochet braids out, she'd feel around for that braid and if that rubber band inside, where to start rattling, her braids and my brother was recording those where we fell. Sorry, if it's a little shaky, but this is what I mean see that braids going across it's in between those two zig zag braids, and this is what you want to have the smooth base. So, as you can see, I started crocheting her hair in and I'm using the cars 1b and number six and I'm putting the pieces in at uneven balances so that she can have a long, layered, look and you'll see how that looks in the end. But basically, you want one short piece in one long piece on each side and then, as you work your way up her head, you want to even those pieces out so that it looks half-and-half and that how you'll create a layers book - and this also helps them - Make the hair look a bit thicker at the bottom or below, and if you're wondering I did cut the hair in half and I'm going every other color, so one be even fixed and one even fixes a lot and so forth. So from at the bottom um. We can use bigger pieces and they can be further spaced apart that, as you work your way up to the top, you want to start using medium sized pieces and putting them closer together. So you won't have any gap. So the closer you get to that anger. Braid, this is the one going across that first we're going crack. You want to put the rest through. You want to make the rest of the pieces smaller as you get closer evaporated and now we're on there interbreed, and this is really important. You want to pack those little pieces in really close together, not to the point where it's overwhelming to braiding you're causing a lot of tension, but there should. You should not be able to see any of the back of her hair after you installed the pieces on the incubate, and this is shelter if using straight Eric, really encourage it to be a little bit more space, but straight hair as different as an Internet. Face forgiving, so you need to have make sure all the gaps or covers at this point, and so now I'm taking two fingers and I'm measuring the front of her head and I'm installing a tiny piece and that's going to be the start of the rest of The search a spacer - and I do this because I'm going for true Facebook, I think it looks better than pushing all the way up to your edges and it please, through solos, disallow unnecessary tension. So you don't need all that tension on the edges, especially if you have finer hair, like my sister Jessica. So I just picked using and there's a lot out and then I put in all of the other smaller pieces to start off there. The first days - and I kind of just do that in a straight line and if you have tips in your hairline, like my sister, does naturally, then you're lying may not be perfect. Just try to get it as varied as possible without adding too much fun tension on the little baby hairs cuz, you don't want to over over braid your hair for this style. This is supposed to be protective style, so your braids should not be that tight like if your head is hurting, then your razor too tight, and we want to avoid that because the first a breeze already tighten up your head. So you don't want to have tight braids on type of pipe crochet braids, that's just going to be too much tension and we're putting this styling for that. Her hair can look nice and also be protected in rural education. So now I'm just going in and filling in the rest that braid for those pretty things I should say, and I'm also putting these pieces really tiny and really close together. You want the pieces of for us to be very thin and, as you get back towards that anchor for a using kind of make them a bit more a bit bigger just to speed up the process. But do you want to put those pieces close? The other? Just as you did on the anchor breeze, you don't want down in this part and at the front of her head. I am you the pieces that an even balance, I'm not staggering the lengths anymore, because this will just help give her a lower look. So next you just want to blow dry the hair and make sure your blow dryer doesn't get too hot. So you don't want to melt the hair, some blow dryers to overheat a bit, and you do not want to ruin all of that work that you just put in and then she's going to follow it up with a flat iron. I recommend that you use your flat iron around 75 degrees. I think the Kanekalon hair skin would spin up to 100 degrees in certain brands, convulse efficiency. But I reckon I need to stay around 75 degrees or if you do have a friend that can go up higher, that you test it out on a different piece before you put it in here. This is what it's going to look like. As you can see, there are no gaps, he has a nice layered look and so here's the course whisk up at the front and if you do have thicker hair, your gaps aren't going to be as good as hers, but she does have finer hair and yeah. That'S about it. I hope you guys liked the video got it helpful. If you have any questions or comments, leave them down below and I'll get back to you and you don't bring your thumbs up and subscribe and I'll see you guys next time, bye, nice, funny, hello, it's for my god!


Comments
Vic JJ: This was one of the neatest crochet styles I've seen. Beautiful job. 1 question how long this hair style last.
FlaviaMaxima1: Really nicely done. How often can be washed and how to maintain it in genera?
Whats up W: Very nice job pattern was excellent, nice
kallixtu: How long was the hair you used
asexieru: Great job but there are some videos on Youtube for better closer techniques.