How To French Braid With Weave | How To Braid
- Posted on 18 October, 2017
- Braids Hairstyles
- By Anonymous
Hey GlamFam! Today I will be showing you how to do a French Braid with weave! I already showed you all How to do a French braid, and then got several requests to do this video! I hope that you find it super helpful and informative! If you love this video and would like to learn more styles of braiding, be sure to check out my braiding playlist: https://www.youtube.com/playlist?list=...
Here are the tools I used for this video:
Mannequin head: http://amzn.to/2ygkdeo
Classic Denman Brush: http://amzn.to/2xJegUf
My Fave Braiding hair: http://amzn.to/2x8UtjX
The braiding hair used in this vid: http://amzn.to/2xaNCH3
Rubberbands: http://amzn.to/2xJWyAf
As always, please let me know what you think of this video on how to braid! Be sure to check out my other videos on this channel if you want to know how to do hair like a pro! If you like this braiding video, please give it a thumbs up, subscribe, or share it with someone you know!
I have many tutorials on this channel for braiding and hairstyling, you can find videos like, how to cornrow, how to make a wig, how to customize a wig, how to do children’s hair, how to do intricate braids, how to curl hair, and so much more!
Most of my tutorials are tutorials for cosmetology students, so I break them down and detail them as much as possible! My goal is to educate people on hair!
Thanks for watching, and enjoy the rest of Glamtober!
Love you GlamFam! Stay Glam!
Linwood
How to french braid with extensions | How to braid with weave |
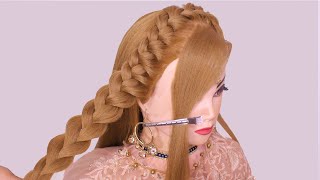
Hey glad family would hear today I'm going to be showing you on my lovely mannequin here, Catherine, how to do a French braid with hair added. So I've got so I'm jumping here over here by all tray I'll, go ahead and show you the pack. It'S just a jumbo braid. This is a really inexpensive hair. A lot of people lately have been asking me what my favourite brand of braiding hair is, and they assume that they assume that its expression here, but honestly it is Rasta free. The hair is incredibly soft. It'S really easy to work with, but for the sake of the purpose of this video, we're going to be showing you with the out rate jumbo braid, which will get the job done, it's fairly soft as well. Alright, so I'm gon na take about half of this bundle, because I want it to be a pretty good size that I'm working with and a lot of times. People will want to just start braiding like this, but you guys can see how those ends are not tapered at all. It makes it a very abrupt stop to the end of the braid. So what I like to do is I'll grab half of it here. I'Ll grab the other half over here and then I just lightly pull it away from one another. Just stagger those in some so notice. How just we're doing that? It begins to stagger some and then from there. I could take little pieces and begin to pull what this is gon na do. Is it's going to make sure that, as I'm braiding, the break gradually tapers down, instead of just coming to an abrupt, stop, don't notice a difference there, that's with a very light amount of tugging. Now, if you need this hair even longer or you want to taper it down quite a bit more, you can honestly do a lot more pulling with that. But, honestly, it's not necessary. Nothing. I like with this hair is even though it is a cheaper here. It'S pretty easy for me to get my fingers through, so I don't have to worry about it catching a ton. Now I do have half of her hair pinned up over here, because we're not going to be braiding on that half I'm going to show you guys on this other half here. If you don't know how to French braid, I would recommend that you start out with my tutorial on overhand braiding and then go into French braiding before you attempt doing this. But the hair had it if you're trying to jump right into this and you've never done a French braid. You got ta have a really tough time, so I'm gon na start off with my brush here. You guys know how I feel about my Denman brush. It is the best brush ever. I absolutely love it, so I'm gon na start off by just kind of making sure if his hair is too tangled and then I'm gon na bring you guys up close. So you can see exactly what we're doing all right. So we're gon na begin by taking a triangle section of hair. Now being that we are starting off with this section of hair, I am going a little bit larger than I typically would a lot of times. I start off with a very small triangle, but I have a pretty good sized section of hair that I'm gon na be adding into it, and it's gon na leave a little bit of a hump here. So I want to make sure all of the artificial here. I'M adding is perfectly covered so from there. I'M gon na go ahead and just take my two fingers slide them through that section and it's gon na instantly create three sections for me. Like so y'all don't mind me, my allergies are acting up, so my nose is running like crazy. I apologize for sniffling in your ears, okay, so that's how we would start that off now in order to prepare for braiding. Let me back you guys up a little bit in order to prepare for braiding what I'm going to do. This is my bundle. I already stretched for you on camera. I'M gon na take about a third of this bundle, so I should feel like I have half in this hand of what I have in this hand, and it actually feels a little thin still, so I'm gon na go ahead and fill that out. Alright, that feels like about half here that I do here so the section where I have half I'm gon na, take it and wrap it around the bigger section so we're just wrapping it around I'm gon na. Add it to itself like so and then I've got three strands that I'm working with. Okay, let me pull you guys back in, so we can continue all right. So I have my mannequin here. I'M gon na be going ahead and picking up this section of hair. So I've got low in my nose. Jesus I've got this triangle section here and I'm gon na just go ahead and separate that out, like I showed you guys just a moment ago, just like that and notice I'm having to kind of hold on to quite a bit at a time. So I will say this is gon na be a bit more difficult than you guys are accustomed to from here. I'Ve got my three strands and I'm gon na just go ahead and assign one natural strand to each of the additional strands, just like so okay. So my middle strand gets assigned to my middle strand. My left strand gets tied to the left and my right strand gets assigned to the right now from there. I'M gon na go ahead and just begin a simple braid making sure I'm keeping my finger underneath there to hold that knot pretty secure, and once I take that first swipe. I'M just gon na go ahead and pull this hair off to the side. Some and then we're gon na go ahead and pull over from the opposite side from the right, so we're starting off. This is a regular French braid. Now notice, I'm going quite a bit slower than normal, because I want to make sure that my knot is not doing a ton of sliding okay. So here we go. My knot is all good once I'm pretty sure it's secure, I'm gon na hold it nice and tight and then from there I'm going to begin to pick up sections of hair from the outside and add it in so basically, my goal here is to cover up My little knots and things like that, so I'm gon na fan that hair out some pass it over and right on in I'm gon na do the same thing from this side here. So we're just picking up a bit of hair, smoothing out with our fingers and pass it right on over. Let me do the same thing here and we'll literally just continue this process all the way through. So I know right now, it's looking a little like wait. A minute now - and I will tell you that this is more difficult than it looks, but hopefully this is something that you guys will be able to pick up on pretty well. The biggest thing is going to be your grip now notice. Each time I pick up here, I'm smoothing that hair out, as I add it in that's incredibly important because it's gon na make your braid look a lot more neat and then just understand that the smaller the sections that you pick up when you're braiding the more Neat and professional that braid is going to look so we're just continuing that process down in order to keep that braid, nice and close to the scalp and tight I'm gon na keep my hands as close to the scalp as possible. Okay, then, every few steps I want to stop drag my fingers all the way through the ends of the commercial hair that we're adding in that's gon na help me to keep from having it matte up because keep in mind this hair is synthetic hair. It'S incredibly long, it tends to tangle really easily. So you want to stop every couple steps and when you're braiding, no matter what type of braid you're doing and detangle through the ends of the hair, but especially if you're doing it with hair added, you really want to make sure that you are taking that extra Step there, so you guys can't see at your doing this here if the color is matching pretty close to your clients, hair, it is virtually undetectable as to where that hair has been added in so long as you don't have a massive amount of hair added in There and that's why I start off with a larger section of hair, rather than starting off with a really small section like I typically would so we're just gon na continue right on down sectioning off these small sections, smooth. It out add it to my outside strand on the left and pass it up and over the center, which I will tell you guys if you are used to doing underhand braiding, and this is like a bit more difficult for you. I want you to talk yourself through it, the same way that I talk you through it in the video. So when I say that what I mean is this a lot of times when you are working with the type of braid that you're not accustomed to doing, because you are more of a natural under hand, braiding or whatever the case may be that's type of braiding. That you are more prone to do is going to be a little bit different. You tend to braid with the creative side of your braids, so when you're learning a new, braid or you're doing a braid that doesn't feel as natural to you accessing that other side of the braid. That'S more analytical is a bit better. So talking yourself through, it really helps you out with the steps and remembering what you're doing so. You don't go into autopilot and start braiding underhanded or get lost in your design. Now I will say, I've been waiting for so many years now that it's something where it's like once I get started on it, I get started on it and I just follow my rhythm, but until you get to that point, sometimes talking yourself through it saying: okay, Add in and over add into the right and right over Center add into the left and left over Center. Your clients might think you're a little crazy who cares they're still gon na pay you and ultimately, if their braid looks bomb, they don't care if you're crazy. It doesn't matter to them all right, so I'm gon na kind of speed through some of this. Just so you don't feel like you're, watching your entire life away on it and then we'll pick up back towards the bottoms, quick tip. Again, don't forget whenever you are braiding behind the ear, once you get behind the ear, you want to have your client tilt their head forward. What this does is it stretches the skin on the neck and it's going to help to ensure that if they tilt their head down later, it's not snatching that hair out at the base of the neck or causing any types of bumps. If you're braiding tight enough to where it's causing bumps on your clients, usually that's a sign that you're braiding a little too tight, you can actually cause hair loss from that called traction alopecia, and you definitely don't want to put your clients through that type of discomfort And you know just be tearing up their follicles like that, so this is just a I guess, preliminary measure just to insure that their hair and their scalp stay healthy. Because, ultimately you want your clients to continue coming back and if they don't have any hair. For you to do, then you just lost the client. So I know that might be somewhat comical, but it's the truth all right. So once you get to where you are no longer picking up hair you're, just going to flip into a standard, an overhand braid, because that's really all this braid is - is just a standard, overhand, braid and you're, just adding in hair as you go, which is why, If you don't know how to do this, or if these are difficult to grasp my first step that I always tell people is go back to my video on overhand braiding and do it again it makes a massive difference so from there I'm just braiding this hair Down and notice, I'm just giving that hair slight turn as I braid. What that's going to do is it's going to help to secure the ends of the hair. That is not artificial, hair and allow it to kind of tuck in there and blend with this braiding hair, and it just gives a certain smoothness to the braid as well. So let me back you up a little bit, so you guys can still kind of see. What'S going on and see where the hair on a mannequin stops, the hair continues to taper down on the end of this artificial here, so we just continue that process all the way down. Let'S see how we're doing that slight twist, it just makes that braid looks so much more plump and smooth. It just gives it certain niceness, that's one of those tricks that I keep in my back pocket in the salon. Just so you know that really helps your braids look. Incredibly, neat is an extra step that at first feels a little awkward, but it makes a huge degree of difference now notice, I'm already well past, where the hair stops. There'S no more of the mannequin hair here, but notice how there's no hair popping out anything like that. So on straighter hair, you can do this type of technique and it will allow you to easily tuck the hair away and just continue on with your braid. So we're just continuing on braiding all the way down to the tips of the hair. Now, on the ends of this, you could choose to, because this is synthetic hair you can choose to roll it on a roller and dip it in boiling water. You can choose to tie it off with some of the excess braiding hair. You can choose to secure it with a rubber band. So, however, you choose to secure. It is entirely up to you, but it's really that simple. It will take a little bit of practice. I'M gon na warn you now, but once you get it down, it's not bad at all. If I'm gon na secure it with some of the hair, what I'm going to do is take a very small amount and wrap it around and then just pull it through. The little loop I create there and it's knotted on the end, we're good and secure all right. So from start to finish, of course, let me know what you guys think down in the comment box below. Thank you guys so much for watching you're the bomb.com. I love you, glam fam stay clam and I will see you next time, god bless and if you're enjoying glam tober, please continue watching bye, bye,


Comments
Tara Quinch: I’m going to try this. I’m a natural underhanded braided and always felt anxiety about overhand braiding. But I will talk myself through this. Thank you!
Janneen Brown: Thank you!! This is first one I understood and FINALLY! My first try I DID IT! Beautifully too! Keep these tutorials coming!! I really appreciate your help and talent!
daanceduh: Yay I did it! Thank you. I think the most difficult part is just aligning the weave with your hair in the beginning. Once you get that down you’re good to go!!!! THANK YOU!!!!
Terrie Woodley: I just would like to say thank you for the tutorials. I am especially thankful for this one. I hadn't braided like this since I was in highschool, that's been 20 years. Thank you so very much.
Princessa G: I learned to French Braid from one of your previous videos. Can’t wait to try this with the added hair!
S Pagaduan: This is the most helpful braiding video I’ve ever watched thank you
Giggles Gigs: I love it! Your hands are blessed Thank you for this awesome tutorial! I'm good with cornrows but the French braid with added hair has been a challenge for me. I believe I got this now
joella frazier: Thank you for explaining so clearly. Wonderful! Showing the visual like this really helps.
daanceduh: Going to give this a try tomorrow! Thanks - you had me cracking up too about the client losing hair LOL. But it is very true I appreciate your care while braiding
Perfectly Random Bre: Im a licensed cosmetologist and I still come to your channel to learn new techniques you are a wonderful teacher
Mary J Flanagan: Now, I know how to add my extension without it looking bulky at the start. Thanks very much!
Vicky: This video is just what I needed. Great and easy to follow. Thanks.
Catherine Conard: Thank you!!! You make it seem so achievable !!! Awesome instructions!!!!
Mzkeys88: Just calm, thorough, and informative on your approach. ⭐️⭐️⭐️
Tatchik77: That is a great tip about talking yourself through it!!! That works like a charm
Ariel Brathwaite: This was so helpful, there were so many tips and tricks and it is just lovely to follow through. One of it easiest, if not the easiest to follow and understand. Thank you so much.
Tiffany Dixon: That looks so natural. Can't wait to try this new technique. Have a Great day!
Jackie Wilson: So very helpful! You are an amazing teacher!
Theresa L. Jones: Thank you for doing a tutorial that ACTUALLY TUTORS! I hate it when stylists just post themselves doing hair, at a faster speed, with music playing in the background. That's not teaching! I can't wait to try this now that someone has taken the time to EXPLAIN and FULLY DEMONSTRATE what I'm supposed to do. Great job! Please keep the tutorials coming!!!
jazz: Thank you I needed this for college so that I could prosper!!
Kayla Boateng: I always watch your channel because your always taking it easy and and making it very simple, thank you for doing this because I now know how to braid properly it it's all because of you. I hope you will keep on doing your channel because I couldn't of done it without you ,bye
Deb c: Thank you so much love both of your videos. Learned how to French without hair added, and with hair added
Jinell Evans Dos Santos: Hey Linwood I can now Fishtail to the scalp ;fishtail;French braid;dutch braid;fanned out braid;Celtic braid;dutch fishtail;cornrow;box braid and rope braid\twist and I want to become a multicultural hairstylist and YOUR CHANNEL has taught me the MOST thanks glamfam
Fay Samuel: Learning so much during Glamtober! Blessings x
Kristyleelu10: This video was soooooooo helpful I love the way u braid!! Ahhhh!
valencia Moss: The title should be changed to "VERY DETAILED TUTORIAL " THANK YOU FOR SHARING
Purple Reign: Beautiful. I can braid my own hair but now I'll try with adding in extensions. Side note to you, Linwood...you can try Black seed oil for your sinuses. It's available in capsules as well because God knows the liquid tastes like death and not many can handle it. Just be consistent and it should offer relief. Stay glam, love to the family
Shirley Hightower: I LOVE this video, YOU have taught this tutorial better than any video’s that are out YOU are the BEST!!!!! You have been a blessing to me. Thanks so much. I LOVE your teaching, you are AWESOME, you make learning fun. You explain so well. I am watching all your video’s.
Jade Drummond: When I need to learn something I’m coming to your channel!!
Lena Smith: Thank You for sharing Linwood your braid is so beautiful! Hope you feel better.I know how sinus problems are.
Jamilah Randall: Thank you for this tutorial.
Royalty Goddess: I just started french braiding hair (yes I'm a beginner) on my girls hair and they turned out great even with my first attempt. Now I'm wanting to add weave to their hair and I've seen different videos on how to actually do it. I wanted to know if you choose to add the hair under so there's no not or is that your preference to add the hair under?
Samantha Sy: Nice! I think I'm gonna try this on my daughter she likes this hairstyle
Nilla Chapo: Thank you I love ur videos!
Tanya Tabron: Beautiful!!!!!
Crypto Sugar: Love it thank you
tanji2936: Thank you thank you thank you! Your first tutorial helped me clean up my french braid, soooo this will allow me to take my daughter's braids to the next level since she wants added hair(yaaaas I'm over excited)
AKIYIAKELLY: Great Video Like Always :)
SHERRY RICKS: I LOOOVE YOUUUU!!! You are an AMAZING Teacher. You and your wife are Awesome
Pookieboo Fam: Lin, thank you for the tutorial. I love your channel and videos. Love your beautiful family too. Where can I get the holder clamp for the mannequin head?
Vex U: I wanted to add in hair to do a long French braid on my short thin hair for a wedding I'm attending but after watching this I have a feeling I am not going to be able to do this on myself
C. whitaker: Finally someone who can braid like this with hair !! I wish you were near me !!!
Marisa Figaro: This is so helpful. Can't get the individual feed ins technique. So simplified here.
fuzzysnapdragon1: Thanks !!!!! Very useful
Heavenly Glow Tanning salon: Oh my goodness, you are SOOO talented.
T. Brown: Thanks!!!! ٩( ᐛ )و 'preciate the words!
Chrissy's Point of View: Beautiful braid
Danii B.: THAT is one bomb braid
K Mitchell: Love your video! Get some natural raw local honey. It will help you with those allergies. Feel better!
Gemini Mom: Very nice braid._
Ruth Foxe: Thank you for this video. You need to give yourself a pat on the back because you just taught an old dog two new tricks. The larger triangle section and the twisting of the hair so that the the hair is secured in the synthetic hair.
Jiosel Roberts: What can you recommend mannequin for practice wedding hair, prom special event hairstyle?
Brea Pelliccione: Thank you soo much!
kiaa: i really love how he do it step by step i really love it im really go try this hairstiy
Elle Iza: 20, 000 views and only 500 likes? illegal. thank you for this video! i added one more thumbs up
Deb JB: Great job!
Jiosel Roberts: Great job
whitsWIT: you are the truth!! you explained it the best way yet and there's no big knot at the top
OpiWhatsername: Do you have any advice for someone trying to braid with kanekelon hair like Jinx from the show arcane? It's for myself. And I am a hairstylist who has a hairstylist coworker who does the Dutch braids often with the kanekelon hair. Your video is the first thing I've seen at all referencing using the hair for a French braid though. Whatever tips and advice you can give will be much appreciated.
Rack shorts: You are perfect in all. Thanx for shearing n stay Glam
Lulu N: I like the way he said “ Jesus” lol
N Grt: Can you please do some hairstyles for people with bangs?
Sunlight Shore: Nice. Is it harder to do on shorter hair?
MRS. O: WOW LOVE!
Chelle Robinson: lol thank you For sharing & being patient ‼️
8Bit Lindberg: nice!:)
THE Connie Lee: This channel got me slappin' my mannequin all upside the head. Imma keep trying though. UUUGGGHHH!!!
Keiandra Mil: I do have a request. My cousin has a bald spot on her crown well it's not bald but the hair is thin, dry and brittle only in that spot otherwise the rest of her hair is hydrated what can she do to get that middle part healthy and growing
Grace Medley: Thank for the information
Nickie Rasberry: I'm relearning this. Thx Linwood ❤❤
Just Miller: So how to I incorporate clip ins on myself? My clip ins are about 14 inches and my hair is shoulder mid shoulder? I always have fly aways where my Nat. Hair ends! It looks amazing except for the little pieces making it messy! I've tried starting them higher, lower, sideways, product, ugh u name it
Erica Elem: I wish I stayed by you you braid better than I can
LINDA SMITH: Beautiful
Keyetta: He's a great teacher
Kel Tomlin: Your nails are beautiful
Genevieve Lamps: can you just come over and do it for me ! jk your video was extremely helpful thank you and I hope you feel better
Lena Smith: You're welcome Linwood. I'm glad that you went to the dr. Feel better soon!
Isabel Vega: love this
GRladies: Can you do a video on tips for caring for natural Kinky textured hair? I struggle with dryness and breakage and I'm not in touch with a stylist the meets my needs.
nifemi daisi: Where did you get your mannequin? I’m looking for one but where do you get them?
Kētta’s Coils: Lovely
Keshia Payne: very nice
HallieEva: Wow
Shina Evans: U finna have me out here stuntin!!like yea i truly appreciate u bro!!
Katie K: Omg you are the most talanted person i know
trl 96: any tips on the bottom of the braid? when i come to the bottom of the braid i always get this bubble when i do it on myself, but the braid always get´s fine when i do it on someone else :P
Little Fridays: Snatched ma weave
Diliylah Mills: He’s a little funny
Hajji Powell: Thats pretty.
Vanessa Kay: Geometry