Voluminous Half Up Half Down Hairstyle/ Bridal Hairstyle/ Bridesmaid Hairstyle
- Posted on 24 October, 2021
- Curly Hairstyles
- By Anonymous
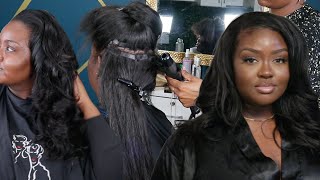
In this video I show you step bye step how to achieve this voluminous half up half down style and all the hair products I use. This style is great for brides, bridesmaids, or any formal event.
Get My Bridal Hairstylist Starter Kit Guide for ONLY $9.99. This guide will show you all the products and tools you need in your kit to get started as a bridal hairstylist! https://bridalbeautybiz.samcart.com/pr...-
Instagram: @Megan.lorson
For collabs email: [email protected]
Hi, my name is megan larson and today i'm going to be showing you how to do a beautiful half up, half down style for a wedding or any kind of formal event. It'S going to be a beautiful half up, half down, i'm going to be doing it on morgan's hair. Today, she's got super super thick long hair. So i'm going to show you all the products i'm going to be using to prep her hair and all the products. I'M going to be using along the way to style it, but we're going to be doing a really pretty voluminous half up half down. So, let's get started all right, so the first product i'm going to be using in her hair to prep with is the new paul mitchell, tea tree, hemp, hair and body oil. I love this oil because it's super lightweight and it just soaks right into the hair and absorbs right into the hair and into your skin. But i like to prep the hair with this, especially if their hair is long and thick and coarse, even if they have fine hair. This is a real, a really good oil, because it is super lightweight and just absorbs into the hair. It'S not anything super heavy, but this is going to nourish the hair and just prep it for our style that way, she's going to get a nice smooth, shiny, end result when we finish styling it and then once i put it in the hair, i just like To take my brush and just comb, it all the way through the hair to make sure all the product is evenly dispersed throughout the hair, and then i'm going to section her off and we're going to start putting some curls in it. If you guys hear little baby noises, my little baby girl hunter is in the room with me. So you're gon na hear some baby noises all right, so we're gon na section, her hair off and start curling, the back and i'm gon na be using a wand for this style and a lot of times when i'm doing half up half down styles, i like To use a curling wand, because it is a lot faster and saves a lot of time and also it helps for a lot of people. The curly wand does a really good job of holding curls, so the next product i like to use is paw mitchell, hot off the press. This is a heat protectant, but it also gives hold and helps to fight, frizz and humidity, which is great especially for anyone. That'S going to have an outdoor wedding or anybody who has super frizzy hair, but i just love that this gives a little bit of a hold. So i'm going to spray each section that i do with this. So they get that heat protection, but also that hold, and then i'm using my one inch paul mitchell, curly wand. I love this wand. It curls really well heats up really quickly and it does a really good job of holding the curl. I'M just going to start wrapping it around and i have it set at 360 right now, i'm just going to hold it on there for a second and then i like to hold my curls for just a second. This is going to help set them cool and set them, and, depending on the hair texture, you can pin them up for even more longevity or if it's a certain type of hair texture that doesn't like to hold the curl, you can definitely set it. Let it cool for 20 minutes and then take it out, but just holding it also helps to set that curl. So it stays in for a really long time. So i'm going to finish curling the whole entire head, like this spring, each section with hot off the press, and then i will show you the next part of how we're going to be putting it up. So so i just started her next section and i did want to mention real quick. So as i go up, i'm taking zigzag sections and i'm also going to be bricklaying the curls. That way, we don't have any like lines that we've created that way. It fills in the hair and creates a nice beautiful flow and then on this i'm going to alternate which way the curl space. So on the bottom. I turned the curls all this way and on this row, i'm going to turn them the other way and then we're going to just keep alternating them and bricklaying them. As i go up, the hair do okay, so i'm getting up towards the top now, but before i curl this, i want to go ahead and get a little bit of product in her hair prep it a little bit for her bump and i'm going to show You what i'm going to do to do that and we're going to go ahead and get the volume that we want in it and then finish curling the ends. So i'm going to be using a little bit of the puff me light texture powder and i'm going to section her hair just take a little section under here. Let me just make sure you guys can see that and i'm just going to spray a little bit of that powder right at the root area and i'm going to take another section back and it's important that you just get this on the roots. You don't really want to get much on the ends at this point, or else it's going to be a little bit more difficult to curl and it's going to be a really funky texture. When you go to curl the ends and then now she's got lots of texture and grip and volume up here all right, i'm going to take my teasing brush and right, where her part is i'm just going to lightly tease that and because we've got the puff Me it's going to lock that right in, but i don't want her hair to separate when we pull it back, so i'm just going to lightly tease back to right here right before we get to her crown area. That way, this will just all nicely come straight back and i'm just going to lightly comb over that and then we're going to take a little section right here and then i'm just going to twist it and then at this point you can pull out some pieces. If you want to give it some more texture or more volume and just kind of see where you want it - and i like that, so i'm going to go ahead and tie an elastic right here and the reason i stopped curling at this point is because if I were to curl the hair all over and then go back in and do this at this point, then it's going to mess up my curl and i'm probably going to have to redo it anyways. So i like to get my volume get my style like the base of it done first and then i'll go back and curl the rest, i'm going to just give that a little twist and just kind of out a little bit before i like it and then Make sure i like the amount of volume? That'S there, let me grab the same amount of hair on the other side and her hair is really thick. So i'm taking more sections and using more elastics. If she didn't have as much hair, then you could definitely get away with using less elastic bands, but for the volume that i want to achieve in her hair want to make sure that it's going to hold all night she's dancing doing whatever she's going to be Doing so, i'm just going to secure this one and then once i secure that you can pull it out a little bit more, i'm going to take a little bit more of that whipped taffy on my fingertips and make sure it's completely worked into your fingers before You start using it and then i'm just going to go through and smooth smooth any first. There is pull out any hair that i want to pull out and then we're going to go ahead and pull this up. Hunter has a lot to say in this video too so, okay and then i'm just going to play with this and see where i want it. That looks good. I'M going to lift this one up and i'm going to bobby pin all right. So i just pulled up this side and i decided i'm going to go ahead and put an elastic band to pull these two together for added security, but you will need to go ahead and bobby. Pin those in place anyways just so you can get both sides pulled up and then you can put the elastic in once you have it pinned up, so i just removed the two bobby pins and now i'm going to give it a twist. So it kind of locks it in and then i'm just going to take this elastic band and we're going to put that in here and then. After doing that, you can pull it a little bit tighter and then go ahead and pinch and pull out the sides. How you want them give them the amount of volume that you want and then i'm going to go ahead and brush this out to just make sure i've got the hair smoothed out where i was putting it up in the elastics, because we're going to curl it In just a minute and then we're going to take this piece back down and then it's got a little opening in the center. We'Re going to give this a little bit of a twist and then we're going to loop it up through here and then we're going to pull it tight. And then you can see how much volume that just got. And so it's going to be like a beautiful voluminous style with cascading curls and then we're going to actually do the same thing under here with this one as well just to connect this one from this one. So, there's no separation between the two sections, so we're just going to give this a little bit of a twist. That'S going to help us feed this through and under this one i like to put my two fingers down and then grab it, bring it over and then pull it a little bit tighter and there now we have two little perky ponies and you can see how Much volume that's gon na get and how pretty that's gon na be once we curl it. Now, i'm just going to put some more heat protectant on it and finish the style off curling it, and then i will show you guys, the after okay. So i just finished curling her hair and i'll. Show you guys the finishing touches that i'm going to do, but look how pretty that is so much volume. Just by doing those two little perky ponies, i'm gon na go ahead and secure this top one. I'M gon na go underneath and i'm gon na take a bobby pin and i'm just i'm gon na. Do this one right here and then i'm gon na open it up and just stick it flat and weave it in that way. It keeps it nice and secure and keeps it flat, and then i'm just going to use my hands to comb out these curls and position it exactly where i want to gon na come down through here and then. Last but not least, i'm gon na take a little bit of hairspray and i'm going to be using the paul neutral super clean extra. I like this because it gives good hold, but it's not anything super sticky or super stiff. You definitely don't want that. If anything, that type of hairspray can create even more frizz in your style throughout the day, all right and then i'll give you guys a 360 view of the whole entire thing. Oh hunter's, just moving my camera now i'll give you guys a whole view of the whole entire hairstyle hope you guys enjoyed this and sorry about all the little baby noises but um just trying to film this video and do what i can when i can so Hope you guys enjoyed this, and i hope you guys got some good tips and tricks out of this and stay tuned, because i'll be doing a lot more updo videos and up styles and all kinds of stuff like that. If you guys have any video requests as usual, let me know in the comments below thank you for watching and i'll see you in the next one. You


Comments
Pamela Q. Fernandes: This is really simple and I love how you explained this. It looks very pretty. Going to try it now. Great job...
R Nguyen: This is so beautiful! I just realized I’ve been curling my hair wrong, lol. I was holding my curled vertically. How would you do the volumizing if you needed a side part in the hair? Love your instruction! Congratulations on your baby! Your pup was so cute. I love your technique on getting the perky ponytails! I never thought about twisting and looping it through. I love the tendrils/pieces in front, too. Her hair is beautiful and it’s such a gorgeous look! Love the baby noises!
Bill Stolz: What a great job of explaining step by step how to do this style.
Michelle Stratford: So pretty! I'd love to find a way to do these things myself one day.
Jennifer Walpole: This style is so pretty! You give really great instructions. I also kinda loved when the doggy came to visit
Elizabeth Rosa: So beautiful!! Thank you for your tutorial!!
Elif Ceren: lovely styling! thanks so much for sharing <3
queenb0102: So beautiful Thanks for sharing your knowledge
Alina Gonzalez: This is amazing! I have super long hair, hoping it works for me this weekend!
Steffaaa: This is so pretty but so hard to do it to myself
Kristina Bertrand: Beautiful Hairstyle Megan!!!♀️
Randomu Fujoshi: Loved this, it was beautiful.
Vanessa Fire Thunder: Love it
Nittaya Canavan: It’s beautiful
sophie brownwood: U love this I was hurt wondering if u did this for a bride where would you put the veil x
MegaTinni: This is serious mum stuff: dog and baby and all <3
Gunnar Berli: So beautiful ❤ How do you girls lay in bed and sleep with long hair like this? Is it hard to undress and put on nightie?
Jen: The jump cut from 11:35- 11:38 skips how you got to that point... makes it difficult to follow...
Mikayla Deemer: Can you tell us which products you used in comments