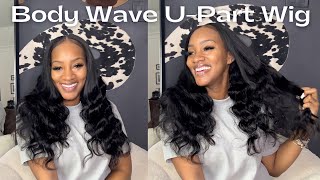
Quick Little Girls Braid Style | Coi Braids| Knotless Box Braids
- Posted on 28 May, 2021
- Curly Hairstyles
- By Anonymous
Hi guys it's irene's braids and i am back with another video today i am going to try to achieve some koi larae braids on my daughter, um. This little braided style is so cute and it's trending for the summer of 2021. I really feel like they're, very uh child appropriate, so i'm going to show you guys what i am going to do on my daughter. So, of course, i like to start my knotless braids out by sectioning the natural hair out into three sections, and i like to take the right side of the sectioned off hair and i like to drag that side over to the left side grab. The left batch of hair and then i like to go ahead and add in some braided hair through my index and thumb finger and braid it into um. My section make sure i'm gripping in a nice. You know secure grip, i hate to say tight, you guys, because i don't want you to do it too tight, but just make sure it's secure. Okay and i continue to feed in the braiding hair between my index and my thumb finger until i get to the consistency of the braid that i would like to achieve now, you guys, i don't want to make these braids too thick or too big, i'm just Looking to fill in her braids nicely, but i don't want to make them too big, some more of a medium okay guys and i'm going to continue to braid that down. Until i get to a stopping point and for me that stopping point would be the length that i would like for my braids to be at and um guys, please remember that when we get to that stopping point, we are going to be using our handy dandy. Black rubber bands, so i prefer to use the black ones, because the black rubber bands do hold up better try to stay away from the plastic rubber band. You guys more so that the clear ones that you see those will pop easily. So if you're going to do this, look, you need to definitely get some black rubber bands, like you see in the description shown in the previous screen, so i wrapped the rubber band about six times or so make sure it's nice and secure and then i'm going To just take my scissors, i'm going to razor off the excess hair that i don't need, we're going to make the braids a little bit shorter and then we're going to use some perm rods to curl the ends of the hair that we decided to keep. Now guys, please keep in mind that you do not have to use scissors to raise out the hair. You actually can use um. I know some people like to use blades or like hair razors, whatever you find and then also you guys, you can cut the hair in half and then go ahead and pre-stretch out yourself to make it shorter. So that way, you didn't have to razor off anything or you can buy the hair already at the beauty, supply store, that's made floater girls and it's already short, it's pre-stretched and it's ready to go so try to look into your local beauty, pla, beauty, supply store For something like that, all right, you guys so what i'm going to do is i'm going to have you guys continue watching me braid my daughter's hair, and i will see you guys back in a second within the next clip to discuss further um the following steps. All right, let's continue watching. Okay, you guys, so i want to just mention one thing that i did not mention. Some people ask how many rows, how many braids um i don't like to give that answer and the reason being is because everyone's head size is not the same okay, so sometimes it may require more parting for people with fuller heads, and i use the word fuller, Because i try to stay away from using the work um, you know someone with a big head. I don't like saying that you know, especially in the professional setting, so i like to say, fuller, head um and they may require more hair, and then you have some clients who have smaller heads, average average size, heads and so sometimes the sections can, you know, vary, But if you would like to know how much my daughter has as far as in today, i did make so far about three rows and with that being said, she has one row in the back and then now i have i'm working on my third row and What i do is i like to go typically straight across for my back row and then, as we move forward, i like to go ahead and round each row after that, and the reason why i like to round it off is more in a u-shaped part is Because it allows the braids to fall in between the row underneath it, and that would give it that full look now, not necessarily for this particular style, because we're not really going for the brace to be too full we're just going for the braids to lay flat And then also to have you know that cool lightweight short cute and curly hairstyle? Okay. So that's the look that we're going for um, particularly in this video um. But i just want to mention that real quick, because i always get so many comments about that. And i and you guys, as you guys notice. If you have been watching my channel for a while, i never mentioned how many braids are, and i don't mention um. You know how many rows i've done, because it's i don't want to say yeah. Just do you know five rows and then now your hair, looking crazy, you know you can't it just doesn't work that way. It goes by each client's head um. Exactly. I don't like to say how many packs of hair i use, because i don't want to tell you because technically i only use what two packs of hair on my daughter: that's it: okay and then what? If your daughter's head is not the same size as my daughter now, you went to the store and bought two packs of hair, and now you got ta go back because all because i told you two packs, so hopefully that makes sense. Okay, guys all right. So, in the meantime, let's go ahead and continue watching and uh. We will go from there all right, thanks guys, okay, you guys, so i am using some small perm rods. I picked up three packs, but i misplaced the pack. I don't know how i did it guys, but i did so you'll see in this video that one side of her head will not be completed with perm rods once i'm rotting them, so i will add more rods once i dip all the braids with them, so That way, i can, you know, bring some to the other side now, there's two ways to do this guys. Now i did this my way, you don't have to do what i'm doing you do it the way you want to do it. Okay, now you can twist the braiding hair as you wrap it around the rod and what that does is it allows your curls to be more of a tighter curl or you can just roll it around the uh raw without twisting it, and that would just give You, you know a loose flat, curl, okay, so that's the difference between the two. Now you can use a thicker rods if you want, and that will make your curls. You know a thicker, you know shape the smaller rods, give you more of a tighter curl. So i prefer small rods, that's just my you know thing to do um, so you do what you would like. Okay, guys now, once i rot all of her hair, i'm going to then dip it in hot water. You must dip it in hot water. In order for the curls to be instant mind you guys this is a youtube tutorial, so i am going to unravel the perm rods as soon as it's dipped just to show you guys the results. Okay, i recommend that you do not take the rods out. I recommend that you keep them in and let your child sleep in them overnight. That'S what i recommend, but i unfortunately cannot do that, because i need to show you guys what the results will look like at the end of this video um. So if i were to do this style again, i'm going to leave the rods in overnight, so that way her curls are much more tighter and then lasts much more much longer. Okay, so i will be using a coffee cup to dip her hair in. I did use a kettle to heat the water. You can use your stove top and just make a pot of water and then pour it into a coffee cup mug with a handle. I prefer to use that on her because we're using perm rods and it's easier to dip the hair into so you guys do whatever method works for you, i'm just explaining what i did in hopes that that might be beneficial to you. Okay. So, let's continue watching. Oh yeah guys and one more thing: um as you dip your baby's hair with the perm rods, and then you use their coffee mug below. Please blah blah blah blah blah the cool air of you blowing as it's dipping into that hot water. And then, when you take it up out of that hot water and you bring your towel to dry it blow so that way you can get that heat up off of your child's neck and um. That way, you know she doesn't fly she's being burnt um because sometimes when they can feel that heat, they feel like they're going to get burned and they jump, and then they get scared so uh definitely blow okay, guys. My girls have been getting their hair braided since they were babies, so they're just pros. They see her like you know, pros they don't move they're, very, very good when it comes to going through these steps. But that's just one thing. I would like to recommend to some of my parents who are new at this okay, so let's continue watching okay, so i'm using a pair of scissors to just take off those straighter tips at the end of the curls. I went ahead and used my scissors to cut off those little pieces. I don't really care to have those you can keep those if you like, but i just went ahead and got rid of them, and what that does is it helps shorten up the braid as well too trying to cut too high up. Otherwise, you can get it like a choppy end and you don't want that and um you guys. I cut straight across, don't cut straight across cut at a downward angle, and that would make it more um. You know uh, it will thin out the braid versus it being straight across and choppy. So a lot of things that i did in here. Don'T don't follow me guys then, like i unravel the curls, i would not unravel the curls. If i were you guys, i probably just leave them as they are um, but i did unravel unravel them and i don't think i really care for the unraveled look and then also you guys. Please give my. I don't really care to have the curls um, the perm rods taken out so soon. So, if there's anything, i can recommend differently. I would recommend that y'all don't take the curls out too soon or off the perm rods, and i would recommend that you keep them in a little longer, so they could get the curls could get tighter, but other than that. That style came out really nicely. She loves her hair um, but those are just some things that i would do differently all right guys. As always, you can follow me on instagram, at irene's, braids and until next time. I will see you guys in my next video


Comments
Ikea Peart: This a fabulous tutorial, thank you so very much!!!!
April Lewisjp r: I REALLY APPRECIATE YOUR VIDEO TUTORIAL Irene!!! You do AWESOME WORK on your own girls/children head! Not only that but I definitely love how you express what you're doing! BEAUTIFUL ! & I have subscribed to your YouTube channel. Thank You !
Char Turner: A very cute look. I love the size of the braids and the tips you give throughout the video.
Alandria Banks: Thank you‼️‼️ I have watched several videos and yours was the only one that showed me what to do if the braiding hair is too long
AKIYIAKELLY: Thanks. I am going to try this Knotless method.
Rainbow Peach: Super cute!! Thank you for posting these videos!!
Wilneshia Jones: Excellent❤️
Boss Lady: Good job…
Molly JD: Will the ends stay well with a week of swimming and vacation?
AKIYIAKELLY: She is a Good girl getting her hair done.
Moe Mizz: Good job. Doing this tonight
Catrina Hood: I use thinning shears!!!
Roblox fans;: Pretty
Hair for your needs by Kaye Murray: Watching from Trinidad
Marion's life vlogs: So can I watching
Marion's life vlogs: Come to el