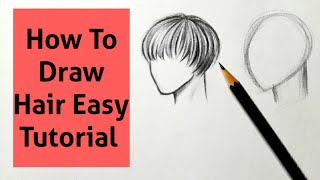
How To Draw Hair | Procreate Tutorial | Step By Step
- Posted on 25 November, 2022
- Easy Hairstyles
- By Anonymous
How to draw Hair in Procreate ✍️ Step by step Tutorial✩
Hi guys!✨
On today’s video we are drawing hair! I go over how I draw hair step by step while sharing my tips and guides on how to draw different hair styles in Procreate!✍️
All these drawing tips and techniques can be used BOTH on a drawing tablet or drawing in your sketchbook!✏️
Let me know if this helped you out in the comments below! ⬇️
If you liked this video, make sure to show it some love! Give this video a thumbs up and SUBSCRIBE if you want to see more. Don’t forget to turn on NOTIFICATIONS! ♡
Thank you for watching and have a beautiful day!
Much love,
Mel
---
Artists shown~
✧ kedavra.art - https://www.instagram.com/kedavra.art/...
✧ sarucatepes - https://instagram.com/sarucatepes
---
PRODUCTION
️ Device: iPad Pro 11inch
App: Procreate
️ Brushes: Hair Brush Pack
️ Editing: Wondershare Filmora
Shop my digital brushes here
️Hair Brush Pack:
Etsy -- etsy.com/listing/1180233998/procreate-hair-brushes-hair-brush-easy
Gumroad -- artzxmel.gumroad.com/l/hairbrushpack
Music credit~ (I do not own any of the music in this video; credit goes to the original creator.)
Music provided by BGM President
Track : A Summer Night's Dream -https://youtu.be/hC29Vt9u6T0
Music provided by BGM President
Track : Rabbit Loves You -https://youtu.be/pMQEvugIbc0
---
For business/YT collaboration inquiries:
---
Timestamps~
00:00 - Intro
00:34 - Hair types
01:52 - Analyzing references
03:28 - Procreate brushes
04:13 - Drawing Hair
11:51 - Painting Hair
---
FIND ME ON
Instagram: https://www.instagram.com/artzxmel/
Etsy: https://www.etsy.com/shop/Artzxmel
Twitter: https://twitter.com/artzxmel
tiktok: https://www.tiktok.com/@artzxmel
Facebook: https://www.facebook.com/artzxmel/
---
#drawingtutorial #howtodrawhair #arttutorial #procreate #digitaldrawing
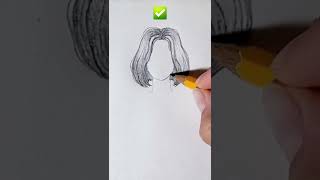
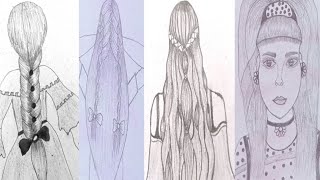
Hey guys, welcome and welcome back to my channel, I hope you're all doing well today, I'm going to be showing you how I draw hair step by step I'll also be sharing my tips and guides on how to draw different hairstyles we're going to cover some Basics. First, like the different hair types and what brushes to use then we'll dive into coloring and rendering later on, don't forget to like And subscribe and make sure to hit the notification Bell to get updates. Every time I post a new video. Let'S go over the different hair types: there are four hair categories, straight: wavy, curly and coiled or kinky hair. Each category then has three subcategories, which are a b and c straight. Hair or type 1 can often look glossy and lies flat on the scalp. It is usually thin and has a little volume. Wavy, hair or type 2 is usually characterized by its s, shape. It can go from straighter. Wavy textures to well-defined curl patterns, curly, hair or type 3 is identified by its spiral. Curls. This hair type tends to have great natural texture and volume, and it does not lie flat on the scalp, coily and kinky or type 4. Hair has a well-defined tight curls that are voluminous and full of movement. This hair type is not oily and the texture appears thick and full now that we know the different hair types. Let'S study some references. It can be really helpful to study the way some of your favorite artists draw hair. So that's what I'm going to be doing here. I will have the name of all these artists in the description below the hair will originate from a point or Source. That'S called a starting point. A starting point shows the direction of flow. The hair follows it's pretty much where you part your hair, you can have one point, multiple points or a line, then hair is grouped into sections or chunks of hair. Like this, the more sections you add, the more detailed the hair will. Look. It'S completely up to you and your style. I saw this one artist saying to group the sections into banana shapes, which I thought was funny, but it really does help now we're gon na look at some Disney references. I love the way Disney creates their iconic characters and a big part of this is the way they design their hair. You can see, they all have a starting point from where all the hair flows from and how the hair is then grouped in two sections. This goes for all hair types from straight wavy or curly for Type 4 hair. Like Antonio. Here it's more about hair texture, you can see how the whole hair has an overall shape and how his curls kind of Follow that shape foreign. I used to struggle to find a brush that worked well for me when it came to drawing and rendering hair. So I decided to make my own the brushes. I will be using come in my hair brush pack. This pack comes with five brushes that were made to make drawing hair easier. I will mainly be using the Smooth hair brush for sketching and the main rendering, if you're interested in checking out these brushes. The link will be in the description below. If you want to stick to the procreate default brushes, then I recommend the 6B pencil for sketching and the round brush and brush pen for color and rendering my first tip is to draw out the whole head. This way you can accurately draw in the hair without making her head too big or too small. Now that we have a nice bald head, we're gon na place the starting line right down the middle and start drawing the hair, with the overall General shape, using simple lines and don't worry about any details at the beginning stages, curly and wavy. Hair can seem intimidating to draw at first, but it is much more simple than you might think. The best way to explain how I draw this type of hair is to draw as shapes over and over once you have the general shape of the hair. You can start breaking it down as needed. The more sections you add, the more detailed the hair will look, that's pretty much it for wavy hair. All you got ta do is draw more s, shapes until you're, satisfied with how it looks and to make it less boring. I like to add little flyaways here and there, which adds more character to the hair for the ends of the hair. I used to struggle how to make it look good. So what I do is just group, those hair sections and make them end a point, as you can see here, so the hair will look thicker at the top and it will get thinner towards the end of the hair. These are the curls up close the tighter the S shape the curlier, the hair will be. You can make the hair loop around as well. If you draw it loose like this, then it will look more wavy than curly just make sure to stretch out that s shape now for straight hair. What I like to do first is place in where the hairline will be then I'll draw out the general shape of the hair, even though the hair is straight, try not to draw it just as a simple straight line, going down. Add some natural, curves and swoops to add bounce and movement to your sketch. It will make the hair look more alive and dynamic, or else it's just going to look stiff, then add in those loose hairs and flyaways and separate the hair into sections and look how much better it looks here. Are those hair chunks up close for the ends of the hair? What I do once again is group them into sections as well, so some sections will end on a point and some will be grouped together, foreign curly or coily hair. I take a different approach on how I form the hair for this type of hair. What matters most is texture, so I start by drawing the overall shape and add texture to the edges of the hair. Then I start separating into sections for the smaller curls frame. In the face I use those S shapes that we saw earlier, then I continue adding those flyaways and make any adjustments until I'm satisfied here is the hair up close. You can make those as shapes or you can draw the hair like a small spring. If you want to add some texture to it, what I do is add small, U shapes, and it does the trick. So, as you can see, if you remember these tips and keep practicing you'll be able to draw hair better in no time, I did three extra hairstyles, so we're gon na quickly go over them. First, we have braids. Braids can look really difficult, but they're, really not once you break them down. So first you're gon na place a zigzag line down the middle and then you're gon na draw C shapes connecting from one point on one side up to the middle of the C shape. Above and I'm gon na draw this out slower in some examples here in a minute after the braid is formed, I then add those flyaways coming out of the braid okay. Here we go starting with that zigzag line down the middle, then placing those C shapes connecting to the braid section above the tighter you draw that zigzag line, the tighter the braid will look and the more stretched out the more loose it will look, foreign and then Finally, just adding those flyaways coming out of the braid, I'm going to shade these braids real quick to show you how easy it can be. All you do is first fill in the braid with a base. Color then, with a darker color, shade the top and bottom part of each braid section, and that's it very simple shading and it looks so much better foreign style. I believe these are called faux locs. I will admit it was a bit of a challenge trying to figure out a way to draw these in a simpler way. So once again, I started drawing the overall shape of the hairstyle, with the starting point being where the hair is tied and then what worked for me was drawing thick waves, which will be the braids. Then I shaded the hair and erased some of the middle of the braid to add those highlights back in, and here is that braid up close in more detailed for the third hairstyle. I wanted to draw a short pixie, hair so start with placing the starting point and drawing the hair coming from there. At this point, the process is pretty self-explanatory. Just group the hair into sections and keep in mind bangs, are always going to go from thick at the top to thin at the bottom, and here are those bangs up close foreign. It'S important to first figure out where the light is coming from for this one. The light is coming from the right, so the shadows will be casted on the left side. So now that we know where the light is coming from, let's pick our colors for the hair. I won't go too detailed into color theory for this video. So, let's keep it simple by picking three colors when picking your Shades keep in mind, no hair is just one flat color. First we're gon na pick our base color, which will be the overall shade of the hair. Then we'll pick a shadow and highlight color, these three Shades will be the main colors for the whole hair and to make things interesting, I will add different Hues to the shadows and the highlights later on. I usually start by coloring in the hair on a new layer underneath the sketch or line art. This layer will sit above the skin layer and then I will set it to Alpha lock, since I've already done that. All I'm going to do now is fix the base color of the hair to the colors. I chose, I always start with the Shadows, so I'll be adding Shadows using that darker color I picked earlier and I'll place it everywhere, where the light wouldn't reach. So that's under her head and since we know the light is coming from the right most of the shadows will be focused on the left side of her hair. Now I'm going to start carving out those hair sections using the middle tone of the hair and the shadow color, and even though her hair is straight, I'm adding those swoops and curved lines, so her hair won't look flat or stiff I'll continue this process of separating The hair into chunks using different shades of that shadow color until I'm satisfied foreign comes a fun part I'll grab that highlight color in a low opacity and start adding more detail and breaking up the hair, then I'll, add any extra flyaways and deepen the Shadows on A separate layer set to multiply now that the basic shading is done. I like adding a rim light on the side. The light is coming from to add more depth so on a separate layer set to add. I pick a light, saturated, yellow, shade and start placing that Rim light where the light is brightest. Lastly, I will choose a soft blue color to place in some extra highlights. This light appears blue because of the sky above her and make any last minute adjustments for wavy hair. I use the same technique, so I will start with the Shadows: first, placing them on the left side of her hair using the darker shade I picked at the beginning, then, with the lightest shade I'll bring back some of the color to the hair and start carving Out those hair sections using the s-shape drawing method mentioned earlier now, it's time for my favorite part, which is adding more detail by breaking up the hair. This is the part that takes the longest, but I find it really enjoyable, so I'll usually have a video or a movie playing in the background, while I sewn out at this stage of the shading process, once that's done on a separate layer set to multiply, I Will deepen the Shadows to add some Dimension to the hair? After that, I will start adding some highlights with the lightest color I picked earlier and then on a separate layer set to add. I will add the rim line with a light yellow color, where the light is brightest. Foreign all that's left to do now is to add some extra blue highlights and make any last minute adjustments for curly and coily hair. What really matters is texture, so my process will consist of adding shadows and highlights with texture brushes like the 6B pencil. As always, I'm going to start with placing the Shadows first with the darkest shade and then continue with the highlights. Then, on a separate layer set to multiply. I will deepen the Shadows even more and I'll continue this process of adding more shadows and highlights on different layers until I'm satisfied. Lastly, I'll add that brim light to the right side of her hair and on a separate layer, I'll add a warm light with an airbrush and that's it I'm curious to know what does your hair drawing process look like? Let me know in the comments below. Thank you for watching till the very end if you've made it. This far make sure to like this video, if you found it helpful if you're interested in learning more of my process and like seeing these type of videos subscribe for more content, don't forget to practice and don't overthink it you got this. I appreciate you have a great rest of your day and I'll see you in the next one.
Comments
Artzxmel: Hey everyone! If you're interested in getting my Hair Brushes for Procreate, I'm having a Black Friday 30% OFF Event until November 30th! My brushes are available both on Etsy and Gumroad!✍ The link will be in the description above :) Have a wonderful holiday season!✨
0ceanamber: This is so helpful thank you so much! Your art is always so beautiful!
-Byul Arts-: How this only has 3 likes? UNDERRATED BTW I LOVE IT!❤❤❤
Bustyflor Ytb: Woww! I always wanted how to do braids since I struggle with them but that top of yours is really good! Love the tutorial overall! !
Imperatriz Navier: Assisti ao vídeo sem entender nada do que vc falou, mas gostei bastante do conteúdo