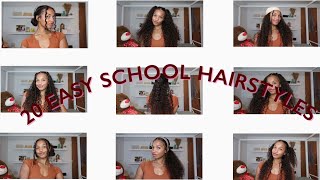
Heatless Hairstyles // Heatless Curls Tutorial #1
- Posted on 07 March, 2021
- Heatless Hairstyles
- By Anonymous
Hey Fam!
Here’s the first video of my Heatless Hairstyles series. Throughout this series, I will be showing you a variety of Heatless methods that you can use to create various styles of fabulous curls/waves!
There is also a bonus fun fact segment about Cicadas, cause ya girl is spontaneous and random like!
If you enjoy this video and want to see more like it, please like and subscribe!
Hey guys welcome back to my channel um, so i was going to do a heatless wave, slash, curls tutorial and show you all of the different ways that i do curls and waves in my hair in like an overnight heatless way. But it was just taking too long and trying to do one each day is really tiring, and so i just decided i'm just gon na do one at a time and we'll make this a whole series instead. So here we go welcome to my heatless curls waves. Tutorials, so, basically, what's going to happen, is i'm going to show you how i put my hair up before i go to bed and then in the morning, when i wake up, i will take my hair out and show you what it ends up. Looking like the benefits of doing these heatless curls waves, is it's not going to damage your hair, like heat? Does like a curling iron or a straightener, or a hair dryer, or anything like that? You don't want to put heat in your hair because the heat is going to strip your hair of moisture and damage your hair. And if you're like me and your hair has been on a journey from dry to finely happy and looking good again, then you will understand that this is so much better and it's kind of more convenient too. So here is number one way that i curl my hair in a heatless way. So let's go all right. So what you're going to need is a hairbrush, a rope, some hair ties and a spray bottle. That'S everything everything that you need to get beautiful, curls, okay, so step one brush your hair, all right so brush out your hair and separate it into two sides. First of all, this is going to turn out different for everyone chokora, because everyone has different hair um and your hair type might hold the curl more or it might lose the curl quicker than others. I'M very lucky that i have a naturally wavy curly hair plus my hair type is thick and my hair strands. My hair strands are all different like i have some very thin hair strands and i also have some really really thick hair strands. But my overall head of hair, i have a lot of it. I have thick hair. I hope that makes sense. So my just hair tie, it holds curls really well, even when i use like a straightener or a curler, i find that i'm very lucky that my hair just holds it. Unless i've i've like blow dried, it blow dried it straight and then curl it. That'S. When my curls drop quickly so tip to y'all out there, if you blow dry your hair straight and then try to curl it you're just going to lose you're going to lose your curls all right. So, let's get into this! I have now divided my hand to it's, not perfect, but it is what it is now you're going to get your rope or waist string whatever you call it and put it on your head, like this and you're, going to start with the side that you're not Going to be working with, and i'm just going to get one of my hair ties and put it into a cute little little pony cutter with this attached in now. What that's going to do is it's going to hold this in place, some people they get like a clip and they clip it in so it stays still. But this is one less thing you need to worry about. Next. What i'm going to do is my spray bottle and i'm just going to lightly dampen my hair. I don't want to be sopping wet, but i also want a little bit of moisture in it so that it can put a little bit of product in my hair and also when your hair dries in the shape of the curl it it just holds. Holds it better? I don't know how to say that in a better way. Ah, there we go, it is sufficiently damp. So now i'm going to pull this back over the top and we're going to start making the curl twisting. So this is the first method with the rope with this method. What i'm going to be doing is creating two curls per side going in the opposite direction, so what that is that's going to do is that is going to create a more natural looking curl in your hair, because it's not all going the same way. It'S got. Two directions: curl and then two again on this side: let's start so what i'm going to do is i'm just going to grab a section from the front and when i say the front and the back, what i'm talking about is the part in front of the Rope and behind the rope all right, so i'm going to grab a section from the front and i get a little brush and i'm going to wrap it over the rope and back get it out and then back under over here right. So it's fully wrapped around then i'm going to grab a section from behind and then this one is going to go in front in front or over the top of the rope and back underneath right. So you can see that they're both wrapped around now. This method is a little bit similar to braiding, where, as you do, the twist you add in extra hair along the way. So i'll just show you with this, so we've got our front bit. Connect grab another section and add the first section like that. So i've got the extra bit, i'm just going to twist it over the top and back underneath and then the back section grab a chunk. Add it on and put it over the front and wrap it around. So you can see it's wrapped all right. I'M gon na show you this one more time and then i'm gon na speed it up all right so add, grab an extra chunk. Add it to the first front and wrap around always remember when you wrap, you always go over and then under all right. So, no matter what side you're going so now, we've got the back, add a chunk and we're gon na go over and then under all right. I'M going to speed this up and get this side finished so remembering grab add over under so all right. So now that i am at the base or the nape of the neck, i'm just going to keep that same wrapping over and under the other side over and under all right now that i'm at the end, i'm just going to do my last little wrapping make Sure i get those ends nice and tight. I give them a little spray as they try and do at always try and get them to do what they're told all right. Now that we've reached the bottom, you can see that it is fully wrapped over another and under and i'm just gon na get my hair tie and tie that down now this step, you need to be a little bit careful and make sure that your little end Bits see this one's come undone, then they stay, they stay in place and they get tied tie then babies down, because the last thing you want is to take your hair out in the morning and to have these beautiful curls and then at the end, there's like One that's like sticking out weird and it's because you didn't make sure that it was wrapped around so there we go all those ends tied down. So that's our first side all done now to do the second one. Let'S go now what's the first thing i need to do spray it pop it back over. There give her a spray start that and um yeah. Let'S do it. Are you ready all right so now we're at the end um just quickly before you end up going to sleep, i would recommend quickly giving it a once service spray just to make sure it's a little bit damp and if your end, things really annoy you, you Can tie it up um, there are two different ways that i would recommend tying it up. There is the classic um princess layer buns, where you put them both up like this, just wrap it around and tuck in the end, and then you've got these two princess layer, buns or um. My personal favorite is because i find like i move around a lot in my sleep, and i also sleep on my side and i find these just they're a little bit uncomfortable and i don't like them and there's been a few times where i've woken up. And i must have been really annoyed with them in my sleep and i've like ripped them out so another way. That is my personal fave. Is you switch them over and then you pull this up and tie it and then just tuck in the little remainders there? You go all right, i'll um seal in the morning and show you what this looks like good night good morning. It is hair unwrapping time um i have gotten up in breaky. Had coffee had a shower gotten ready and now it is time for me to release the mane, so you ready, let's go. Let'S start, i normally um start by undoing both of the hair ties. Just so it's done. I don't know. I just find it's what works for me. Um. I don't know if you can hear it, but there are some cicadas that are being really noisy at the moment, so you can probably hear it. In the background, i tried putting my aircon to hopefully drown out the sound of their screaming, because that's all they do so yeah if you can hear them. Let me know in the comments section below love to know fun fact about cicadas. They um so they basically live underground in egg like when they've, but so they crawl down, lay their eggs and the eggs stay underground. I need to like probably double check my facts, but apparently the eggs stay under. You know i'm gon na google. This we've gone from like hair tutorial to fun fact about animals or cicadas, no freaking way, okay, so this is on national geographic. So it has got to be fact right. I know university. They taught us to always look at like journal articles, but you know what i trust: the national geographic. They know their ish no freaking way. Oh my gosh, okay, so cicadas! This is such a rat. Okay, cicadas. They um the females. Cutters lay up to 400 eggs and they're like in twigs and branches. So after six to ten weeks, they hatch but the young cicada nymphs, they dig themselves into the ground to suck the liquid off of plant roots and then get this 17 years later. I thought it was seven: no 17 years later they crawl their little. They crawl out of the ground as like, fully functioning adults, they crawl into trees, they mate, and then they scream at people all freaking day and night. Oh my goodness. Oh sorry, my bad! It'S 13 to 17 years, but still holy cannoli and i'm pretty sure. I can't see it anywhere here, but i'm pretty sure they only live like a few days above ground. That is insane: okay, fun, facts with billy, mid hair routine about cicadas. They live underground for 17 years and then they come out of the ground just to scream at people, probably not, but that's my gift, all right back to the hair tutorial. Okay. So what you're going to do when you are unwrapping your hair is you're going to be really gentle to not um disturb the curls, so you're going to really really gently unwrap it. Oh, these are going to be good. Look at those curls. Oh, my gosh they're going to be bouncy, so you're really really gently undo the curls slowly unwrap them bit by bit. Ah, so cute all right so bit by bit and wrap these babies like a christmas day present, because i don't know about you, but when i write presents at christmas time, i'm really gentle. I think i annoy people when i unwrap presents because um i like very carefully unwrap them. I hate wrapping. I hate ripping paper because in my head i always have like the intent to reuse the paper, because you know we use recycled, it's better for the environment. Take care of our world - oh my goodness, so it helps if you just like, hold this up and then just gently each time now that, like we're past the base, um unwrap like take over over both sides and then like the part that has been added in, I normally just like divide part: the seed like moses, oh my gosh. This is gon na, be so good. Please, please behave okay, oh yeah! Oh yeah! This is like the most exciting part is when you unwrap your hair, and you see how successful it is and you're like. Oh my gosh, it looks so good. Look at those curls. Okay, so don't touch the curls, don't disturb them. Yet it's not time, but this is bouncy. Oh, my goodness, all right we're gon na jump onto the other side. Hell yeah boom. Look at these curls. They ended up so good. All right throw away the rope and what you're going to do is you're just going to shake out the curls all right, so shake them out with your hands, never ever brush through it for y'all out there who grew up with like curly hair. We know that if you brush your hair out brush your curls out once they're like beautifully formed you're just gon na get frizz, so don't do that just shake them out. What sometimes, what i do is use my fingers almost like a comb, and i put it in like at the base and then i like, pull it out like comb it through about. What'S that like 10 centimeters, so not through the ends, just i'm just ripping my earrings off, not through all the way through to the ends just at the base, because that what that's going to do is it is going to brush out your hair a little bit. But just at the base to get a bit of volume now what i'm going to do, i'm going to put it over to one side and to make sure i don't have that like intense part, i'm just going to like basically walk at now, i'm i'm a Millennial, so i i don't, do this whole middle part thing, it's always a side part for me. I just feel like it suits my face better. So there we go. There'S our first heatless curls, using the rope of your robe wow, i'm impressed. I always like. I am always just so impressed with myself and my hair that it can do this and i'm not using like a curler like look how good these curls are. Like people always come up to me, and they compliment me on my hair, whenever i do this they're like how did you do that and when i tell them? Oh, i use socks or i use like i just use like it's a heatless curl like what, like. I just literally wrapped my hair around my row, boys band and slept in it and woke up and took it out. Basically, i woke up like this. I woke up like this. I woke up like this. I just need a fan right now and i will feel like beyonce, so this is it. This is the end product now, just reminding you all, it might turn out differently for you and it's not going to last in your hair. The same for everyone does that make sense. This lasted my hair all day like i can go a few days and my hair still looks like this, maybe a little bit more ratty and crazy, but it's still like curly and whole. It holds that curl. But that's just for my hair type, if you have naturally straight hair, you'll, probably find that your curls will fall um. I don't know if it's gon na last all day for you or if it's gon na last, just for one day and then the next day. It'S not as curly, it might end up looking more wavy the second day for you, but yeah, just letting you know some people if they have like, naturally curly hair. This is going to help. You really form your curls to help them last, rather than having that like really because sometimes for me, i have like my hair naturally can be really curly if i style it and put product in it, but the next day i wake up, and it's just like A frizz ball so for all those curly girls out there. This is amazing, it's so much better for your hair and i honestly feel like this is so much easier than curling. My hair plus you're, not gon na get burnt by your curler or straightener. Oh, my goodness, that's a pain in the butt all right. I will see you guys in my next video. Thank you so much for watching this whole thing. I hope you enjoyed learning how to do some heatless curls. I hope you enjoyed learning random facts about cicadas and their life cycle. I'M a teacher, it just happens so um. If you like this video and this kind of content, please like and subscribe. If you have any other hair requests or heatless curl requests, which you will probably see in another video soon um, please comment down below. If you like this kind of thing, please tell me if you have any feedback for me. Please tell me check it in the comments. I appreciate all feedback and comments um, so yeah. If you like this kind of content, please like and subscribe, i don't know if i already said that, but i'm going to say it again like and subscribe click. The little bell below click the little subscribe below and um i'll see you in my next video thanks. So much for watching love. You guys bye,

Comments
emmajoyce: Omg how pretty!!! I wanna try