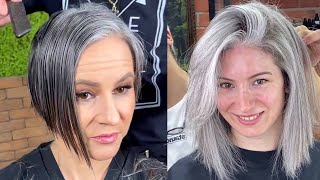
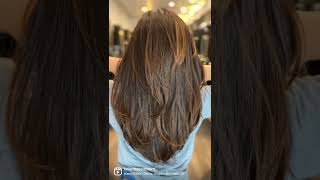
Simple Long Layered Hair Haircut Tutorial With Face Framing
- Posted on 05 September, 2019
- Long Hair
- By Anonymous
Education Director for Sam Villa Andrew Carruthers shares a simple way to create a long layered haircut with face framing that is adaptable to different hair types and densities. Discover how to create airy layers in this full haircut demonstration, including a sectioning technique called the Foundational Breakdown with this in-depth haircutting tutorial.
LEARN MORE Enjoy more tips on hair cutting and more at our professional blog, the link is below.
https://www.samvilla.com/blog/easiest-...
SUBSCRIBE NOW Want more education? Make sure to subscribe to our You Tube Channel: samvillahairtutorials
VIEW LIVE EDUCATION All upcoming live online events are listed at https://www.samvilla.com/education-cal...
TOOLS used in this video
To learn more about the Sam Villa Signature Series Invisiblend Shear click the link below.
https://www.samvilla.com/products/shea...
To learn more about the new Sam Villa Rose Gold Ionic Dryer Limited Edition click the link below.
https://www.samvilla.com/products/blow...
GET SOCIAL with us!
Instagram - @samvillahair https://www.instagram.com/samvillahair...
Facebook - @samvillapros https://www.facebook.com/SamVillaPros/...
Tik Tok - @samvillahair https://www.tiktok.com/@samvillahair
YouTube - @samvillahairtutorials https://www.youtube.com/c/samvillahai...
Hey friends, Andrew Carruthers, here, education, director for Sambia, one of the most commonly searched for haircuts on the entire Internet, is just a simple long layer. So we thought we'd give you a tutorial on a really simple basic shape that gives you beautiful, Airy layers, plus lots of tips on how do you adapt this shape for any clientele and for any hair density, so we're gon na get into the sectioning first. Let'S get after it before we get into the section one thing that we always want to do is we want to prepare the hair with some product. We love the red, can one United, mainly just because it gives the hair a nice slip and it's great for sectioning, but it does not leave the hair oily at all, especially for those of you that might have fine hair. Your guests have fine hair. This is a great, even that's, not gon na make it heavy, so we're gon na miss that through next step is let's get the sectioning in we're gon na go into a sectioning that we call the foundational breakdown. It'S so that we can get the head section off into the different areas that make the biggest difference sides back top. Those will be the major major transitions that we'll have to deal with. So the first thing we'll do is just section right at the vertical transition. This is the area of the head that transitions from being more vertical up into more of the top of the head and we'll continue that back and around as we follow the crown and the crown has a slight dip downward. So we'll follow that dip as we go around and then we'll just balance it out on the opposite side now on the mannequin head. This is gon na, be perfectly balanced side to side because she comes out of a factory, but the guests that sit in your salon do not so don't freak out when you try this and one side looks slightly lower than other. It'S more important that you keep. This balanced with their natural head shape so be really cautious, as you part that off. If you need to check yourself, you can take your calm place it in a vertical position and just slip your finger right behind the cone right where it pinches between the comb. In the head, that's gon na be where that vertical transition stops, and then everything up here on top we're gon na be working with slightly differently and we're gon na talk about the variations based on hair density. So we'll just take that twirl it up into a nice little nut and place one of our dry sectioning Clips in. I know that the hair is wet, but the dry sectioning Clips hold the hair really really nicely and that's balanced enough for me. I'M not gon na go crazy. Next section we're going to take is we're going to find where the hairline changes right behind the ear, and this is gon na - be really essential for the face ramming portion and one of the things we don't want to do. Is we don't want to keep cutting hair over and over and over again? So if I included this piece of hair, that's gon na become more face framing into the rest of the haircut. I'M gon na cut it twice, that's just inefficient, so we find right where that hair line changes and drops down now, if your guests wanted less face framing, you could easily scoop this section forward so that you are dedicating more of the hair into the layering pattern And less of the hair into the face frame layers and then we'll just clip those two pieces forward. That'S telling us to leave those alone, we're gon na step to the center back now, if at centre-back we're gon na take a one-inch vertical section. So just a section straight up and down and about an inch wide. We are gon na keep this slightly loose. We'Re not going to get crazy, crazy, precise and hard lines with this. So don't get super obsessive about the exact size of the section. The main thing that you want is something that you can be consistent with, so we'll take that one inch section now from there. We want to decide what elevation and finger angle we want to create for the layering pattern. This is really going to depend on hair density, because what happens is as we take the elevation and then choose our finger angle. This determines how much weight is taken away from the top and how much is left at the bottom. If my elevation is more low, I'm going to take more weight and density out of the perimeter and leave more weight and density towards the top of the shape. The higher that my elevation becomes. The more weight and density I'll leave in the perimeter, then more weight and density I'll take away from the top. So you have to decide based on your clients density, we're gon na go right in the middle because our Lydia mannequin head here. She has just really medium density hair, so we're going to elevate to 45 degrees above horizontal, so there would be horizontal we're gon na go 45 degrees, above that. What that's gon na do is give us a really nice balance of fully layering the hair, but allowing there still to be density on the perimeter edge. We'Re gon na use the six and three-quarter inch streamlined series shear. This is just a personal favorite shear. For me. Right now, that's a lot of why I'm choosing it, but we want to have a shear, that's long enough that, as you do the point cutting you're actually able to get into the hair to create some texture. So there's the elevation 45 degrees above the horizontal you'll, see my finger angle is pretty much perpendicular with the grain of the hair. If I wanted to take a little bit more length off the top and leave a little bit more towards the bottom, we could change the finger angle slightly, but we're just gon na go perpendicular at this point. There'S an over direction necessarily at both sides of the section you're coming into the center of the section. Now I'm going to drop this out of its position just so you can see the point cut better, so we're going to work with not a super aggressive point cut. We want this to say stay very, very soft, very invisible. We want these layers to be very very loose and we don't want to see hard lines within the shape. So by taking that very soft point cut, it's gon na give us a shape, that's very, very loose. Now one thing that you're probably going to notice is, we did not put in a perimeter. Yet we didn't go down here and cut in a heavy one length, and the reason for that is, as efficiency is going to teach us that if we just work with the hair up here first then we can come back down here to create the perimeter and We'Re not gon na cut that hair twice again less often, we touch that same piece of hair that are efficient, we're going to be. If you want these layers to get longer, as you move forward, you can offer direct back we're going to keep it balanced with the head shape, so we're gon na continue with a natural over direction, which means both sides of that section are gon na get over Directed into the center we're gon na go to that 45 degrees above horizontal elevation, find our guide and then again just gently point. Cutting to that guide. So, what's really key here is consistency, so section size will be consistent, elevational be consistent. Over direction will be consistent and we're choosing all those things with intent and purpose so that we're building the shape that we want instead of having to try and readjust later. So. This is a pretty simple shape. We'Re just gon na continue without 45 degrees, above horizontal elevation find our previously cut section as our guide and then use that six and three-quarter inch stream line series shear to just gently, remove the length. So I'm gon na continue on working down the right side and then I'll switch to the left side same exact process as we get to this last section. One thing to be very cautious of is the head shape is changing right here. It'S starting to head forward on us because we've passed the horizontal transition. The horizontals transition is right here. If your read can train. You know this is the corner back, but this is a really important change in direction because a lot of times what happens is we keep our body in the back of the head and as the head moves away from us, we create a lot of our direction. So just be cautious of that transition and when you take that last section you're probably going to be just in front of that transition, so move your body so that you're over directions stays consistent. This is where we do tend to get into a lot of trouble with creating weight right behind the ear, so just be conscious of that little transition in the direction of the head, shape and you'll notice. I'M here on her left side now and I haven't changed my body position. I haven't started to step over to this side and pull the hair to the outside then, and it's for two reasons: number one we're not over directing forward or back to create length forward or back, but especially when we start in and get into these body positions. Where our fingers are kind of on a diagonal we find if we change body position side to side, it becomes inconsistent. So we've discovered that for us it's just better to stay in a similar body position on both sides, and that keeps this line very, very consistent. All right so now, let's go into the top, so we're gon na drop this top area down, and what we'll do here is we'll section again for what we're going to preserve for the face framing portion of layers. One thing that we'll probably notice is that this line, if we carry it straight up straight up straight up, we're going to be behind that pinnacle or the peak or the high point of the head and most of the hair that sits behind that high point. That hair isn't not going to fall more towards the side or more towards the front, so we don't want to include in our face-framing, so we're going to take the section from where it ends on the side. We'Re gon na find the high point of the head and section to that so you'll end up with a slightly diagonal back type of a section then just marry that on the other side. So what we're parting off now is the difference between the hair. That'S going to live more on the sides in front of the head and there that's going to live more in the crown area, so you can see. Now we have more of a crown section we'll take that hair. That'S left in the front just part it down the center. For now it doesn't matter where she parts for the moment incorporate that into sides and then isolate it with a clip. Let'S get into the crown section here, because the crown is very round surface we're going to work in pie shaped sections, because these pie shaped sections as they radiate down, will turn into a vertical section. If we kind of take the section as a true vertical section, what ends up happening? Is you almost end up diagonal on the shape of the head, so this pie shaped section, keeps us more vertical. The most important thing is that center point of the pie shape always goes back to the center to the high point and we're going to want to find ourselves and about the same width of section at the bottom of this section. So, just thinking about that section size that you have in those previously cut sections grab a little bit of water here we just want to keep her damn. This isn't something that we have to keep the hair sopping wet for so just enough water in the hair. For control we added the excuse me, we added the one United as a cutting lotion. So as long as we keep the hair damp, we should have a really great control over the hair. Again here you have decisions to make, because if we want shorter layers, then we want to continue to keep a higher elevation and we could even change elevation here as we transfer into the top of the head. And if I wanted a lot of fullness a lot of body on top of the head, maybe I would go there, but we want to keep these layers a little bit on a longer feeling side. So we are going to keep the elevation consistent from the bottom, which was that 45 degrees above horizontal. What that does is it keeps me from getting shorter, as I go into the top? In fact, it's going to start to get a little bit longer and for you super hair dorks. Yes, as we get on to the top of the head, it's almost gon na create a bit of graduation towards the top of the head and that's gon na leave. Us that longer feel total to the layers again. Take a slight piece of that previously cut section continue to pie, shape along the head again we're not going to over direct back here. We'Re going to take both sides of the sections meet that into the center of the section elevate up. There'S my guide from underneath and there's my guide from just behind. So the great thing is, you have two guides now to thoughtwell and softly point cut to the previously cut section again. Consistency is really the name of the game here. We just want to be cautious with our elevation or our direction, and clean sectioning is really important for this, because if we start to lose our section cleanliness, especially with these pie, shaped sections, we tend to start to kick off to one side of the other and We'Ll create some asymmetry on the haircut. So if you find that in your haircuts, you find that one side tends to get longer than the other two things to look at one would be your sectioning as you're sectioning traveling, in an odd way around the head shape. The other thing to check into is what is your / direction? Is the / direction? Staying consistent and / direction is actually from our feet more so than our hands, because wherever our feet are that's where the hair is gon na want to go so just be conscious that your body has to move for your / direction to stay it consistent. So I'm just gon na continue and you can start to see this really beautiful. Layered shape starts to come together. Really soft, really air. You want layers, so we're gon na continue one more section here on the right side and then replicate that on the left side. Now that all our layering is finished through the back and as it started to work into the sides now we do want to start down here and get into the perimeter, and the reason for that is the face. Framing is going to need to be very cautiously detailed to the perimeter, so we need that perimeter line. We got some efficiency out of not cutting that perimeter right off the bat with the layers, but now it's really important that we have that perimeter length set in so that we can base our face framing layers off of the perimeter length. Let'S just give her a touch of moisture again with that continuous mist bottle, I'm using it our short cutting comb, our Signature Series short cutting comb in white because she has slightly darker hair. She has kind of a medium tone of hair, so we could really kind of get away with either color the short cutting combs just a favorite of mine. Personally, because I, like the super wide teeth on one side and then the finer teeth on the opposite. Sometimes with longer hair and know, this Sam prefers the long cutting comb, which is a great choice as well. Alright. So, let's get down to the perimeter most important thing whenever you're cutting the perimeter of any haircut is that you're, looking at it as close to natural fall as possible. So take your time make sure that she's combed out into her natural falling position we're gon na layer around the front. So I'm not too worried about again the natural parting at this point. But if we were cutting something more like a bob, then I'd be really cautious to make sure that I was also working in the natural falling position. We'Re going to follow the natural head shape really carefully by paying attention to again the flatter curve across the back of the head and right about here. You can see that's the horizontal transition so horizontally, that's where it transitions more from being that more gentle slope across the back of the head and then turning a sharp corner and becoming the gentle curvature through this side of the head, so pay attention right there for That change in direction because we're going to again work with texture, no problem with putting a little bit of tension on the hair with the fingers still be gentle with it. So you're not disturbing it too far from the natural fall of the hair and then we're gon na look for where do we start to regain some of our density on the perimeter? Now, if she would have sat down in the chair before and she said hey, you know, I don't really want to lose too much length off my hair. Then, of course, we would have been really cautious with that first length on the wires to make sure that we were preserving all the length on the perimeter and not cutting too much density out of it. We'Re gon na keep our one length very horizontal, very parallel with the floor, so we'll keep our fingers just very parallel with the floor and again that really gentle soft point cut with the six and three-quarter inch streamline series shear, as you can see, we've hit that Point where the transition happens so rotate her. If it was me in the salon, of course, we'd be walking around the head instead of rotating her or you know you can rotate your chair to it, which is great. The key is just to make sure that you're moving and just follow that perimeter around the head. So I'm going to complete this side and then I'm just going to step to her right hand, side and complete that side. Okay, once the perimeter is finished, now we're just gon na again read Anthon if it got a little dry there. I live here in Southern Oregon, where it is incredibly dry, so the Icahn heads just dry up so fast. I swear. I go through a bottle of this water every time I do a haircut here all right. So now, let's get into the face: framing we'll go back to our sectioning, which was kind of a diagonal from that high point back to where it starts to meet the hairline here and then behind the ear and we're just gon na isolate that side to side And don't worry if these things don't all blend together perfectly which I know a lot of you get really upset about if it doesn't we're going to show you how to blend everything back together and pull it all back together now, if you have not seen it, We have a face framing tutorial. It'S actually one of our most popular youtube videos, we've ever created and we'll put a link to that in the description, because it has a very similar concept to it. We'Re gon na do things slightly differently with this one, because we're going to leave these feeling just a little bit longer, not quite as heavy as a face framing as that specific tutorial, but we yet even have an entire playlist of just face framing tutorials, for you Guys there we're going to start from the top, because the top really is our shortest point and for a lot of our guests, that's the most important thing. That'S what they're most concerned about because they'll say well, we want the shortest point of the layers to fall at a certain point on the face, or they might be really cautious about the lengths on their head. So they'll say: oh, please, don't cut anything shorter than this, so a lot of times it's intelligent for you to go ahead and start in the shortest point of the haircut. So that way, you know that you're protecting their needs and also protecting yourself so that they don't get upset. So in other tutorial, we over directed everything very straight forward to the front of the face, which gives us a very, very strong drop-off of length. From short to long front, to back this time, we're going to over direct a little differently, it's not going to come all the way forward. But if you look at it from a side view here, this is how the hair is going to fall. So if we over direct just slightly forward, that's gon na naturally give us some short to long motion. Then, whatever we elevate to is going to give us what kind of weight balance we had kind of similar to the back. So we're going to over direct Fort Worden, pretty gently, then our finger angle again can make a big difference here, because if I take the finger angle - and we just kind of take the fingertips way out that direction, you can see we're gon na create a lot Of short, it's a long and it's going to dramatically drop off into that blanks. If we keep the fingers or perpendicular to the grain of the hair, then it's going to be a more gradual drop off towards the lengths. That'S what we want it first, because if we go too steep, then we start to connect to the perimeter, we're not going to bring the face framing back very far so I'll. Redirect that forward, you'll see that finger angle is perpendicular to the grains of the hair. So, what's gon na be really important is the shortest point that we cut here. In fact, for you and your guests safety, what you can do is take a very small piece here and you can drape it to the face, be very very light with this, because you want to allow for that natural bounce. That'S gon na happen as it dries and the fact that it's gon na curve off to here don't pull it down straight and then cut it. It'S gon na be too short, so drape it around the face, keep it very gentle and let's say we she's wanting it to be, maybe just around the lip line. Cuz, that's a really beautiful place to put that first piece. The thing that we want to do with lengths is, we want to point to things or we want to draw the attention away from something, so she's got great lips or great cheekbones or great jawline. You can place things into that area to really draw attention to that. Alright, so we have a little guide there. Now that's going to make sure that we're protected there's that guide right there. Actually I changed my mind. I think we are going to just take a little bit more diagonal finger angle. I think if I stay to perpend perpendicular, it actually would keep the face framing too short too far back so we're you gon na just stretch the fingertips outward a little bit extending that length forward and the reason we're keeping this at a little lower elevation and A little less / direction than the previous is to keep a bit more weight to these ends. The previous way that we showed you how to do it would take more weight off of everything and it's gon na again create shorter in the center and then a really quick drop-off in that length. If we over direct it stronger forward. This is going to give us a really nice gradual, build up of length and weight, as it falls back so we'll now take that bottom section out incorporate the two we're going to use the exact same / direction that we did for the top. Just that slight / direction forward. Now what we have is. We have a start and finish point what's great about that is now it's just a contain of connect-the-dots. So here's the start point and then we know that we want to connect to the perimeter right there at the back of the ear, and that's that finish point right there. So that tells me exactly what my finger angle needs to be start finish and then again just a soft point time. I feel like that was very Bob Ross of me to say just a soft little fluffy point gun. So, as you can see, that builds a really nice, gradual buildup of length and weight towards that perimeter and again don't worry too much if this matches this right now, first off it doesn't matter as much as you think that number two I'll show you a little Way to adjust that after we finish the left-hand side, so we're gon na go through the identical process over here on the left-hand side, I'm going to actually step in front of her and work in front of her. It'S just gon na be a little more natural than me standing behind on this side and trying to create this sort of thing finger angle and I've got to change body position a little bit just because we were on that diagonal on this side. So I'm gon na step to this side and stand in front of her but identical process. Alright, now that we're finished with the front we want to see, do we have a blend between the back and the front, and I can tell you right now that yes, there's definitely gon na be a little bit of disconnection, because we've changed elevations we've changed over Directions and the lengths are just not going to match up, but again we would like to promote that. You don't get super worked up about this because we chose what we did here for a purpose. We chose what we did here for a purpose now, as you blow this out, especially maybe you'll, say. Okay, I can see the line between the two. So here's how you work with that, really it's all about just creating some visual connection. It doesn't have to necessarily become something where you're matching things together. So what we'd suggest is that you take sections between the two points and you'll see that there's that little detachment well actually a significant detachment and really all you need to do - is just kind of create some points of connection within there. You don't want to match things up because again, you chose everything that you chose for a really specific reason here and if you go through and all the sudden start over directing this back and blending everything together, what you're gon na end up with is something that Changes the purpose of your shape so I'll just go through and horizontal sections between the two. You can see. There'S my detachment again. We don't want to destroy that, so we can even come in from behind and just do a little bit of slide cutting between the two. It wasn't much of a detachment in the sections above there's a little bit older detachment between these lower sections be cautious as you get to the weakness on top of the ear again, you can see there's that detachment work from behind with the shear and just gently Softly one between the two so we're gon na do that on the opposite side, then we're gon na get into the blow-dry, especially with these really beautiful, softly long layered haircuts. A great blow-dry is so incredibly important we're going to start with a product application. Of course, our absolute favorite volumizer Red King guts, 10. The way that this distributes into the hair is so awesome, because what you, where you really want the focus of the product application is right at the scalp when you're working with hold products, you can get some of it through the mids and ends as well. But if you want body in the hair the primary place that you want to focus, that product is right at the base, so having something that sprays out as a foam. But it goes right exactly where you want it. Instead of having to put it into your hand or onto a brush or something like that, such an incredible product and the great thing is, is it does have a pretty incredible hold to it without feeling sticky in the hair, which I don't know about you? No one likes sticky hair, so we'll brush that through just to distribute the product, we're not going to get into a ton of details of the blow-dry. Just because we want this particular tutorial to be focused on the haircut, not so much the bowl of dry. But we have tons and tons of blow-drying content out there for you guys already. We are gon na work. First, with a wrap dry, so you'll see we'll go through and work the hair to the head shape. First, just to start getting some moisture out of the hair and we'll work it back and forth what that does is it creates a more natural feeling to the movement of the blow-dry. Then we're gon na switch to our artist series spiral thermal brush. This has become a huge favorite of our entire art team. We'Re using this because we're gon na get some polish on the hair, but we also want to build some shape into the hair. So the thermal core is gon na help to create the heat that we need to get some wave texture into the hair. But the bore hair bristle is gon na pull that cuticle super super smooth, we're also gon na use. Our new special edition rose gold light ionic dryer. This thing is so pretty. This will be released right around the same time that this video will be. So you guys will be getting access to it right at the very beginning, if you're seeing this video right as it's released, we're going to take the nozzle we're gon na put it on slight diagonal, which helps us to not have to put pick our elbow up. So that the nozzle is parallel with the head, like I said, we're going to wrap dry forward. First then, we're gon na switch and work back just to get natural movement, then we'll switch into the round brush cool blow-dry finished. Now it's time to get into our detailing phase. We want to really focus in on the face framing, because it's such a strong feature of this. This is what she's going to really pay attention to in this haircut. The main thing that probably needs adjusted right now is going to be the weight distribution potentially a little bit of the perimeter, because we did cut everything at elevation. There might be a couple little irregularity is just based on the natural shape of her hairline, so we're gon na check in on both of those. Let'S first look at the density most of the time you're going to find that you're going to have a little bit more density up here and then it's going to be weaker here and that's just kind of typical, a little more density through this area and then Right around this bottom hairline, it tends to get a little finer and a little more sparse. We want to balance out that density a bit so we'll first come to the top we're going to use the Signature Series invisablend sheer what's important about this. Sheer is it's going to be incredibly soft and it's not gon na take a ton of hair away with each cut plus, since the bottom is actually not a sharp blade. It'S a polished surface. It'S going to allow us to slide through the hair quite easily after we close this year, so we're gon na just maybe enter in about halfway into the mid strand, close and then slide through and you're, going to notice. Not a ton of hair is gon na. Come out we're going to slide out just a little bit farther in close and then we'll slide out a little bit farther and close and a little bit farther in a little bit farther. What we're doing by starting in the midst random working out is mimicking. What hair naturally does hair will always be as densest as at the base and then its lightest and the ends because of a natural shedding process. So if you camp out for too long in one spot, let's say we sit here in the mid strand and we hit that two or three times what you do. Is you create sort of an unnatural feel to the hair? Because you keep density here and then there's sort of a line of demarcation, almost of where the hair starts to become thinner and finer by gradually working out to those ends that allows you to keep that very natural feel to the density. A little bit goes a long way, so we'll do a little bit then reintroduce that into the rest of the shape. That'S actually feeling super good, so we're gon na leave that alone and a lot of times. It might just be this front hairline. There might not need to be a ton of adjustment do that on the opposite side, we're making sure that the teeth are facing down as well. One of the theories with blending shears is that, whichever direction that the teeth are facing, the hair will be influenced and moved in that direction. We want those ends to fall down and back so we want to be careful to make sure that the teeth are facing that direction. That'S feeling good as well, so we're gon na leave that be now. Let'S comb through this front and just see how that perimeter is falling, there's just a little tiny point right there that the hairs just feeling a little out of balance and we can even use the invisible in there just to gently peel a little bit of length Off that piece, because it's again it's not a complete and total change of the shape, it's just readjust mint. Really after you get that face framing feeling, just how you want it now, of course, it's time to readjust anything through the rest of the haircut, and it could just be the exact same thing. Looking at the density of the shape, the mannequin heads these Linea mannequin heads, they do have a little bit more density right here in the crown, and you may even go to see that on a video. These top layers tend to get a little heavy feeling, especially because remember as we came past the crown we didn't increase elevation and kept the elevation at that 45 degrees above horizontal. So what that does is it builds a little bit of length towards the top layer. In theory, it's actually a graduation because it's calling a short so long towards the top of the head, but whatever that's little details. What you need to know is if it goes short too long from bottom to top it's going to build some weight, so we can do the same thing here. Just very gently remove a little bit of that weight and density through the mids and ends be cautious when you're removing weight because a lot of times what we find is that people just want to go to the ends and adjust weight at the ends. That'S not really where weight and density lives, weight and density lives more in the mid strand of the hair. So we've got to get that sheer in to where the weight and density actually lives and that's starting to feel nice and light and soft, and that's exactly what we're looking for now. Remember, too, that this back area isn't perfectly connected or blended through to the front, and I just want you to take notice that that's not a parent in the end shape is it so it shows you that it doesn't always have to be everything perfectly matching matchi. You can select things where you want them to be. We wanted a little bit more layer through that back for good reason, because there's a lot more hair back here, but we wanted to keep some density to create a really full and solid face frame. So sometimes you have to imbalance the shape to get digital balance makes sense. Final step, of course, is to add just a bit of finishing product. We'Re gon na keep this one super super simple: we're just gon na use a bit of a shine flash 0/2 from redken. This is a favorite of ours for a very light soft hair, because you can get some shine and some slip and there's just enough of a touch to it that it helps to separate the layers and give it some texture without ever feeling oily or greasy. So we'll just lightly mist that, through the entire shape focusing the product more through the ends of the hair, a lot of times shine and texture products, we want to keep more through the ends less towards the scalp and then just give her a final little fluff. This is the part at the end of the service where you're like. Oh look, how beautiful you look who's your neighbor. You should recommend them to me. I need you back in here in six weeks to get your next appointment, starting to finalize the service till he's hard on video, because I don't have a mirror. So excuse me for a second and make sure she's looking perfect for you guys. I like that. One thing too that we did not talk about, and I promised that I would so I'm gon na step back just a little bit is I'm sure a lot of you are asking. Well, you cut this off of a center part. What if they don't have a center part? This is a huge, huge, huge question with tons of answers. I'M gon na give you my personal opinion, mainly just because that's all I can really give you you're gon na get a different opinion on this from everyone. For the most part, I would say that I cut most of my clients from a center part, and the reason for that is is I didn't find that most of my clients always wore the exact same part. So if I cut this asymmetrically, if I part this over on the side and leave this much longer and this shorter, so that they fall at the exact same point based on that part, if she decides that she wants to kind of do this one day now, It'S completely out of balance again, so what my clients - and I discovered is that for the most part, it worked really well just keep things based off the center, especially on these more moveable haircuts. Now, if your guest has a very heavy side, part that it always gets parted from, then you might want to look into. How do you imbalance the layers in a way so that they fall at the same point? But that's honestly, a whole nother video? No, that self, so, let's review this real, quick first thing: you want to part it off into the foundational breakdown, find your vertical transition buying the comb on the side of the head. We'Re gon na part that around to the crown make sure you follow the natural shape of the crown there, then we're going to part just where the hairline starts to become weak again, as it goes up and over top of it ear. We'Re gon na part right at that point. Everything on tops just going to stay pinned up and on for now in the back. We'Re gon na take a vertical section. If you one more density removed from the perimeter you're going to keep that elevation lower. If you want to leave more densities to the perimeter but take more weight from the top you're going to increase the elevation, we want right middle with that 45 degrees above horizontal for our shape, no / direction forward or back. We call that natural / direction. That'S where you take the outside of the the section and you bring it both into the center to keep it following the natural head shape. Once we've reached that line we're going to leave everything in the front alone as we get to the top we're going to find the high point of the head and connect to the section from below and we're going to pie shape through the crown, but basically mimic Exactly what we did through the lower portion of the haircut once all that is finished, we're going to laser line in our perimeter? Well, not laser line and texture in the perimeter, then we'll bring in the face framing we're going to keep this one lower elevation. Just that nice slight diagonal forward or / directed forward movement to create the shape that falls back and away from the face. We'Re going to adjust the finger angle depending on how quickly we want to drop from the shortest point of the face, framing layers into the perimeter. And then, when we get to the side, we'll have a little piece of the perimeter right there at the bottom edge and we'll have the first piece that we cut as our guides and you just connect. The two then give her a nice blow-dry readjust your shape. A little bit do some blending if you feel like it needs it and that's how you get these beautiful long layers. You have any further questions on the shape or anything else. Please leave us a comment. We'D love to hear from you guys thanks so much for watching I'm Andrew Carruthers education, director for Sandia

Comments
bookwrm4evr: This haircut is what i always try to explain to my stylist how or what i want. It works beautifully for my curly hair. Balance when its straight and balance when its curly giving the crown a bit of volume, but not take away too much on the sides making the ends look stringy. Gorgeous!
laurie ann wilks: Watched the whole video, and I just love this cut! You did a wonderful job with explaining every detail. Thank you for sharing. I've been cutting my hair for years I have long hair and I've been wanting to layer my hair for a very long time I don't know if I could pull this off myself but reading the other comments a couple of other ladies were able to do it so I can do it too! Then again thank you so much!
ACP DC10: You are a gifted teacher! I wish this guy would consider do a series of instructional videos for all kinds of technical and practical life skills. I would watch them all!
Shelley Wallace: You did an exceptional job of demo and explaining this cut. Thank you for doing such a complete and thorough job... just a stunning cut!! ❤️
Cookie Davis: Love this cut! I really loved how you described and went thru the cut so nicely . Your tone was perfect, and thorough. Thank you for your help.
Kyra Renee T: Wow, you did exactly what I wanted for bangs, ♥️I have only had my bangs cut well 5 or 6 times. My cheekbones are amazing... and stylists do not know how to accentuate that. 47:44 I always say, I want the long bak to cut back to shape the face and either I get it butchered or it is too long and I so I ask them to go in after with a raiser to sheer off mid pieces to create the cheek bone accent.. ... that can work.. The high up pieces on the back of hair is too short for my hair... but I so love the bangs.
Leanne Michele: I love this video and your emphasis on consistency. It is so important when cutting. I have recently been getting a lot of requests for layered, stacked pixie bobs. Almost an inverted bob but shorter in the back. I’m riding the struggle bus when cutting these cuts. Could you please do a pixie bob hybrid tutorial? Or a pixie tutorial?
Thalassa C: Andrew, I’m a new stylist and I love watching your videos. The fact that you touched on the “finalizing of the service,” and talked about rebooking, thank you! I really need to focus on the finesse and you helped drive that home. I love watching your videos before and after work so I can grow my skill set and techniques. Thank you again, Kate
Daina Turlā: Thank you! I just decided to cut my own hair for the first time and the result is PERFECT! This is exactly my style! You are a great teacher!
Paeches Lenore: beautiful cut and style. and a wonderful tutorial in all aspects. note to stylists: i use a stylist's ability to listen to my request for a mid-part haircut as a litmus test. as someone that enjoys, and sometimes requires a movable style, having an unbalanced cut after telling you to disregard how i mostly part my hair on the left, but sometimes do in the middle or on the right will make me never come back. regardless of how much i loved every other aspect of your services. i've found it doesn't matter how i approach it. generally i would rather avoid escalating the interaction past requesting for a balanced, symmetrical, middle-weighted cut. still, sometimes i end up with side-weighted cut and/or color. if seeking, my part can be found on the left side (although, a few have found it on the right???) and i can tell they look for it and put it in the back of their mind. sometimes i don't think they do it intentionally. are prioritizing side-weighted services over the client's request something drilled in beauty school? if so, it'd be great if they didn't anymore.
Michael Davis: Great-paced, very articulate, and detail-oriented video. Thank you, Andrew
MaritMakeupManicure: Thank you!! for helping me cut my own hair!!!Funny enough the front sides always been the hardest to get decent looking:)) Growing my bangs out it was a mess -until now!!
Tammy: This was so enjoyable to watch. I love his relaxing style of instruction.
Patti Burton Salmonsen: I learned this same technique in 1981, my instructors were the best! Totally helped my career, love watching this channel.
Elaine Davies: I love your style of teaching. When I left college I realised how basic the training really is. Hairdressing is an art as you have to adjust the basics to each client because of their personality head shape, preferences and expectations. Thank you so much for your channel I love you sharing your knowledge and experience!
Justin Bequette: Love this video! Very thoroughly explained all techniques and what works for different hair types. I admire how he applied the technical aspects of sections and angles mixed with the artistic style of finger angles, head shape, and how to cut transitions for a beautiful haircut result.
Triksha: By following your video I tried this with being completely skeptical on my hair myself... and I feel proud of myself with the final result that turned out the same as the end result shown in the video. Thanks for teaching us this haircut, it's so beautifully detailed. Perfect video!
Tanya77xfiler: Beautiful cut❤️ loved your teaching technique. Very easy to follow.
Hila Glam: The best, easiest and most accurate tutorial I've ever seen for such a haircut. Thank you!
Lyvonne West: One of the best haircutting videos I've seen in a long time. I appreciate that you explained why you were doing each step. Thanks for the knowledge!
theswordoftruth 1844: Very helpful! As a hairstylist for ahh, let's see( thinking back, got NY/NJ license in '76)so like 50+ years , you always can learn something! The crown cutting is sooo important, and most of us learn it through trial & error which isn't good for the client so this is a very important tool to use! Knowing it when you get your license and as a rookie stylist, it's going to be a great way to start a client following and build your career as a top stylist! And, always aim for that in wherever your talent may be; as a cutting specialist (which I love) or colorist etc., always aim to be at the top of your game by continuously learning! Seek it out and build your knowledge with your on-going experience. Very satisfying as an artist! I wish Redkin was easier to get into back in the 70's, for us early geometric cutting pioneers. It would have made it go faster with less mistakes committed on our Guinea pig clients, am I right? Sorry bout that all who suffered in order to push hair cutting into stylist levels in Cosmetology as a whole. Then we had the advent of way better hair products for which Redkin made a huge early mark in the industry, as a whole new way of looking at styling. It has been a "long strange trip", but a blast!
Heather G: Thanks Andrew...Detailed with all the right info! If you could do an additional short to this one of "imbalanced layers" to incorporate the parting, it would be much appreciated
Toni Judd: It's me again I just got thru cutting the back of my hair, didn't cut the front since I already face framed it and added some longer layers. And I love how it turned out! Thx for this tutorial, it really helped to understand that the back and front don't need to be exactly matching to create a great cut, fun! ❤
Sophia: Such a beautiful result! I’d love to get my hair done like this but I’m too anxious to go to my local hairdressers...not good experiences. As a result my hair is super long and I’m terrified they’ll be all too happy cutting too much off.
Toni Judd: I am a hairstylist and cut and color my own hair at home, I have always wanted to cut my crown shorter for lift, thank you for this tutorial, it has showed me how to fearlessly achieve this look!
David Campbell: Great job teacher. You always make it look easy.
Deborah55: This is exactly the way I cut hair! First time I've seen any other stylist cut this way. I'm not a legitimate hair stylist I'm just gifted. Lol I've been doing this since I was 11 years old I'm 55 now. So glad I watched your video! Thank you so much for sharing! Btw...my daughter is an awesome cosmetologist, she specializes in color. My mom was a "Beautician". Is there a difference between the two? lol
BOUTIQUE BELA DANTAS: Amei o vídeo, mas seria muito bom se tivesse legenda em português. Vc arrasou
Radley Rayne: This is exactly how I get my hair cut & have done for years. My hairdresser does this cut perfectly having trained at Vidal Sassoon & it works so well with my thick long hair. My hairdresser had an arm injury a couple of years ago & was unable to cut hair for a year & I reluctantly went to another hairdresser to describe what I wanted & how to cut my hair. I said I wanted a long layered cut with over directed disconnected layers.......her reply was “I don’t use those silly words to describe hair cuts, I just cut it & see how it falls!!! needless to say I walked out without letting her touch my hair!!! If I ever need to visit another hairdresser than my own I will be showing them this video as it is perfect & so well explained. Thank you for your tutorials & knowledge
Pinnacle Transportation Services: You are such an excellent teacher, everything is explained so well. I have no hairstyling education but from this video I did a pretty good job on my practice head!
Paula Anderson: WOW now that's art!! 48 yrs old and finaly I only hope when I have my first visit to a creative stylist, that I walk away with this look. Absolute class
Konstance Thongprachanh: Simply amazing! So informative and clear with the explanations. I wish I had found this video 10 videos ago! Lol..thank you, thank you, Thank You!!!
Michelle Biagott: Simply beautiful .Absolutely love it .So thoroughly well explained .Thankyou
Caramels Kate: Thk U so much for making this video. Aft trying a couple of times, now I'm so much more confident when cutting my own hair than before. And the results were all so satisfying.
Laura Mullins: Andrew, you are such a good teacher: your tone, simplicity, conveyance -- all so pleasant and easy to grasp. Thank you.
C C: This tutorial is so clear and concise. I wish Andrew had been my instructor when I was in school. If he was my instructor, I may still be in the industry.
Sandra Mortada: Thank you, for such a fantastic way of explaining. Very methodic.
Lorie Pyper: Excellent educator. Able to share his knowledge with a calming experience. Thank you
Sharon Miller: I am a hairdresser of 28 years, and I love love this cut and placement of face framing! You are an awesome educator, love the way you explain things! Can u please list your products, shears, and blow dryer for me?? Ty again! Bravissimo!!
Anna Woods: Which size brush did you use? Medium or large? I want to order your brush but I want the one you used in this video because I loved the volume and curls you were able to achieve! Thanks so much! I love this video and your instructions are always so clear and easy to adapt for any hair type, especially in this video.
Leslie: Just gave myself a Covid quarantine cut using this video and I honestly think this is one of the best haircuts I’ve ever had. It took me awhile to get the sectioning right but I really think that’s a big key to layers that look good. Thank you for the amazing instructions
Christine McCombs: Great video. I don't cut hair, but never knew all of this information that you told us. I can tell you know and like what your doing! You're a very good teacher.
Exotic Daisy: Did this today! Her hair was bit shorter but still same thing! Thx! When a client has bulky thick coarse hair I love doing notching or pointed cuts
Amelie Scott: My husband followed this video to cut my hair. It turned out beautiful!!!!!!!! Thank you for taking the time to make this video.
Pareen Merchant: Awesome technique. Thank you for educating in a simpler way.
Hien Lam: What a GREAT EDUCATOR!!! I find that not all talented artists can be great instructors and vice versa, but you are both! Thank you so so much for sharing your knowledge in such details! So many ah-hah moments
jose martin chilet: i humbly appreciate this kind of videos, thank you so much! you are such a great teacher and expert!
Ana Paula Martinez: Here's a hairstylist who takes pride and love on what he does, explaining everything to the "T". Watched the whole video and every time he would do something I'd be like "oh..thats why it didnt come out the way I wanted". Do you have a salon in GA?!? Or know any hairstylist that would do that exact cut and technique? I'll go wherever I need to get the haircut I always wanted lol Thank you so much for posting this video!
Bonnie Stewart: Someone that actually explains body position. So very important when cutting hair.
Alma Goh: I can tell you're a really amazing hair artist... I just wish you could explain in a more visual way many of the terms and concepts you mentioned in this video.
Florida_grl_43 Beach: After watching this last night, I went down to my home salon and did this hair cut on my mannequin. It turned out great! I like this method of the long layered hair cut with face framing... Thanks so much for all your free education!
White Rose: I had an interview today to work in a hair salon, I had to do a haircut, I saw your video last night and I did it step by step today, it was great and I will start working from tomorrow, thank you, you are great and I pray for you
brightphoebus: The main thing I think, about getting your hair cut, is the attention, handling and pampering we get. We love that, it makes us feel beautiful and touchable, human, connected. : )
Cansu Keskin: Wow! Great job Love that hair tutorial
Kristen Oliveira: Andrew is one of the best in the industry and Sam Villa is lucky to have him. My mentor was Sassoon trained so I was very fortunate to have her bless me with a lot of this knowledge when I was very fresh in the industry. To give a great cut you have to understand the shape of the head and how the hair falls on that head, Andrew is exceptional at explaining this! Thank you for providing wonderful, free education that is so accessable!!!
A: This is simply beautiful. Amazing explication. Thanksss!!! ♀❤
R Tong: Andrea gives very good instructions and explanations. I am not a hairdresser and I understand the tutorial. Very nice long layer haircut.
Marvie Ross: Andrew C. is absolutely fabulous! This long hair cut is both chic and sexy and its easy to see that it will be so sweet if allowed to dry naturally as well. Amazing tutorial, thank you.
Marcy Miller: The thinning shears made all the difference. Finally a cut that lacks the top being too short and heavy. Beautiful.
Luce Z: What a fab video. I could listen to your voice all day long, ever so calm and you explain things so well and the style is superb. Thanks for sharing!
karen deruyter: You are a fantastic teacher Andrew. Good work, thank you.
Maria Lascaibar: Thank you so much. Very detail layer cut. Thank you for sharing ❤️
Marion Smith: Thank you. Thorough explanation and beautiful work.
Tammie Parrish Miller: This made perfect sense in every way. When I went through beauty college, which was way back in the '80s, we were taught to do blunt cuts and start at the top and work our way to the ends. If you weren't talented, it was inevitable that you were going to cut into the line. When I got out of school and secured a job at a reputable salon, we were retrained to cut the way you just showed, which is from the bottom to the top. Point cutting came in later and really made it easier to get flow. I truly enjoyed watching you work! Thank you for sharing your knowledge and talent!
Silk: Saving and rewatching this content until I have the key-phrases memorized. That way, when I go in for my cut, I can clearly articulate what I would like
Grits Kennedy: Simply stunning what a perfect cut! This cosmetologist is gorgeous and talented..love lovie love this cut this video is just what i needed! Thank you so much!
Gail Strejc: I have always loved cutting layers, long layers, short layers, the only new thing I did learn about 10 years ago, was to point cut or chip cut the layers to make them more seamless. Once layers come in, I believe we might see a revival of perms, because everyone has that friend with naturally curly hair and their layers look amazing. Everything cycles, but so many are afraid of layers. I remember the gypsy haircut, one of my favs for the time.
Anita James: Awesome job - thank you so much!!!
Mirva Arcaima: You are such a great teacher!!! Thank you for this video.
Sunshine Girl: I am so glad to see that a stylist finally understands that you DO NOT always have to start a haircut by cutting the hair straight across the bottom. Every time I go to get a haircut I tell them I don’t want the bottom straight across and what do they do.... cut it straight across. Nice work and explaining the steps with this cut. Maybe I should let my stylist watch this before cutting my hair.
Shana h: I didn't like it at first, I thought the layers too short in the back and it wasn't all smooth and blended but I love the end result. This would work so well for my hair!
Tanya Pnak: Thank you for creating this video. I'm a cosmetology student and it really helped explain a lot of critical concepts we have been studying. I've watched it a dozen times. Thanks again!
Bri Leann: Your tutorials are always awesome!
Paula H: I'll never cut my hair again. Amazing
Madeleine Belle: Wish i could find someone like Andrew in London .. instead of having to do my own hair for years...nice layering and final shape. It seems to be the trend nowadays to leave the ends choppy and blunt .. not easy on the eye...no doubt an expensive payout to look like the hair has been cut with gardening shears..thank you.
Amelie Scott: Gosh you are a great teacher. My hubby has been cutting my hair since 2020 following your video each time, and my hair cut is always gorgeous!!!
Tina H: Thank you so much for sharing this haircut with us. You explained every step so well.
Sheri Mae: This video is great! One thing to note that I wish I'd know before the end of the video : THIS IS FOR A NATURAL CENTER PART. Amazing video !
Rocko Battino: This man is a hair design artist and second to none. This is what it looks like when someone taps into there gift.
Patricia Back: I did hair for years. I'm with you on cutting hair with a center part... with some exceptions... specialty looks etc. This was a great tutorial and a great look. I'm 63, with just below the shoulder length hair and grown out bangs. I've been stuck in my condo for weeks without a haircut and I see this! I'd love this cut with the curtain bangs. Or maybe just a long shag, but NOBODY can do that anymore. Thanks for making my evening. ⚘
Grace's Recipies: Thank you I really like how you explaining everything wow I love Layers in my hair I cut my hair by myself is hard but your videos teaching me.
Diane Zeisler: Love Andrew's voice as it is entrancing and rhythmic. I am noticing on this video a low volume beat in the background and it is distracting me from the information being given. I am only 10-minutes in and I felt the need to share this with you. I hope I can still be a member of the fan club!
The Master Diamond of My Life: So pretty. I love it. I need to work on my blowouts.
Sadness: Question ♀️; would you cut the perimeter first if they have extra long hair and are wanting 3-5 inches off, but still want a long layered cut?
Morbid Mutilator: Im from New Mexico and I cant get a good haircut where I live. I follow a lot of haircutting tutorials. I believe this is my fifth one I'm thinking about doing. Im always cutting my hair wondering why and how certain angles are cut in a distinct way. This video answered all of my questions. I am so grateful for your channel.
Melanie: I am learning so much! Thanks. Keep the tutorials coming. I am trying to figure out how to cut my husband's hair like Barry Gibb during the disco era.
Chantal J.: Ive learned so much watching you…(I’m not a stylist)..But I’ve always cut hair, including my own….I mimicked what I’d seen..but I was never consistent.. ….It took me a minute to understand you…”45 degrees from the horizontal..and elevation..” … Comb and the right length in scissors make a huuge difference too..As opposed to 7” barbers scissors.. Thank you!
Elizabeth Milligan: I'm that person that 95% of the time parts my hair on one side - I'm never completely happy with how my stylist deals with all that weight; is there another video regarding how to cut that?? Thank you for this video!
uzma Sadiq: Very clean and clear ❤
mac cuoi: Very detail and easy understanding ! Thank you very much Andrew.... hope to see more video haircut in different hair style ...
kalima Tayyeba: The best video that describes elevation. Thank you very much Andrew you are one of the best teachers or maybe the best
Alice Aguilar: I love your teaching method. I wish you were my hairstylist. Beautiful cut.
Patti Burton Salmonsen: I have 10 mollys I practice on, with new colors and techniques! I went to 3 schools for being a stylist,you never stop learning, plus I’m a perfectionist and I absolutely hate it, my clients loved it but I always over thought everything, drove me crazy
PLUME 1: The best explained cut you have done imo-thank you-very much appreciated! If wavy, medium curly hair, do fame frace the same?
Karina Fernandez: Very detailed explanation. So good excellent proffesor.
Sumaira arsalan: Beautiful work thanks
Tata K: I wish the hairdresser I went in the last few years were following this tutorial... I am not a hairdresser but I used to go to an awesome hairdresser and that is what he used to do...wish he was close to my home! Thanks for the tutorial anyway, might show to the next hairdresser I go
Aurora Rain: Gorgeous! Love this cut! Might be doable as a DIY....maybe...lol.
VectorAero: This is down to a science and so methodical that it's quite impressive.
Phoebe Lo: I love this hairstyle ♥️