How To Cut A Curly Layered Haircut On Long Hair With Razor | Curly Cutting Tips & Techniques
- Posted on 16 December, 2021
- Long Hair
- By Anonymous
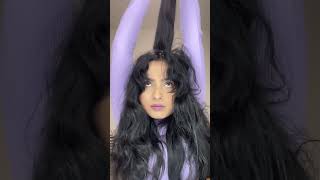
Curly Long Haircut for women with Razor
Curly Hair Cutting Tips & Techniques
"I Love Haircut - I Love Hairstylist"
Really refreshing to be able to have longer highly textured hair to be able to work with for cutting styling cutter color. That'S what i'm doing here today. Many of you, myself, included perhaps some point in your career. We'Re told to never cut curly hair with the razor, and you know what it might be true for some of you. It might work - i'm not here to say what's true and what isn't true, but i am here to say that you know you never know anything until you try it and a great way to try a great way to practice is to get a great mannequin and See the end result and judge for yourself, you know my good friend, dj muldoon has a saying that knowledge destroys fear. Um and you know knowledge comes from practice. It doesn't just come from someone telling you something and you believe it that's kind of dogma. So if, for some reason you know, you wanted to try to work a little bit differently with curls and waves check out the janet mannequin fantastic all right, so here are some of the things that i want to share with you about um, razor and curlier hair. So the first thing that i want to do is be sure that most of the time i'm using what's called the edge of the blade when i'm cutting. I don't want to, for instance, i'll show you what i don't want to do. I don't want to take hair and put the razor flat on it like so because this will definitely disrupt and confuse the curl pattern and the resulting look could be what people call frizzy. Now again, i hate to say you know that you might find a reason why you want to do that for something you know here. You'Ll notice, the way the blade cuts from the side of the each strand of hair and you'll also notice that there's a good bit of tension so that it's not dragging along the hair in any kind of a random way. And again, you can already see the hair is slightly damp. Plus it's been prepared with the curl and wave serum from our friends at goldwell and very excited to uh get some new tools from our friends at denman. I use the tangle tamer great great little tank detangling brush, where i worked from the ends in and got this beautiful consistency, and then they set all different variations on denman brushes, which will be great when i go to style and add product into the hair. So love that okay, so again back to edge cutting i'm working around the head vertically. Here i've taken a horseshoe out from the top and i've taken the frame away from the front. So i want to keep this hair long, but i want to layer it to bring out shape and volume, and then i want to do some detailing around the face. I'M working overhand elevating, there's my guideline. No new hair here, just going through what i just cut, letting my hands slide as i come through and cut with the edge of the blade on the side of the hair section again. This will not disturb the curl pattern. It really will give you a beautiful cut and again what's super important here. Is your combing and your tension so again from the root through great control and coming up and around and looking for your guideline looking through the hair and cutting through from short to long now, again, there are people that always believe the curly hair should be cut Dry, which i often cut curly hair dry. I think it can be a great fun way to cut curly hair, but also cut it wet with tension, and what you have to realize is that, obviously you have to do a little pre-test on the hair i played with some of the hair and the nape And some of the hair in the temple to see what the kind of shrinkage factor would be here and then, as i go in and cut my guideline, i adjust to know how much that hair is going to shrink. Is it more difficult to um see your guideline when you're working in this manner totally it's different. You know, first of all, when working with any kind of a soft line, it's going to be harder to see your guideline period so whether you're point cutting slicing using a razor guides are always going to be softer, so they're harder to see so very important where You put your head you'll notice that i'm looking right through the hair look at where i am i'm looking right at it, i'm behind it and i'm looking right at it. So yes, anytime, you cut, you know obviously curl in general because of the way it curls around your fingers. It can be hard to follow a guideline. That'S why tension again becomes super important, so you can see here the effect of what this layering is doing. Releasing the weight, keeping the length releasing the weight. I'M now you know i'm going to work all the way around the head from one side to the other, because this is a great body position for me and a great way to control what i'm doing you could stop when you get to the middle and switch Around and come from the other side, but i'm also cutting everything on base, i'm not using any over direction because my elevation is so high. All of my length is dropping out below the kind of bottom of the earlobe, so i don't need to use any over direction to protect the length. Again, i like to look at that hair as i'm working making sure that it's developing the way i wanted to keeping it damp evenly consistently damp, never soaking, wet and letting it develop. So again, you know the whole concept behind this series that we've been doing for a couple years here is that you have to keep practicing, and you know if you've been doing here for a while and perhaps there's something that you were told or that you believe For whatever reason that you shouldn't do, um mannequins can be a great place to see. If that's really true now you might do this and you might not like the end result and then you can make a decision for yourself. But just you know, because someone told you lots of people said never paint hair always use a foil. I heard that for years and years and years lots of people said never use a razor at all. Lots of people said never use a round brush, never use a curling iron, never relax, hair, never perm, hair it it it's very, limiting very limiting and i'd rather be defined by what i can do, not what i don't do. How do you keep the hair from getting tangled so number? One first thing i did was i used the curls and waves from gold. Well, i love this stuff. I uh thank you goldwell. We just went to an event yesterday, where we stocked up on tons of great product and then i'm using the tangle tamer from denman brush and every once in a while i'll just go through and make sure that hair is groomed. Look at that right through from roots to ends right through from the right conditioner and the right brush and you're good to go absolutely and then, of course, today i actually washed with um hair story new wash, so i didn't want anything that would um really have A lot of detergent or really kind of excite the hair texture a lot, so i use new wash to cleanse janet again. The you know. The real showpiece of this is this beautiful, janet mannequin from our friends at pivot. Point they've really expanded their range of highly textured hair. For many years we we had the amber, which was a great mannequin, and this mannequin is very similar to the amber, but the hair is much longer um. So a lot more lessons out of it. A lot more great long, hair and long hair, styling long hair, color long hair cutting the janet mannequin from our friends at pivot point. So what is it that you're doing today? I'M adding layers towards the in the back yeah? So i'm layering the underneath below the horseshoe and what traditionally people would consider kind of a concave or an inverted angle. And this will give me a nice lean silhouette and allow the curl to really express itself. Then we're going to come around and we're going to do a customized face frame and then we're going to come over the top and layer again. So here you can really see. I can see the guide. I'Ve got great tension, i allow my hand to slide away, and i work out to that length very deliberately. It'S it's tricky to get this angle, i want to be honest with you. You have, to you know, have practice razor cutting to really be able to kind of tweak the blade around enough to maintain this angle, you want to come up elevate up and away from the head, find your guide, good tension. I feel like my tension's slipping a little bit in here, so i might have to break this in two i'll work out to here and then i'll stop and i'll redo it, because i'm getting down deep inside the finger there. I want to make sure the tension's very consistent. Now again, i don't believe and i've i can't say i'd, never believe, because i was definitely trained. I started off of it also soon and it was wonderful training still. I think some of the best training in the world, but we were taught a lot of things not to do, never use a razor um and i could go on and on to the things i was taught not to do um and the way that i was Able to practice those when i left sassoon, because i wanted to change, i wanted to do things differently - was with great mannequins like this and that's what i'm encouraging you to try if there's ever anything that you're, afraid of or you were told not to do, but Maybe you're not even sure, why not to do it. You haven't seen it for yourself. You know that's dogma, that's not knowledge! That'S not practice. Just someone telling you don't do something and you're, maybe not even sure why you shouldn't do it, but you don't do it. That'S never going to be a great thing for you, so get a great mannequin. Try it see if you can make it your own. You know for me. I figured out yeah. There are ways that i don't particularly like to use the razor on curly or highly textured hair. I don't use it flat. I don't use it very much on the bias, but i will use it on the edge and i find get very great results and you have to make sure that your blade is nice and sharp great point cal. You know number one reason why people do bad razor cuts. Is they have bad blades blades aren't sharp okay re-dampening that hair i'm gon na now just switch around, because you know with the type of layering that i did. It'S all internal and everything towards the bottom. Can start to get heavy so i'm going to use another very simple, razor technique that will keep all the length in the bottom but remove some of the weight just in kind of channels or bars. I call it slicing, but literally it's going to be about removing bars of weight and doing it in a very invisible way. So i want to make sure that hair is detangled, see it's been sitting here a little while. So this was the process a little bit of curls and wave serum the tangle tamer from our friends at denman and we'll use some other denman brushes when we prepare the hair for styling. So we're going to kind of do a little bit of a wash and go here with the styling. But now, if i leave this, as is we're going to kind of have a little bit of a dead zone um where the hair will just be kind of puffy and the layers will sit on top of it and it won't really work as well as i Would like it to look how nicely that's detangled, so i come down now and i want to look. I want to think of where the layers are going to fall and where they're going to taper out to and then from that point down and i'm not going to go all the way to the ends, because it could make the ends too thin. I'M going to put in a few little channels of layer that, where those layers fall on top what's beneath them won't be so so bulky look through the hair. Look for thick areas and kind of really just get that separation now again very much working with the edge of the blade. So that means the blade is t to my finger. So it's not scraping the cuticle at all. Okay feel this see if it's tangly, it's not still in good shape, still relatively damp again go in like a key in a lock. I can see some of the layers falling over right there from the section on the top. So that's great, i can see right where i want to kind of etch my way out. You know now i'm a firm believer, and if you want this, this is my 30th year as a hairdresser, and you know i'm always trying to evolve, and i never want to do things the same way just because i'll get bored i always want to wake up And be excited to try new things um so again, if this is something you haven't done, if you're afraid, if you believe it's wrong, maybe even if you've had bad results before get the mannequin practice see if you can figure it out for yourself, i'm telling you Honestly, i've got plenty of curl clients and over my 30 years, i've worked with tons of curl and highly textured hair in different ways, and i definitely have to say that you can get great results with the razor if you really understand and put yourself to it. Okay, now we've got the layers falling over. These are the layers that we just cut up with elevation, and we just want to make sure now that we don't have so much of that thickness in the bottom, which we don't coming through coming through and now exactly where the layers fall over. I can just very gently nothing too heavy, very gently blend that into the outline that was dropping away. Okay. Before i move on to the rest of the haircut, i'm going to apply the styling product because we're working kind of a wash and go, and this is kind of the biggest area um if you're not familiar with this concept of styling check out on hb, live Dot me: we've got a whole series um that we did with dyson styling all different types of textures of hair and of course we worked with the incredible tequila riley on highly textured hair and she taught us the wash and go, which is something i've used. So much so taking this hair, making sure that you've earned your way to the roots and it's very very easy to work with now. For this i love this. I can't live without it now. This is my mazani foam, wrap i'm using it on highly textured hair for wash and goes getting this in the hair really saturating it now. The reason i'm doing this because i'm going to move on to the other parts of the hair, cutting it's a great opportunity for this to start to style itself and dry. This is the denman paddle brush. Look at this. If you haven't seen this, it's like the denman brush, but a giant version and then really getting that hair, that product distributed into the hair. I'Ll be honest, you can almost not use too much of this stuff. I have piled it on hair, like you wouldn't believe, to get incredible finishes. Um, so don't be afraid if you're gon na try it i'm gon na come over here. I'Ll do two panels on this side, so very, very simple, but very effective. Get some of the foam wrap right on the hair, really work it through with your fingers. Really working it in tripods are important too. So again, someone who's out there. You know almost every weekend teaching. I often have students that have bad tripods and it makes it very very difficult to learn. So, of course, you know pivot point. Besides making incredible mannequins, they make the best tripods in the world, and this is the units called the universal tripod, virtually indestructible. If you take good care of it, um last can last 20 i've had some of the tripods i've had over 20 years, but if that tripod is kind of rinky dinky, it makes it very difficult to practice all this stuff is available at the pivot point shop. Just go to pivot point hair, pivot, point education, google, any of those and you'll find it pivot point shop. Okay, so you can see right away the effect that we're getting here lean but expanded, beautiful, defined curl. Let'S come into this side so again deliberately kind of styling as i'm going um. So you know for me a lot of times: hair cutting is kind of something happens, wet and then it evolves as the hair dries i like to get in a foundation. I believe we can work. You know very technically, very clean, great tension when hair is damp and wet, and then we can start to really refine that to customize it. I also believe you can truly see what my hair is doing. I know that that sounds contrary, but i think when the hair is wet or damp is when it does what it does most rushing natural loving this i hadn't seen one of these before until i got this care package from my friends at denman, and i love It you see really separates, gets the product through consistently and really kind of sets that curl up for the wind. Look at that beautiful, curl! Okay! So i'm going to leave that in, i might add some more product later as we go. Let'S come around the face. Now i'm going to gently clip this back just so. I can stay neat i'll clip it at the root a little bit. Then we need to decide what we want to see happen here. Obviously we can. We can go to a certain degree just because it's in front of the ear, this can be kind of disconnected from the shape. I mean you could even cut this all the way to here, which may be a little bit extreme, but it could still work. I just want you to understand. As long as you don't go back behind the ear you want to stay in front of the ear. You can do lots of stuff with this area. Sometimes we used to call it the drop because it kind of especially with long hair it like drops out of the rest of the cut, just want to take a minute and say hello to our audience. We'Ve got fantastic people tuning in from all over canada, iowa everywhere people douglas mccoy, saying hello, steven steilin good. We got some great people, hopefully they understand the concept. I know a lot of people have a fear or a dogma or believe it's wrong to cut curly hair with the razor um. I'Ve heard it for many many years um. What i'm encouraging you to do is try for yourself right, because knowledge destroys fears. My good buddy, dj, muldoon, says and fear comes from not knowing something being unfamiliar with it. Make up your mind for yourself get you know, get a mannequin get the janet, try everything you want with curly hair cutting, because you've got a long, mannequin now and see what works style it and see what you like see. What works? Okay, i'm going to work! Mostly just using slicing around the face, you know she kind of already has a length i want to work with, because maybe i can save it for future. Looks where i go shorter, so i want to show you how effective just slicing can be so great tension. Coming from the bridge of the nose working to below the lip and turn my way in now come from the tip of the nose working to below the chin and turn my way in now come from the chin and turn my it's like a little bit of A j motion to create a shape using just this slicing technique. Now i don't need to go all the way to the existing length to make this work, but i want to work longer and longer, just so: there's a nice relationship so when you're ready to drop the length, you just turn turn your razor. You just curve a little tiny bit like a j motion now on the second side, i'll break it up a little bit so that i can come back from the underneath again from the bridge of the nose to below the lip and curve in i'll. Take the pieces one at a time tip of the nose to the chin and curve in try to use facial cues from either side below the lip to below the chin. Do you have any um any aha moments, or some tips when, when you're working on curly hair and they have different curl patterns at the hairline and from left and from to the right how to keep things even or yeah i mean i, i would say first To do a good analysis to try to think okay, this looks springier. This looks looser, so try to make your formulation before you even get into the hair and then keep your eyes open, because you have to see how it responds. I mean think about color. We think okay, this is my formulation, but if it doesn't respond, we kind of change our formulation and really it's the same thing with hair cutting. There'S no simple catch-all trick: that's going to make it all kind of work out perfectly all the time. But yes, you want to go in and analyze first, you know you could say well, then let me just cut the whole thing with no tension dry, that's kind of one of the formulas that people come up with they say. Then i can see exactly what it's doing all the time and great that works, and i do that all the time, but sometimes i don't wan na i wan na do things different. So i think about you know. Maybe this side needs to be technically cut. A little longer, if i'm going to cut with tension, maybe the other side needs to be cut a little shorter. It'S really up to you to make it work it's going in and doing a little bit more just weight removal through here coming back in getting any extra length off here, letting that start to lift up is that attached. Let'S get it! If we see any little pieces that are zigging and we want them to zag, let's take these clips out and see how this relates little kind of botticelli-esque type thing. Where you see, because of the way the sides were layered, it starts to relate in as a face frame, so it didn't have to connect. You could have if you wanted this area to be heavier, but very rarely, especially if we're going for any type of volume or kind of fun shape. Do we want a lot of heaviness next to the face? I know i usually don't unless we're doing like something kind of a line. Okay last panel in the haircut i'm gon na put a little more product in this front. I put a little bit in, but i'm gon na get a little more in we're styling as we go, i'm using the mazani foam wrap, which is just amazing. I mean mizani again, if you're not familiar with it, it's a line made for highly textured hair, styling relaxing and it's made a huge difference for me. I think they're great products in all lines, i'm using some gold well curl and wave serum, which is working phenomenal as a prep and as a great kind of blade glide. But i haven't really found anything lately that i enjoy working as much as for finishing as the the foam wrap and now using the tangle. Teaser really get that in there tangle tamer and coming back to get the finishing texture using the denman paddle brush, letting that hair expand out a little bit one last channel in the haircut, i hope everyone's having a busy busy holiday season. I know you know feels like just a minute ago, but you know last year. Obviously we went through a wild time and hopefully it doesn't happen again. Um. I think you know most of the people i've talked to said their businesses are back on track. I hope yours are as well and i hope uh we're able to make the most out of this holiday season and you know, stay safe and make lots of money. Okay, so coming into that top portion, i've got a short area in the front and i want to work with that. So i want to again layer this from short to long so come in here, i'm going to comb this straight up to the ceiling and i'm going to think about where this falls and think about the shrinkage too. So right now it's falling about this much longer, which is a good inch and a half, and then, when i bring it up here i mean the safest way to do. This is just take a little bit of time if you're, unsure so i'll, come through and i'll just nip it a little and see how it reacts. Taking off like a fingers thickness, let's see what happens, see how much it jumps up. You can see it. I mean you know even that little bit, i don't necessarily want these curls longer than the frame, so i feel safe to take a little bit more off. You know what, if you're, really unsure get out your diffuser and dry, especially if you're working on a mannequin. You know, as you get experience you can start to to know how much hair is going to shrink um, but if you're unsure janet is here, for you pull out your diffuser and see what she does there now it feels like it kind of matches right in To the layers and the framing around the face, looking right through now, some of this is going to fall over the shape in the back. So i want to make sure i work all the way through and then we'll have to look at that to see, because i don't also don't want it might be a little bit of like a solid curl falling over at first. But we'll come back and use our favorite technique of slicing. Now, let me make sure, as i was working through that one i started to feel a little bit of tangling towards the ends. So let's get out the tangle tamer here and make sure that's easy to work with beautiful nice again i'll, probably just take one section on either side of this and over direct them slightly towards the middle. So let me turn towards you guys. Let'S see i've got all this hair coming into the center face frames. Dropping out layers around the underneath are dropping out good tension. Look for your guide! Let your hands slide, a nice rhythm with your stroke, nice rhythm. It takes a little practice to get that consistency of stroke let that drop over now. I don't want to come to the other side and raise her this way. I'M not going to say it's wrong, but for me i find it more dangerous. So that's something i do less i'd rather tilt the head towards me, get my over direction in my combing just right and do exactly what i've been doing, find my guideline and turn the blade and work my way up into the hair. Okay, great just where we want to be at this point now again, because the last long piece here is going to fall over the layers from the back. So we want to come into it and use a little bit of slicing. So it's not just the dead zone again of thick hair. So this right here, i'm going to put a little bit of slicing in here. So it means i'm going to come inside the hair and etch into it, with the blade vertically working with uh. You know any kind of razor uh will work. I prefer the feather plie, which is the razor i'm using here, excited to say for 2022, where there's going to be a hairbrained edition, we're working with feather to do a drop together. So at the right term. Yes, yeah: i want to be like the supreme of the tool business so we're working with feather and we're going to do our own harebrained feather plie, often imitated, never duplicated, matthew uh, mr scribbles is watching from croatia wow they're. All here today says hello, hey buddy! Merry christmas to all our friends in croatia, we've got a lot of great hairdressing friends. There matthew's a transplant from new jersey, but he's been out there for a while married with a family hope he's doing very, very well. Okay, another application of the mizani foam wrap and then we'll do some diffusing and we'll take a look dry. So again, really you know technically what you'd say is: there's you know kind of a collapse shape. We made the hair squarer by taking the weight away internally. Even this way, you know the term most people would use a square, we didn't really kind of round the hair. I know that can be confusing and it's never should be used with clients, because it means nothing to them, but usually when the layers are, you know shorter on the inside longer on the edges, um you're, giving that hair more of a lean or sometimes square. Look totally confusing, it means really very little it's not right or wrong, but it's just you know, i'd probably say because we use the word square so much for so many things in hairdressing. I'D rather be more descriptive and say lean, but lean doesn't mean no volume. I'M super important there so through these lengths and ends, i'm going to get even a bit more of the phone wrap in come back with my denman paddle brush. If you guys haven't seen this it's kind of amazing, i really make sure i've got that distributed. Well. All the way through to the ends, you know that might be one of the areas that will need some shaping up when it's dry. If some of the ends the older hair um, looks like it needs it, you know, as i mentioned what i found with this foam wrap. Is you really almost can't put too much? I don't believe you can put too much of it in the hair, especially when you're trying to get a nice polished result so sometimes i'll, just plop it into an area that looks like it needs that refinement. Just look at how that works. You know i'd, say: product and tools have changed a lot of what we can do with hair. You know and you're not worried about this phone like at the root or anything like that and weighing it down or no quite the opposite. This foam gives volume. I mean well first of all this hair, even if i dry, the texture, very small, all i have to do is have her flip, her head upside down and we're going to get a ton of volume with this haircut and and janet's hair texture. So no i'm not worried about anything laying down. So this is one of the tools i also think has made a huge difference: um, the dyson supersonic and especially the dyson diffuser, because you can see it really doesn't disturb the hair at all. We always say when you're diffusing, you just want to kind of get the heat going without blowing the hair or disturbing it, especially when you're really first starting as you start to dry it. You can maybe release it a little bit, but this is probably without a doubt, the best diffuser i've ever worked with for this type of drawing. Now you could also just let the hair air dry if you had the luxury or you can put it under lamps or heat lights, which i also very much like, or even you know, bundle it up in a hair net and put it under a traditional dryer. So many things that you can do here, but at this stage i'm not worried at all about expanding the shape, it'll expand very very naturally, it's really baking it in again. I want to give a lot of gratitude to all those who supported hair brains um all the years, but especially this this year and last year, pivot point really came through for us. We were doing so much education, so many of these lives. I'Ve got a garage full of literally dozens of mannequins provided by pivot point to help share education and support um. Hopefully we not end up back in that kind of situation. I don't believe that we will um dyson another brand. That really has worked with us to support. If you head over to hblive.me, which is our online academy, we've got a series of 13 styling videos, lessons, uh, incredible tequila, riley, anko, tron, myself, matthew collins across a wide variety of hair, textures, hair lines and shapes. That'S completely complementary um. I learned so much from working with those guys, and i know you will as well so again feeling now a little more comfortable, touching the hair and even beginning to use the basket and loosening up the holes. But i never pulled my fingers through the hair lifting from the root and expanded. Then all this cut with a razor. If we can see the detail on the curl, it's not the razor, it's how you use it and who's using it. You know just like anything, it's like saying you know, curly hair should never be blown, it's not it's, not true. Don'T let it limit you practice, get your techniques down, get your tools down and it'll make a huge difference for you, lots of great ways to do things, and you should try to learn them all great way to do. That is to practice practice practice practice. I know i do i've got a garage full of mannequins to show you drying pretty quickly, which is great, i didn't feel the need. You know i i'm working um very with the edge of the blade, so it i didn't really thin the ends a lot at all. So if you, you know, if you start working with the flat or with the bias blade, more you'll you'll make the ends a bit thinner, and you have to be careful that they don't get too thin with the kind of cutting i did here. The ends are not it's kind of a much more chunky cut. Using this wide tooth, denman brush, really kind of cool little effect just to lift the root get in there get some air go airflow going now. Denmany uh really makes a wide variety of holes. I'Ve used three different ones, just right here on this curl, i know everyone thinks denman brush is one thing, but literally dozens and dozens of different brushes. I like that, the way it just kind of loosened up the root i'm going to take off the diffuser now and just get some cold air through the hair, great digital control right here we're going to lower it down we'll lower that down. I'M going to hit the cold button, i'm just going to push that hair around a little bit like i said i wouldn't you know, i'm not worried about volume. Here volume is going to be really easy to create just getting some air in there. Why did you choose to cool down the air during this part? You know number one, it kind of sets it sets. The curl sets the texture in just like an old roller set. You have that little cool down period, um and it will be. You know, since i'm kind of pushing the air around without diffuser, i find the cool air will activate a little bit less. You know frizz and flyways. Okay, a little bit of finishing just using as kelly mentioned. I didn't use the scissors much when the hair was wet, but now that it's dry, i can just prune around the edges. Again, i wouldn't overdo it. We were very deliberate with the haircut, but if we find any little pieces that don't feel completely where we want them to be, there may be zigging and we want them to zag love the romantic shape here very botticelli. I just want to check in with our audience here. Sid is saying that it looks great. Thank you sid, for all your always support. Uh junior from hawaii is killing it, as always claire um. Did you perm? No? No. This is the janet mannequin. It comes like this from pivot point, um again a great resource. I know many of us haven't seen great curly, haired mannequins, but head to pivot points website um. Just you look for pivot point janet. They actually have a whole selection. Now, there's probably about six or seven different textured mannequins different tightnesses they've even got one. That'S got like different quadrants with different curl patterns in the quadrant, so such a great learning tool. Oh awesome, my friends of pivot point just dropped the link where you can pick up here. Janet thanks pivot point. Thank you guys and thank you for the support. You know it's true honor, any educator, that's you know been doing this for a minute. You know knows how important pivot point has been to our industry. I mean literally millions of hairdressers. Um have learned how to be a hairdresser using pivot point tools going to a pivot point school, so you know for us at harebrained um. You know our focus has always been on education. To have great partners like pivot point makes it's just an honor and we celebrate that all the time. So, thank you guys. So again you can see here very, very simple. Three three sections: one band around the face: a horseshoe on the top starting off using the razor. I know it's curly hair. Do we raise her curly hair? You tell me if you think that that was bad for the curl. You know if you try it for yourself. I really encourage you and if you at the end, think oh i don't like it, then that's fine but make the decision for yourself starting here, working short to long. Following that, all the way around the head on the underneath, with no over direction, face frame done very freehand and then short to long layers dropping over the whole thing through here now we can start to play with this hair. Now again, if it was my client, i would ask her to shake her head, which i can do very easily by just lifting the mannequin and really shaking i'd, have to flip upside down and shake. And this is when things the magic will really start to happen. For me, we can start to really get our hands in there. It'S all how we touch it and how we play with it. Lifting the root again very happy with this romantic finish. I hope you guys enjoyed it happy holidays, merry christmas to those who celebrate christmas and happy new year to all
Comments
Ana Celi: Gracias
Nas Solo: Merry Xmas