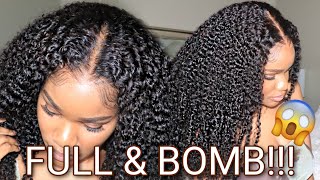
Protective Hairstyle Diy || Selfmade Wig || Black Hair
- Posted on 17 December, 2013
- Long Hair
- By Anonymous
Hallo iedereen. In deze tutorial laat ik stapsgewijs zien hoe je zelf een eigen pruik kunt maken. Pruiken dienen als een protective style voor o.a het kroeshaar.
Bekijk de video en vergeet niet te liken en te abonneren! :) Wil je nog meer van onze haartutorials zien, kijk dan op ons youtubekanaal en onze website http://www.womansglory.nl
FACEBOOK: http://facebook.com/womansglory/
INSTAGRAM: http://instagram.com/womansglory1
FACEBOOK group: http://facebook.com/groups/kroeshaar
Let’s Connect! Wij zijn gevestigd in Tilburg. Heb je vragen, ideeën of wil je graag met ons samenwerken? Neem dan gerust contact met ons op via http://www.womansglory.nl Wij staan graag in contact met andere vrouwen.
Onze diensten: Weave, crochet, braids, twists en handgemaakte wigs, kortom alle kapsels waar wij over bloggen kun je door ons laten verzorgen.
Bekijk ook deze filmpjes:
http://www.youtube.com/watch?v=mXtLdab...
http://www.youtube.com/watch?v=ACxK6wJ...
http://www.youtube.com/watch?v=BfFHw2B...
https://www.youtube.com/watch?v=sAqDXd...
--
This tutorial shows you how you can make your own wig. You can use a wig as a protective hairstyle. Also check out these movies:
http://www.youtube.com/watch?v=mXtLdab...
http://www.youtube.com/watch?v=ACxK6wJ...
http://www.youtube.com/watch?v=BfFHw2B...
https://www.youtube.com/watch?v=sAqDXd...
Don't forget to like and to subscribe!
What we're going to start with today., Because we're going to make a wig with glue make sure you always cover the head with plastic. Plastic cap plastic bag... Anything to protect the head against the glue that we're going to use to glue for the wig. Place. The wig cap on the head., Precisely on the hairline. And now we're going to start with the gluing. [ Gluing ], We're going to add glue on the weave tracks. On the inner part of a weave track. The'Wrong' side. Make sure you always glue on this part of the weave tracks.. This is the outer part of the track. The'Good'. side. We're not going to put glue on that side.. The glue we're going to use.. Is this one, which is made out of rubber. [ Gluing on ], Before making the wig draw a dot on the area where you want the parting to be.. Now we're going to start gluing on the weave tracks., I'm going to start from the bottom. I'll glue on the tracks in half circles.. Here is the first weave track Glue it on precisely on the edge. Press on it firmly for it to stick Right up on to the other side.. The benifit of gluing is that you can decide for yourself where you place a track.. If you want it full, you can put the tracks closer together.. If you want a flatter effect, you can leave more spaces in between the rows.. The track ends up all the way in the front., But is doesn't matter.. You can start it right here and end right there. As long as you know how you want it to look. With gluing it doen't matter. Where you put your next track.. Now, i'm going to work my way up till the middle.. This is my second track.. I'M pressing on it for it to stick, I'm ending it exactly on the edge of the wig cap.. Here I have another track., I'm going to measure because now I'm going to work my way up, like this. [, The top ], The leftover of the wig cap, we're just going to glue over it. [ Closure, ] I've glued it all the way up in a Circle. Here is my dot. Here is where the parting is going to be made.. Now i'm going to glue further. I've glued one already., And here comes the next one, I'm going to cut it down to the size and glue it on further. Close to each other. Till I have a small space left like this.. That'S where we're going to make the parting., Sometimes a little glue might get on the hair.. I use Super hair bonding remover lotion to remove it. Just put a bit on the hair and let it absorb. And when the remover has been absorbed. You can just pull the glue out of the hair.. Now, I'm going to show you how I seal off the wig. Just take a small piece, put glue on the `` wrong'' side of the weave again and roll it up. And let it dry up for a moment.. This is what you get.. When the knot is dried up, open up the hair., You spread the hair in every direction in such a way that there's a a middle point from which they start.. If it isn't flat enough, you can use a flat or curling iron to make it flat.. This is what you use to seal off the wig. In English. It'S called closure., And this is what you get.. What I'm going to do now is take small pieces and glue it like this. On the weave cap., I used a tiny bit of glue not to much. Press it on like this, Don't use too much glue. Otherwise, you'll see the grey colour of the glue on the cap, which will be visible in the parting.. Now work, your way, up. [ The results, ] Thanks for watching. For more tutorials pictures and blogs check out. Do you have any questions, ideas remarks, or would you like to get your hair done by us?


Comments
Nicky Egberink: Top video