Diy Nurse Scrub Cap For Long & Short Hair | The Best Surgical Scrub Cap With Free Sewing Pattern.
- Posted on 05 May, 2020
- Long Hair
- By Anonymous
**The VERY BEST TUTORIAL: DIY Surgical Scrub Hat*
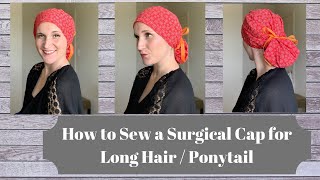
Step by Step and SUPER EASY TO FOLLOW SEWING TUTORIAL: how to sew a reversible surgical scrub cup with long string to tide a pony tail or around the head. Very confortable Scrub cap. #scrubhat #surgicalhat #diysurgicalcap
NOTE: If you are using my patterns to make a blog or tutorial I ask you to please give me CREDIT. I work really hard on designing my own patterns to make my own video tutorials. I appreciate your understanding.
FREE PATTERN HERE @ www.daisymultifacetica.com/freebies
MATERIALS NEEDED to sew your own surgical cap
Fabric needed:
2] Fat quarters [22 by 18"]
1] 20 by 5"
4] 22 by 3"
1] 6" elastic
FREE PRINTABLE PATTERN DOWNLOAD:
www.daisymultifacetica.com Menu: Freebies
Fabric: https://shrsl.com/2ampx
SEWING MACHINE: Amazon https://amzn.to/3fk2uEA
Sewing Machine Plus https://shrsl.com/28mhu
SERGER MACHINE: Amazon
Sewing Machine Plus
Sewing thread: https://amzn.to/2SgH16n
Fabric scissors: https://amzn.to/2Kye3uo https://amzn.to/2VH9pAO
Pins: https://amzn.to/2YvSz9V
Clips: https://amzn.to/3bRifRP and
MINI IRON I USE: https://amzn.to/31YWoWM
MINI IRON OPTION 1: https://amzn.to/2WesnyE
MINI IRON OPTION 2: https://amzn.to/3dTtTws
MINI IRON OPTION 3: https://amzn.to/3c9M1BA
MINI IRON OPTION 4: https://amzn.to/2LfCWv3
Iron Pad: https://shrsl.com/28x90
Hi everybody welcome back. This is Daisy in today's tutorial. I'M going to show you how to sew a beautiful and comfortable scrub. Perfect too much with your reusable face mask this tutorial is being requested by many of you. I hope you enjoy it, and these are the materials that we are going to need for this project. You can use any fabric of your choice. In my case, I am using 100 % cotton we're going to need to cut quarters or two pieces of 22 by 8 8 inches one piece of fabric of 20 by 5 inches four pieces of 22 by 3 inches and one 6 inches long elastic. Also we're going to need a sewing machine, sewing thread, pins scissors, a fabric pen or a chalk, a tape ruler and an item. And, let's don't forget the pattern I'm going to leave you the link with a free pattern in the video description or in the comments below? Also, you can find it on my Facebook page we're going to start cutting the fat waters. We'Re going to fold them in four and we're going to put them together, place the pattern on the folded fabric and secure it with pins or clips. Since the pattern didn't fit on a letter size paper, I cannot add the Similan, so please add half an inch of seam allowance around it and cut it. Let'S put the two pieces of fabric together with the design facing out we're going to use the pattern again. Let'S fold on the first line from the bottom place: the curved area on the bottom of the fabric and, let's mark on both sides, then Fonda and iron. It now, let's grab one of the pieces of fabric that measures 22 by 3 inches we're going to fold it in two and iron. It then we're going to place it on one layer of this fabric, starting from the center we're going to secure it with pins and saw it and then we're going to repeat the same process with the other layer. You now we're going to repeat the same process with the other layer to align it. I always like to start from the center med soil you I don it on both thighs and turn it inside out we're going to top stitch this area, but before secure it with pings all around. This is the area where the elastic going to go. Don'T worry if it doesn't look flat. I run it before inserting the elastic. I use a cloth paint. So it's easy for me to insert the elastic you secure both ends with pings, and so it we already finished placing the elastic that is going to go in the bottom on the top we're going to fold some plates. But before let's prepare the other pieces of fabric that we're going to be sewing next, this is the other piece of fabric that measures 22 by 3 is the same color as the one that we use for the elastic. So this one is the one that we're going to use for the top. So let's fold the in half I'd on it and then make two false to the center and I donate again and we're going to do the same with the other two pieces of fabric. That measure 22 by 3 inches you, let's set aside and we're going to prepare the other piece of fabric, the one that is going to go at the front of the hut. That is the piece that measured 20 by 5 inches we're going to fold it in half and then fold again we're going to mark two inches and a half on the folded part and, on the end, we're going to mark one inch and a half. I like to draw a straight line between those two points and then cut it remember not to cut on the folded part turn it inside out and I on the ends. Now, I'm going to show the two strings that are going to go in the back of the Hat. Now, let's insert these strings on the bigger piece of fabric, secure it with pins, and so it place a very close to the folder area. Now turn it inside out and ironic you set aside and we're going to start with the pleats I like to start in the center. You can make your plate at any direction if you wish, but remember it has to measure nine inches on each side. When you are ready finish with the pleats 9 inches from the center to where the elastic starts, I mark the pleats on my pattern. If you would like to follow those, I make 10 plates in total 5 on each side to face in the center and the rest facing out. My plates are 2 inches, each leaving 2 inches between them. Let'S saw this area leaving 1/4 of an inch seam allowance. You now we're going to place the other long piece of fabric and secure it with pings ID on it in the middle and align it on the front of the Hat and secure it with pins, starting from the center. Now we can just saw it like that and if your sewing machine have a six up option, you can seek Saget or if you have a serger, you may search it, but I like to place a folded piece of fabric to cover the stage. Also, if the Hat is too big, we can fold that area and still look beautiful. Now, I'm going to place the other piece of fabric that I already folded and secure it with pins sew, a straight line, leaving half of an inch seam allowance, also fold. Half of an inch on each end and it's already stunned, my camera turned off while I was so in this part. So I'm sorry, but here we have it, it looks beautiful. You can wear either way you can wear it like this or you can unfold. The bigger part also, this hat, is reversible, and if you would like to sew this hot, don't forget I'm going to leave you the link with the free pattern. In my video description also, you can find it on my Facebook page. I hope you enjoyed this tutorial and don't forget to subscribe to my channel and, like my video also I invite you to visit me on my Facebook, page or Instagram. Thank you for your visit and I'll see you in my next tutorial.
Comments
Val Pardy: Thank you Daisy for your wonderful patterns and careful step-by-step tutorials. With your inspiration I have been able to make masks for the whole family and a beautiful scrub cap for my daughter. Thanks again for sharing your talent.
Diana Hernandez: Thank you so much for sharing this! I’m a beginner and I didn’t do it quite right and it still turned out great! I got a lot of compliments at work, in the surgical dept.
Sandy Lerew: Hello, would love the pattern for this scrub cap. Thanks for the detailed video. Great instructions!
BarBees Apiary_Homestead: LOVE this scrub cap! Your instructions are easy to follow ... THANK YOU FOR SHARING!
Irai Rod: Daisy, I follow you in English and Spanish and have made over 100 masks and a few of these caps. Thank you so very much for sharing these patterns for free! In the spirit of helping you grow a larger audience, I'd like to point out that the pin you call "cloth pin" is more commonly known as "safety pin" or--a little less frequently now--a "diaper pin". A clothespin is (generally) the one used to hang clothes on a line to dry. I know it's totally clear what you mean when you're showing the process...but I've found that a lot of English speakers have very little tolerance for language variance, so if you use the word they're most familiar with, they feel a lot more secure in their comprehension and more likely to think, "I can follow these instructions, everything is perfectly easy to understand, I don't have to stop and think much!" A bit silly, I know, but many get thrown off by small things like that, especially if they don't have experience learning and speaking more than one language and are uncomfortable with "approximate" meanings. I hope you take this suggestion in the kind spirit I offer it. I look forward to improving my sewing skills by making more of the projects you share with us! <3 <3 <3 <3 <3 <3
Choeying “BeautifulLifeChoeying”: I just made two of these Scrub caps. It turned out great. Thank you for making this video.
Grace: I used another pattern I had, but used your sewing method to line it, add allowance for elastic , and add the tie pulls. The finished project is more professional looking now. Thank you!
Amanda Lee Beauty: I love your videos very informative! Thank you for sharing your patterns ❤️
Sandra Smith: Your instructions are so clear love it thank you
elphiascutie3: Beautiful work!
phaedra ellingson: Thank you for the pattern. I really like this. I have two grand daughters who are nurses. They will love these..
Anita Leroy: Thanks for all the work done; covering your hair even in public places, transportation, is a must, cross contamination by hair, and more among women, is an underestimated hazard in such a pandemic
mala hand: Hey Daisy I love your videos. Very easy to follow even for me - I don't sew a lot. I do mostly embroidery work to existing products. I love the fabric here but I can't find it. Do you know the name of the line?? thanks !
Re'n Goddess: I made your masks and scrub caps everyone loves them! Thanks so much!
SK P: Hello Daisy..I made a mask refering one of ur videos and gifted it to my husband on his birthday a few days back. My entire family liked it a lot. Thankyou very much
GLORIA S BORZIE: Very simple and cute
Sebastian B: Thank you. For this and the mask patterns and videos. They are great.
Faigee Sash: Thanks for sharing! I can't wait to start my project You make it look so easy. I would also love to buy that iorn. Amazon does not have it in stock at the moment. Would you happen to know another place that would carry it.
A. Luna: Great tutorial,thank you.
Karen Nadeau: Hi - where can i download the pattern? Thanks for the tutorial
Ligia Gammariello: My lindo el tutorial y muy professional me encanto tratare de hacerlo este fin de semana ❤️it
Marie Nehy: It’s a work of art!
Heidi Harbuck: I'm getting ready to make one of these... but couldn't you just make it single layer and serve the same purpose?? I love the pattern and am looking forward to having one for clinic next week
Ines Reilly: Hi, how do I get the pattern for your masks? Gracias
Carmen Barrios: Muy bueno y muy clara la explicación. Necesito molde de adutos y de niños
Sonia Santana: Tiene el patron de esa mascarilla? se ve muy bonita
Linda Gonzalez: Que bonita se ve esa gorra a combinacion con la mascarilla! Me encanto!! ❤
Midnyt Omen: I love your mini iron. Where did you buy it
maria tovar: Muy bonita
Danai Nyamatore: Thanks very much Where do you get your fabric from
Nida Gonzales: where is the pattern?, you are really good. AWESOME...Thank you
Niti Kalyan: Thanku mam it's so beautiful ♥️♥️♥️♥️♥️♥️
kimberly seegars: Great video... Can you do a tutorial with a headband w/ face mask w/ buttons with the pattern. Thanks!!
Adrianna Carnes: Hi, trying to download your scrub cap pattern and it isn't uploading all the pages for the pattern to print out. Can you help me?
Encar Bondoc: Could you please make the measurements each piece .I can not download the pattern n print coz I have only iPhone . I really appreciate it.Thanks
Meaghan Larsen: Where did you find the striped floral fabric? Pretty
Gina Gee: Really love the pattern but your website is not showing any options to view or download the pattern under freebies.
Catherine Gonzalez: Thanks! Estaré pendiente a la versión Español!
Susan Lipscomb: Nice..Im gonna try it but I’ll cut the strip on the bias to make it easier..thx
Evelyn Vanegas: I love it, but the pattern is not on your page ☹️
Mary Flores: Wooooow i love it.
liliana aramayo mark: Español por favor me gusto de Bolivia Santa cruz muy buena la enseñanza español por favor
onwuzuruike genevieve Maureen: Thanks very much Am in love with ur Pressing Iron
LeAnn Angel: He Daisy, does the strips have to be cut on bias?
Lets.Get.Crafty: It looks very nice, but with 2 layers do you think it gets hot wearing the cap? I just want to be practical since I will be wearing all day while working.would it work with just one layer of fabric?
Ana Ruvalcaba: Que Benito grasias.
D & P Steel:
Gottalovety810: What scale should I print the pattern?
Kawaii devil: Could I just buy the one you made?
Hilary Sutherland: Do you have a hat that requires less fabric? It’s so hard to get and expensive
Trina D: If I made this with one layer of one piece of fat quarter fabric would the cap still be effective? Making for nurses in my family but fabric is hard to come by.
Olga Pérez: Muy bello modelo. Pero la explicacio'n deberia ser en español tambien pa las personas que no hablamos el ingle's.
Rolande Pilon: I'm having trouble getting the pattern
Alicia Hall: Can I buy this cap n mask?!
PSALMSOFSONGS: Where is the tutorial for that mask
Christine Blake: The pattern is not on your Facebook sweetheart. Or have you had a chance to upload it yet
Neta Flinn: Where is this pattern
Jackie Kennedy: Thank you for the direct address in another post... Well, I was going to put it here too, but, it would not copy and paste..., sorry.
Melissa Nelson: Is the scrub cap pattern gone? I cannot find it on your website under freebies. Only mask and headband patterns are there. Thanks!
Paula Perez: Lo puedes traducir a español me gusta tu video
Mary Roberts: Please tell me how I can get your pattterns
Maria Sebastian: Pienso k no está dando información correcta por q si está midiendo en pulgadas es demasiado grande,
Sandra Smith: Won’t let me print the pattern?
Doris Muñoz: No pude con este tutorial no dan medidas ni moldes gracias