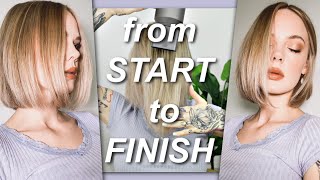
Beach Waves For Layered Hair! (Medium & Long Length) | Beach Waves Hair Tutorial
BEACH WAVES FOR LAYERED HAIR!!
I hope you enjoy this beach waves tutorial! Please don't forget to subscribe :)
INSTAGRAM: @hayleycallen
Curling iron: https://rstyle.me/+WCdWEQE8ntDrhCVs20-...
Texture spray: https://rstyle.me/+-pN528YiLnGb6LR-R7c...
Brush: https://rstyle.me/+FxHqFMPI39_0g80Xef-...
Music by Eric Reprid - Lime - https://thmatc.co/?l=47CB424E
Hey guys, what's up it's haley and in today's video i'm going to be showing you how i curl my hair in order to get kind of like more loose beach waves. So before we get started, make sure you go ahead and subscribe to my channel. I post new videos every single week, so you don't want to miss out so go ahead and subscribe and without further ado, let's go ahead and get started okay. So this is how my hair pretty much parts and looks. Naturally, i did blow dry it a few days ago, but it got wet yesterday and so it's kind of just like frizzy, and i don't even know what it is. So i'm going to show you guys how i call my hair today and what i start out by doing is sectioning my hair into just two sections. So just like a half like this and then i just kind of twist it around and then i just pin it up with a clip awesome. So we have our bottom section right here and i just pull everything to the front and then i'm just gon na make sure it's all brushed out. What i do is, i always start from the back and work my way to the front, and i alternate pieces um facing this way facing more inward. Just to give it like a more natural look, and today i'm going to be using this hot tools, curling iron - and it is one and a half inch. I'M pretty sure this is called like the nano ceramic, but i'll have the exact one linked in the description for you, and so it's already nice and hot. I have it at about 380. I don't have it all the way up and what i'm gon na do is start from the back, taking a section about this big, so pretty generous in size, and i i'm gon na start this one facing away from my face. So i'm just gon na kind of smooth over it to make sure there's no like flyaways and then i'm gon na begin wrapping and i'm only gon na wrap this around once or twice so, maybe like here and then i'm leaving out about an inch to two Inches at the bottom - and i am just going to hold this until my fingers - um - are starting to get hot, so not very long and then, when i'm releasing i'm unraveling and then pulling it down. So you can see right here. It just kind of bends. The hair, it doesn't create like a serious curl um, but that's what i'm wanting so i'm just gon na go ahead and put that piece to the back and then the next one. I do maybe take a smaller section. This time i just kind of vary the size of the sections and i'm gon na curl this one toward my face. So the clamp is going to go on the opposite side, smoothing down, and then we are going towards our face here and doing just the same thing, maybe putting it around once or twice and then leaving that gap at the bottom wait for a couple seconds until It gets hot and the smaller the piece of hair the less time. Obviously, and then we just unravel and pull down, so it just creates this really pretty bend in the hair, like i said before, um, so i'm gon na go ahead and finish this side and once i get to more of the front pieces, i'll show you what I do there never ever meant to be so sour baby running out of steam every day be the same living like this testing. All my patients need a bit of you every time i drink. Okay. So i'm more to the front section here there we go and what i'm gon na do is really make sure. This is smoothed out like the little side pieces where i have like sideburns as i call them, and this one i am going to do away from my face. So i'm just going to take this right here and i'm making sure these are straight up and down, because if it starts to get too like slanted either way, the curl won't look right. So i'm making sure this is straight up and down and doing the same thing, and then i think i want the end curl a little bit more, so i'll just hold it like this for a couple seconds and release. So this is what this side kind of looks like just like super effortless. So i'm gon na go ahead and repeat this side, and then i will show you what i do towards the top okay. So this is what the bottom layer is looking like, nice and messy. So we're going to go ahead and take this one down and go ahead and part it like wherever you normally do. Mine, just kind of stays, parted right here so same deal, i'm just going to be working from the back all the way to the front, and then i actually am going to flip this over. So i can get more right here and i'm just gon na do that for now, so i'm gon na go ahead and start from the back and repeat the same process. I don't okay, so we're done with this little mini section. I actually really like how this is looking notice that when i get to the front, i am doing them all away from my face so like about here. I stop alternating and then the front i just do away from my face. I just think it looks more flattering on me personally, so i'm gon na go ahead and flip this back over and then i'm gon na finish off this section. So what i do for the very very top is a little bit different. I do this for like volume purposes, so what i do is i still curl, mostly i'm curling, mostly away from my face this whole time like for the top and what i'm doing is kind of just flip-flopping, how i'm doing it so, instead of doing it like Downwards, i'm doing it down like this. Does that make sense, so i'm still going the same direction, but i am flipping the curling iron, because this is going to grab the root of my hair and just pull it up. So it makes the top of my hair. Have more volume, if that makes sense, and then i'll just let it go, and this one it just has more volume. I just think it looks better when i do it that way. So that's how i do the entire top part of my head, so you'll see again, i'm just taking this and i'm almost using this as like a booster pulling it up, flipping it again and then still leaving out the same amount. I'M just doing it different ways. So i hope that made sense and obviously you can like see how i'm doing it, but it's just like a little trick that i do for the top feeling nice. What'S the price yeah you're not living twice, life am on my spine, be getting sliced like a lime. Never ever meant to be so sour baby and then for this one. I'M doing it like straight across like this, because these fall the first. So i do these a little more like dramatic, so you see how it gets very swoopy. That'S how i do those and then, if i feel like it's a little too much, i can just go down all right. So that is the first side and i think it turned out really good. So i'm gon na go ahead and do the other one and then i'm gon na show you how i finish everything off all right guys, so that is it for the curling. It'S very voluminous and i really like how this one turned out. I like how it's like wispy at the ends, if that makes sense, so now, i'm just going to finish it off with some dry texture spray, and this one is by davines. I mentioned this in my last: get ready with me. It smells amazing, good stuff and i just get it at my hair salon. So i'm just going to give it a shake, and then what i like to do is hold the hair up and spray, and a little bit of this stuff goes a very long way. If you use too much your hair can kind of get like. I don't know like weird feeling so just spraying a little bit all right guys. So this is the final result. I really like how it turned out again, just nice and beachy kind of wispy messy all that, so i really hope you enjoyed. Thank you guys. So much for watching - and i will see you my next one - bye


Comments
Mekenzie'sLife: Love this!!! The audio sounds a little rough though if that makes sense. There’s some feedback when I’m listening to it. (:
Chrissy Nix: Love!
Luke Roberts: Now you’ve used the claw clip in this video more claw clip in your hair as shown on 1:32.
Chase Bennett: wich salon do you go to
Chloe Keepes: omg is that what i think it is