Creating A Top Piece Or Toupee From A Wig - Doctoredlocks.Com
Supply: doctoredlocks.com, Questions: [email protected]
Millions of people worldwide suffer from hair loss. Learn how to create a realistic diy top piece by dissecting a wig.
Products used:
Wig
Weave Clip
For more tricks, tips and hot deals "Like" us on Facebook!
http://fb.com/DoctoredLocksInc
For hair extension packages and tutorials, visit our website!
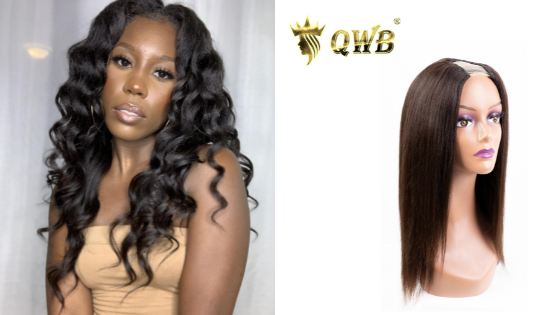
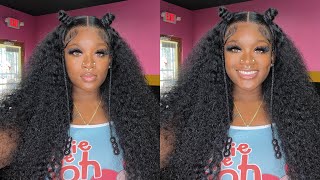
A common problem area for both men and women is a receding hairline or a thinning top. I'M going to show you how to take an average wig and make a piece that's going to cover that entire problem area. The wig that we'll be using for this demonstration can be found online for about fifty dollars. Almost any wig can be used for this. The only thing that you'll want to check is to make sure that your top layer is as long as you're expecting some wigs are going to be very long, but they can be layered so that the layer on the top actually only has a few inches. So, if you're expecting something long make sure that it's actually coming from the top, the first step is to take our wig and flip it inside out, and this is going to show you how it's constructed the wig that we're using for this is a lace front. It has weft construction in the back and then more of a cap style on the top. This is pretty common with the wefts and the cap. Some wigs may or may not have the lace front, but this is the most common type of wig construction. In order to know exactly how large you want to make your piece you're going to measure your head from the place that you want it to start all the way to the back, you can leave on some of these weft. Just cut them cut these tabs right below where the weft is sewn, and that will leave a little bit of extra length in the back for our purposes. We'Re just going to cut on this top part and just leave this and remove all of the wefts. Now for our sides, you can see this wig comes down a little bit and this is going to be a little bit more over the ear area. And since we want to make sure that our sides are open, we're going to go ahead and cut that away. So, where the cap starts to round down we're actually going to cut straight forward, and that's going to be our first step to get this top away from the rest of the body. When we begin our cuts, we're going to start from the lace and move back to where the bottom edge of the cap meets we're going to use our shears and we're going to take the blade and kind of go as close to that cap. You can and that's going to make sure that some of those hairs that otherwise might be cross hairs actually get cut where they're supposed to. If we, if we go too deep into it like this, then if any of the hairs are, are brushed in the wrong direction, then they're going to get big chunks that are actually going to get cut away. We don't want that so we're just going to keep cutting very close to the cap and now we're ready to round that edge. So we've cut away the entire side and we're going to move on to just this back part. Now. The back part is just where these tabs meet in with the top, so the only thing that we're going to cut on this back part is we're just cutting away these tabs, so we're going to cut them fairly close to our cap, making sure all the hair Is out of the way and be careful and take your time on this, you only have to do it right once so it doesn't take too terribly long. Just make sure that you're being detailed, it's better to go, slow and keep all that hair in place. You, okay, just a couple more and we'll be back to our other side and we're just going to cut straight back on that side, and then we will have our top piece removed. So now I'm finding the channel that I cut last time and we want to make sure that we're matching it to exactly where we cut. So I know that this line that I can see where one of the wefts is stitched on the top meets up on the other side. So I'm just going to use that as my guide and again I'm going to move my blades so that they're closest to the cap so that I'm not cutting off any hair that I want to keep and if you're unsure you can kind of feel from the Bottom side just make sure you know where you're going all right and that cuts away our other side. So now that we have our entire top removed, we're just going to pull the underside away and set that to the side. Now that can be used for a whole bunch of other projects, but we're going to focus just on the top piece for now and then we'll do a lot of stuff with that in other videos. So now we have our top, and the first thing to do is we want to just get rid of any of those hairs that were cross hairs that might have been cut off that are just gon na hang in there and we don't want them messing up Our sewing so we're just gon na finger comb all that loose hair out. Okay, all that out of my work area and we're going to take a look at our top piece now. The thing that I'm looking for here is: I want to make sure that any of my cuts are smooth. I like to be really precise and I want to make sure that everything has nice stitching and I didn't cut anything. That'S going to maybe unravel, and I see a jagged line on here on this side from cutting. So I'm just going to smooth that out and it doesn't look like I've cut into anything that wants to unravel. If I had, then I would take a moment here to just put a couple of tacks: stitches in place to make sure that nothing was going to unravel any further and correct any unraveling that had occurred. And I'm also looking at the front piece. And I just wanted to make sure that I don't have any real sharp sharp corners. So that's just more of a personal preference. I just don't want it to look like cut like that. So just doing that. So now all my lines are nice and smooth. This wig already had a comb clip in the front. Now we can either take that out or we can leave it in for our purposes. It'S fine by me that it lives there, so I'm just going to leave it. The next thing is, we want to talk about adding some kind of clip into our piece so that we can easily just snap it in these are weaving clips or toupee clips. They come in many different sizes. This is a small and many different colors silver and I have a light brown and black and nude and all kinds of stuff. So what we're going to do is we're going to take these and we're going to sew them to the underside of our piece. I'M going to use a large size in blonde, and that is only because I want you to be able to see what I'm doing. If I use another color, it's not going to show up as well on camera. The other thing is, if you're, in a pinch, it doesn't really matter what color you use, because it will be underneath, but this is just so that it matches and everything looks nice we're going to. You would want to use something that was somewhat close in color. Now for when so when you go to sew these on, you want to make sure that the comb teeth are pointed up if you sew them on upside-down, like this you're going to have to redo them by cutting the thread and flipping them over. So you want to make sure that you do it right the first time, because it's very frustrating to get all the way done with a piece and realize that everything needs to come back off. So we're going to put one in the front on each corner and then I like to put some on the backside and you can it doesn't matter which direction you so these I'm going to sew them so that they are going that in the direction of my Hair, if you put them in going the other way, sometimes what'll happen. You have a tendency to put the front clips on and then, when you push the back ones in, it might bubble the top of your piece. So if you can have them pointing in the same direction, that's really helpful so now that we've kind of got our layout in place, we're going to stitch those down. So I put thread through my needle and I've put a knot at the end of my thread and I'm ready to start sewing. I'M going to move my clips off my piece. I know where they go and I'm just going to focus on one at a time. So this piece has a lace front, so I won't want to put my clip too far forward because I don't want that visible. The first thing we're going to do is we want to anchor our thread so we're just going to move our clip out of the way and I'm going to put an anchor stitch underneath. I don't want to see the knot on that thread because it'll be ugly. So I'm gon na hide it so right underneath and I go up through my clip - make sure I'm not getting stuck on the other clip and I'm going to do three or four stitches through that same hole to anchor it each time. I'M picking up part of the wig and going through the whole at the same time, if your thread gets stuck. Sometimes that happens just pull the thread back in the other direction. Sometimes it'll pick up a hair and get get a little hard to pull just want to make sure that that's nice and smooth, if you do pick up any hairs, sometimes it kind of binds up a little bit. Hairs are a little finicky, so you can just pick it up and pull if it's too big of a knot, you can always just go back and cut it off. So I've anchored this now I'm going to go back underneath, but I'm not going to come through the hole, so I'm just going to flip it over for a second. So you can see where this is going. Okay, so I'm just going to go underneath and now I'm going to go for this front hole up here so same as the first we're going to pick up a little bit of the wig and go through the hole. We want to move that thread away from the front hair, so we don't accidentally grab it and again we're going to do this three or four times so pick up a little bit of the wig and go through that hole. Okay, one more time and we're going to move on to the next one pick up a little bit of the wig and go through the whole again you're, going to do that three or four times and you're going to move on to the next one. Okay, I have that thread underneath so that you don't have to see it and if your thread gets caught on the teeth like that, make sure that you put your needle underneath it and just pull it out. If you do it again, then pick it out again, because we can't have that there. Okay, now we're on the last hole so again picking up a little bit of the wig cap and going through the hole. Okay. Now we're ready to not our thread. So I'm going to take it, I'm going to go slightly underneath the clip I'm going to push it through a piece of a cap and I'm going to take my needle and go through the loop twice. The pull make sure that you get your thread tight and I'm going to do that two times and that'll be a nice anchor. So I'm going to cut my thread, but I'm going to leave a little bit of a tail just enough so that it doesn't that knot doesn't come unraveled with our first clip sewing on we're ready to move on. I'M going to do the second one in the front. Continue sewing the remainder of your clips, so I've got all of my clips in place and now I'm ready to go ahead and put it on my model. So I've opened all of the clips. There'S snap Clips make sure that they're all open before you start, and since this is a lace front, you can use a little bit of wig tape to hold that down. If you need it, some people like it really tight to the scalp others, don't really care. So much as long as the clips are in place, it should hold it down. So since this one already had I comb in the front, I went ahead and kept that I'm going to position this a little bit lower than I think I want it, and then I'm going to slide it back. If you have a clip in the front on yours, remember doesn't really matter where you put those snap clips. But if you did put one in the front Center do that one first, because if you do the sides and then you do the center and then the other side, you might find that the whole piece shifts into the position that you didn't pick. So always do. That one first so now we're ready to do the front side, I'm going to make sure that it's somewhat even before I start I'm going to take that clip, pull it forward, scoop up that hair and then push it back and then I'm going to push down On both sides of the clip, until I hear it snap now I'm going to move to the other side and I'm going to again hold it in place, but I'm also going to slide it forward a little bit farther than I think I want it scoop up That hair make sure that it's tight to the scalp and then find the size of the clip and then push down okay. Now, we've done the front two and I'm going to move around to the back okay to do your back, clip going to scoop up some of the hair, find the two sides of the clip and push down. Okay. Last one same deal as before, going to find the clip push it a little bit further forward than it needs to be pull it straight back, scooping up that hair, putting my fingers on either side of the clip and then pushing it down. Okay from here we're all ready to style our piece now before we put this piece on, I had put all of the mannequins hair from the top into a ponytail going back, and I did that for a reason. I did that so that you can see that all of this hair that covers is not the mannequins hair, so you can see how nice that this covers the top and the sides these pieces are really effective for that. So she has all of this coverage and through here right where she needs it so from there we're going to check our blend. So this piece was a fairly thick piece on the top, as it came down to check our blend. We'Re going to take a little wonder brush. I love these brushes they're great. You can go down over the ends of the hair and see if it just smoothes in this one's really nice. But if you have any problems with it thinning into a nice blend over the top, you can simply pull that up brush it kind of straighter. And then you can take your shears and just cut straight up and into it, and this will give it a little bit of a point cutting and thin out those ends so that it'll taper much nicer into your own hair. So once you have that taper established and you don't see a shelf line, then you're good to go so for her. You can see exactly how well that blends in the front hairline and then the nice thing about top pieces is that you can also incorporate your sides into your style, so we can just simply pull the top. The nice thing about top pieces is that you can incorporate your side hair in with the piece, and you can create these really believable updos, because you always see the hairline, your hair mixed together, and it doesn't have that bulky feel wigs, usually have a really obvious Ear tab, so it's hard to pull them back. This is also another great way where you can see how well this blends, even though this color is completely different, it always has like that. Really nice flow to it, but you can also tell where the piece hair is from her hair. So you can imagine if this was the same color. It would be completely flawless if this was a menace piece. You'D do the entire process exactly the same. It'S just that the top layer would be likely much shorter and it would be blended to taper into a much shorter hairstyle, so hopefully, with this trick in your hand, basket you'll open up a whole new world of possibilities for what you can do with your hair. Thanks for watching - and if you liked this video make sure that you subscribe to our channel so that you never miss a beat and if you need products for your projects check out, doctored locks comm for all your hair extension needs.

Comments
tall treesinc: Awesome idea! The wig looks like real human hair, so where can it be bought for $50? That would be an amazing price if it were true. Thanks!
Laura Pittman: This woman who's does these different hair transformation is amazing ive watched loads of her videos and she really knows her stuff
Stacey Lind: Love your videos!!! Been watching you for years!!! ❤
Colleen Todd: Thank you very much I am looking forward to trying this!
Eye on art: Thanks so much I did not know if I would like a topper so I took one of my old wigs I do not wear anymore and cut it following directions from you and another person and sewed the clips which your video explained the clip placement very well and oh my I like a topper and 7 even like the topper I made because it matches my hair. I hate wigs in the summer and this is so much lighter. Thanks so much you made my day!
Felicia: Is the topper synthetic or remy wig? Looks realistic! Video is very helpful for people who don't want to wear a full wig.
Marisa Jane: What if you want the coverage on the sides over the ears? Can you leave it on and just add clips so the sides don’t flop around? Thanks your videos have helped me SO much!
Marilyn Baldwin: Thanks so much I luv your video ! I have thinning increasing in the front and sides but I always wear bangs but they are becoming skimpy. I have searched high and low for a wig that fits my big head therefore I think your video has given me hope. I'd like to know is this lace front wig one with a lace part ? I tried a few at the wig store but found the lace parted ones couldn't be changed and looked flat and terrible. I couldn't tell on your video if this one was synthetic with a part or a mono top ? I'm looking for inexpensive wig to try out your method. Thanks so much.
kittyskid1: I wear wigs so I have a goodly wig stash. I will be trying this because I have hair in back but the front is thin. Thank you so much for this detailed explanation. I'm excited about trying this technique.
Kelly Morris: really a great quick idea...! Thank you for the wonderful tips.. hehe
Rachel G: $50 Is a bit too much for a diy for me, but regardless this is a good video! Very well done. ♡
sabesmart: Great idea!!!
miettelund84: I'm thinking of cutting Evanna by ROP into a topper (I realize they just made one also)...But, can you cut the front away a bit? I hate the lace front, no matter what concealer I use I still see the crappy lace. I would like my hair to blend with it and hide it into my hair. Would that work?
PotsPassionsPrayers Tv: Hi. Is it possible to make a wig or a hair topper from clip in extension pieces? Can you please make a tutorial? Please please please? Thanks.
nancy simpson: Great idea, next time please use a light color wig so we can see what you're doing easier. thnk you for the video.
A: I appreciate that you're showing this to us but you should have worn something light colored as a contrast to this wig. It's too difficult to see what you're doing plus the camera isn't close enough it should be way down close to the wig. I hope you make another one where we can see everything you're doing. Thank you
Makayla Werman: What if you don't have any hair for the clips to grab onto ?
Michelle Robinson: Always amazing
Debra Rainey: Could this piece be set further back to give more hair to the crown? That is where I would need more hair, not so much toward the front.
BJ Shepherd: You are amazing!
Lisa Lightning: I just purchased a couple overpriced toppers, for some reason it did not occur to me how easy they would be to make myself! I’m used to having braids on the top of my head, but the braids caused hair loss, and now I’m wondering how I can re-create the look. Maybe I need to buy a complete lace wig and braid it... I wore a topper out dancing the other night and I thought it was going to tear my hair out and fly across the room. That’s the only trouble with Toppers.
twominutetips: Excellent. Just became a new subbie. Do you ever work on gray hair as that demographic of course has more need of hair enhancements. Many thanks
Amanda H: Have any suggestions on a solution for people suffering from traction alopecia (hair loss on sides of head and top...basically hairline). A hair topper would add volume to my hair but it doesn't solve the full problem. I can't seem to find anyone who has a solution for this (especially a DIY one)
Elonda Towns: I would like to know if you can use a full lace wig, to make this.
Debbie Bebington: Great video and well demonstrated, but the background music is torture
Win Tan: You have good videos but please try a lighter background including the clothes you wear. Especially when dealing with dark object. Cannot see at all. Maybe my phone is too small.lol
Eye on art: waxing the thread will stop the tangling.
fun2bwif: ok I cut the wig ..what do i do with the back?
Spiders Q: Too dark to see ! Can't see where you are cutting !!
karen mcgrouther: Love your videos but cant see what your doing its so dark x
joan reese: WoW! Thanks
Maria M: Is it possible to create one that could be attached with an adhesive instead of with clips?
Janene221: The link in the info section for what wig you used doesn't take you to a wig. I can't even find full wigs on your page. Link please?
Eye on art: $500.00 is better than hundreds for alittle bit of hair, thanks
saxyartsy44: Your video is way too dark