Watch Me Slay This Deep Curly Wig |With Bantu Knots And Braids Ft. Alibonnie Hair ✨
- Posted on 09 May, 2022
- 360 Lace Wig
- By Anonymous
═════════════════ დ Alibonnie Hair დ═════════════════
Usᴇ ᴄᴏᴅᴇ “smith20” ɢᴇᴛ $20 OFF
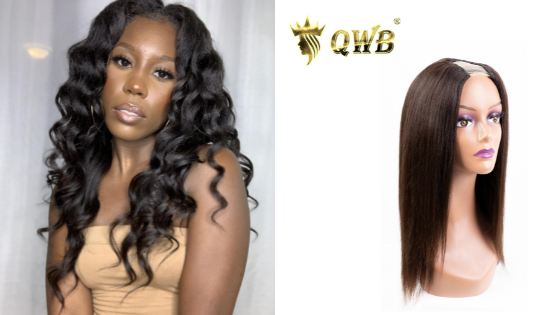
Hair info: 26 INCH 250% DENSITY CURLY HD LACE WIG 13x4 LACE FRONTAL WIG
Direct Link ➤https://bit.ly/3MX3Aa3
,
Highly Recommend Hair:
360 Lace Wig ➤https://bit.ly/3IUn4dN
HD Lace Wig ➤https://bit.ly/3AF6YAz
Colored Wigs ➤https://bit.ly/3qrWTUJ
Contact us:
✅Alibonnie store: https://www.alibonnie.com/ ✅Facebook @Alibonnie Mall:https://www.facebook.com/AlibonnieMall...
✅Instagram @alibonniehair:https://www.instagram.com/alibonniehai...
Welcome to My personal Channel IN THE LIFE OF A BEAUTIFULHUSTLER
Be sure to SUBSCRIBE & TURN ON YOUR ALERTS
——————————————————
MY PERSONAL YOUTUBE CHANNEL : In The Life Of A BeautifulHustler https://www.youtube.com/channel/UCB9xX...
——————————————————
Follow My Socials:
PERSONAL
@iambeautifulhustler
BUSINESS
Instagram:_Beautifulhustler
@thebhslay
@girlsniteoutapparel
Twitter:_Beautifulhustl
YouTube :IAmBeautifulHustlerTV
✨For Sponsorships ,Reviews,& Questions
Email:[email protected]
786-571-1313
To Purchase Hair & Products Www.ibhslays.com
Allow 3-14 Business Days For All Orders
Oh, i get it they paying me out to be the bad guy. Well, it's the last time you gon na see a bad guy. Do a rap game. Like me, i went and cop the chopsticks put it in my punches to pop, what's up beauties and welcome back to my channel if you're new to my channel just go ahead and click that subscribe button and give this video a thumbs up and turn on your Notifications here we okay today we are back guys with another video and, as y'all can see it was given very much. Are you a mickey fan? Am i a nicki finn? What pull up in sri lanka? Yes, okay, so i had to slow my little video down because you know how you to be tripping on me, but i hope you guys enjoyed the uh tic tac in the beginning, because that is the look that we will be doing today and today's wig is Provided by ali bonnie, hair okay, so they sent me this full 250 density 26 inch deep, curly wig the wig was bomb. Okay, the lace was giving and i did go ahead bleach. The knots did some plucking and i dyed this with black using the water dye method. I used the color jet black in royal navy and let that sit in there for about 20 minutes and blue shadows plucked it and boom. Here we are so let's get right into this wigs like because yeah it was, it was getting honey, so um. For starters, i'm going to go ahead and i place that wig on my hair and i just want to cut some of that extra lace from around the ears. That way when i do apply my glue, the wig lays down where it needs to be okay. So i'm just going to pull that back and jump straight into the video using my ruby, kisses foundation, and i am using that lighter shade in that palette. In that level, 16 palette and just applying it all in the inside of their wig. And i already did my ball cap method. Y'All know i already come on here. Looking like a ball yeah period, um so um, the ball cap is one flat and now we're just going to get that wig to match my skin color. Well, the lace on the wig to match my skin color and now that we got it underneath. I just like to go right on top and just add a little more for security. And then i'm going to go in with my um glue and add three layers to this hairline and just rub it out real nice and flat. So it can dry clear. So i'm going to use three layers for my install today and once all of the layers are ready to go and locked and loaded, i will begin the melting process, so this is going to be a good video y'all. So you might want to keep watching, get your little snacks little notebook, pen and paper, whatever you need to take your notes baby, because it's definitely giving today. Okay! So oh real, quick, shout out to my last tech at geneva, meet me on instagram yeah. My baby girl did that top and bottom i was looking like a little chicken for a while, but the beautiful hustler is back and there's some period but uh. Thank you. Beauties for watching um, let's get into it and stay tuned so now that that glue is clear. I'M gon na go ahead and begin to go ahead and place my lace down into the glue, but i'm just combing all those hairs back because you know sometimes the fly always be aggravating in a way now usually y'all know i start placing my wig from the Middle one down, but today i don't know what made me do this, but i actually love this way. Much better, like my wig felt even tighter when i actually installed my wig. By doing one side, then the middle and then the other side, like it felt so much more tighter and i loved how tight it felt and secure it felt because y'all know. Usually i do the middle and then the sides, but it's like it really snatched me when i did it from left to right, like i was, i loved it. So i'm gon na try doing my wigs like this more often because i really love how it felt like it felt so tight and secure, and i just really gave me like a natural facelift and i'm here for that so um. I went ahead and i did that. I blow-dried that in and i'm taking my hot comb and just hot comb in that lace, and you know just to give it. You know a little extra push in the melting process and then i'm going to take my um melt belt and tie that down and let that sit for 10 minutes and then we're going to come back cut that lace off you know tack down. Whatever else is still lifting and then getting to the styling and pulling out the baby hairs and so on and so on, so just keep watching all right. So we went ahead and snatched that lace and now it's time to cut off the extra lace from around the hairline, i can automatically see what's not been tacked down. So i just kind of like to pull that down out the way i'm gon na slit, the wig down the middle and, of course, go in with the fresh razor and razor off all of that lace. Okay, so try to get as close as possible um to wherever you feel like. You don't need the lace and, if you feel like you need the lace to perfectly match your hairline then make sure you keep that little piece of lace on there and you can just go back in and slide the glue under those little places. So that's what i did here on this side, i'm going to get as close to what i don't need and what i feel like i do need just keep it, so i can take it down and i will also repeat the same steps with the other side. As well so um once i do that - and i will you know, begin to do my middle part slick it down, because i am doing the two uh bantu knots at the top with two braids on the side, and i also added some beads to get a Little, you know a little extra look. You know what i'm saying so: um just watch how i cut the lace um and how it repaired to actually do the style so because the style is really what gabe looked like yeah the install was good, but it was the style for me. Okay, it's definitely the style for me, oh and before i go key key key point here now, if you notice my dog, like my cat, was bunched up underneath my um wig, and i noticed it when i was trying to part it open. So i went ahead and i slowed that down quickly for you guys, because i have to really go underneath my wig and grab that top cap, because i have on two caps and i had to pull it and stretch it down and that's what took out that. Little fold out of my you know from underneath my wig from that cap, because when i slid my wig on, i didn't realize that it bunched up the cap. So i had to go underneath my wig and pull the cap down to snatch it down back flat to get out that little issue. So when i did part my hair, you didn't see that cap underneath, but that's what that was right there, and i almost forgot to mention that, because that was a very, very, very important key factor, because this does happen. Sometimes you know when you put your wig on your cap, be all moving and stuff and bunching up so just slide your hand under that wig and snatch that cap down okay and you will be perfectly fine and you will be safe to part your wig. However, you want to, but the wig is looking very natural, as you guys can see here, it's giving the scalpiana effect, but we're going to turn this up a notch when we do that second melting process. So now that that lace is down, i am going to go ahead and begin to do my middle part. Um prepare my you know: bantu knot section so, starting with the middle part, get it sleek it down and then make a part on a side where i'm going to have the braid at and leave our part like it's kind of hard to describe so just watch. What i'm doing - and you would get a better view or understanding of what i think, i'm trying to say but um just section off like two squares on both sides, where your banter knots would be, and i left out a little bit more on the side. So i was able to still do my braid and then have a little piece of stitch slide behind my ear, because i love a good behind the ear tabs. Okay, so just keep watching and you will see exactly what i mean here in this next clip of this video, so i actually pulled out my baby hair section. As i was doing this, i don't. I don't know why i thought i don't know what i thought but um as you can see. I went ahead and i did the middle part. I sleeped it down now, i'm taking apart to cover the tracks in the back and i'm hot combing that over to sleep that down and then i'm making another part on the opposite side and, like i said, i left a little bit out because i am going To put a braid there, and also i still wanted a little something to i have you know to put behind my ear. So this is the first section that i'm sleeking and i'm just going to kind of roll it and like clip it out of the way and then i'm gon na pull down the side where i'm um the side, where my side, what the heck, the baby hair For my sideburn jesus christ, so i'm gon na pull that down and then also uh. Squared up that section right there and like i mentioned it, will be a braid on this little side as well and then a little piece of sticker behind my ear. So, basically, how this side looks is exactly how i'm going to do the opposite side as well part it off put on a section for the baby. Hairs cover the tracks in the back, because it is a lace, front, wig and pull down baby hairs. And then once i do that part, then i will go ahead and tie down the hairline again with the melt belt and then we'll be getting into the doing. The whole band two knots and cleaning up the part and et cetera, et cetera, so just stay tuned for more so now that i got those two sections squared away literally i'm just gon na hot comb, the top part out just a little bit more. So it's nice and flat, the oh, it's the foundation! For me, it's the it's the whole prep for the whole, like you know, when you do the prep like, if your hair about to be a slate or not, and it's just definitely giving yeah, i'm finna kill this like, and i was just so happy. I didn't over bleach the knives because of man - i just don't know, i'm always forgetting i'm bleaching knots and it just ugh it'd be so aggravating, but just thank god. I didn't overlook the nights. I have to do no extra work and under that for today, so now i'm taking um my new love, my new baby um, the olive oil wig holding spray, whatever it's called and i'm just sleeking all of that back around the hairline um, because i'm gon na Go ahead and tie that thing on down and let that sit for another like five minutes or whatever, because this holding spray does dry really really fast, so um. I never have to wait like a full 10 minute. Excuse me, i didn't have to wait for 10 minutes. I really did like about. You know three to five minutes to be honest and then you know took that off and damn boom. I mean it was already scabbed the first time and i just like real scab. You know what i'm saying yeah. This is cute, though, that wouldn't even look cute style. You know people do the two little rolls and they just clip it and just keep it cute professional yeah. It was giving it but um, let's go ahead and get into doing these baby hairs. Before i do the bantu knots, i actually want to slay my baby hairs and get it out the way. So i just went in with the scissors and just chopped it down. I'M gon na take my little uh edge, curler curl those baby hairs, and i will be using that same olive oil um holding spray to swoop my baby hairs. I want to keep it nice, soft, looking, but also you know very much still in place and i'm doing my sideburns as well. I'M going to pull some of that hair, the sideburns with the tweezer and then pull some back to the hairline because i feel like it was just too much out and then i'm going to cut curl and then swoop the baby hairs. And i'm going to show you how i did it on both sides very cute, very simple, very easy. Then after i do the bantu knots you know i will go ahead and do the two braids okay y'all see me over here: snatching a wig okay period. So i did my little swoop on that side. Just kept it very simple, very cute, very classy. You know the girls love a little two baby hairs. Only wigs, you know for the girls who don't like to do too much with the baby hairs or not. Really a big fan of baby hairs and they don't want to do um completely like clean hairline. So i just did two simple little swoops on both sides: just cut it nice and short, and just use that holding spray and spray both sides. And then i would do um the bantu knots as i mentioned so this this i mean what i really love about this holder spray. The most is how fast it dries like. That'S very very important because ain't, nobody trying to be waiting forever for no baby hairs to dry to do nothing. You know what i'm saying: do they style and all that but um, now that i got those baby hairs out the way and squared away i'm just taking a little bit of that holding spray and i'm just combing. It ends to make sure it's nice, sleek and no flyaways, and i'm just taking my rubber band and i'm going to wrap it around wrap it around wrap it around until it's nice and tight wrap it around. Oh, my fingernails y'all kind of blue right now. For me down the wing black so excuse to get on this, but now that i have that ponytail, nice and tight, i'm just going to use a little more holding spray sleek it just so it's nice and flat - and it's very simple - to do a bantu knot. Y'All, all you do is literally just twist the hair and then twist it around in a knot. You can't twist it no more so just twist the hair up and then begin to just go ahead and just twist around as you're twisting around and going around and then once you finish like you, keep pushing the hair underneath the last little loop that you did. That'S how you um create the volume for your bantu knot just twist around push it on the twist around push it on to push it on to push it on and just keep wrapping and wrap and wrapping, and to make this a little more secure. I did take a rubber band and just wrap it around the end part that way my bantu knot does not unravel. So i did it to this side here. Take the rubber band, like i said, go around it just secure it make sure you hide the rubber bands so make sure you slide it completely. Underneath that bantu knot, you know, push it underneath and that way it's nice and secure. You don't have to worry about it, falling down or unraveling, and i'm going to repeat the same step to the other side as well, and the bantu knots are now completed so there it is there, it is there, it is there. It is so now. The next step is to i mean for one, if you want to rock it like this, you can just work like this. You don't have to do the braids, but i think the braids was a nice touch to it. It gave it more of a it gave it a different look, believe it or not, but to be something i simply added to the look. It definitely made a big difference and it's just so crazy how the slightest changes can make a bigger impact so um. Oh, that was a real motivational right. There y'all take the information. Just the slightest changes in your life could make a big you know, make it make your life transform just make it a big difference. Just make it better. Like change is always good, but yes, so um. I just went ahead and parted that little hair that i had on the side and just took a small piece and parted it off, so i could braid it and let me tell y'all braid my hair. This angle was very complicated. Okay, i had to do like some weird arm twisty thing and hold my head to make. It seem like i'm, bringing somebody else. It was like a mental thing. I had to do with my mind first but braiding, my own hair for, like that was yeah a challenge, but i made it work, so i did it on one side, i'm gon na repeat it to the other side and, as you can see, i went ahead And braided that other side as well, so now i'm going to go ahead and just kind of fix the baby hair a little bit because i feel like it messed up as i was trying to do this discombobulated braiding on myself, so um once i go ahead And blow dry that little piece down or whatever, like that, i am going to take the hair out of the rubber band and kind of fluff it out now i did have to stop recording and run to the hairstyle across the street to grab some beads. I really wanted some wooden beads at the end of my braids and honestly, i really wanted brown, but they did not have any so. I just went and purchased some black beads and added the beads to the ends of the braids, which is y'all, know how to put the beads on the braids. Now we all had it and we was little so um same concept, same everything, but this is the finishing look. I hope you guys enjoyed this tutorial. I absolutely love this look. Let me know what you think down below in the comments, and so i'm gon na drop a little. You know a little finishing touches video at the end, so you see the full final look, but the wig is super full, like i mentioned, super pretty 250 density. All details and description is down below make sure you check it out, use coupon codes, etc and yeah. Thank you guys for watching. I will see you guys next time you

Comments
Serene Beauty / kimmy: I love it you made it look so easy definitely gonna try ♥️♥️
Alisha Shelton: I love her . She always doing something nice ,good,perfect, and beautiful
Raquel Sobers: Nah this wig actually look like it’s full and you’ll get your moneys worth. Detailed application Can you recommend where your hustlers can purchase 3 top deep curly wigs?
Christine Zapata: Looks very beautiful on you love this look
DollFaceDeluxe: SO FREAKIN PRETTY!!!!!!
Dev Habe: Felicidades, es un buen ejemplo. 4 sentadillas son unos LIKESEX.Uno muchas y un buen ejercicio. Se deja ver que hay muy buenos resultados Saludos desde la Cd.. de world los mortalesz abian apreciado tan hermosa mujer.k
Raquel Sobers: Love it
Jasmine W: Gorgeous
Locbeautiful _4ever86 Johnson: Your work is so dope.. I wish you showed how you put the beads on. I don’t know how to
LaLa: Effortless
Aquarius Love: Cute...
Paris boo: How do you keep your skin popping especially living there and no dark marks
Sammy Da Goat:
modelchiic17: Yazzzzzz %