How To Short/Medium Hairstyle - Messy Faux Hawk Dutch Braid Tutorial | Milabu
- Posted on 03 April, 2015
- Medium Hair
- By Anonymous
SUBSCRIBE to my channel HERE http://bit.ly/23kRmKr
How To Short/Medium Hairstyle - MESSY FAUX HAWK DUTCH BRAID TUTORIAL:
Welcome back to my channel friends!!!
This braid is so fun, simple, edgy, and pretty! You can do this hair style on short or medium hair. Let me know how this dutch braid works out for you. :)
XOXO, Milabu.
______________________________________________
Latest HAIR Tutorial http://bit.ly/23kMrZH
Latest MAKEUP Tutoria lhttp://bit.ly/1QPAF2k
Latest MONTHLY Favorite http://bit.ly/1rg9R6s
Latest EXPLOREWITHME Video http://bit.ly/1Y4nJvr
____________________________________________________________________
Follow Me Here:
I n s t a g r a m: @milabu09 https://instagram.com/milabu09/
T w i t t e r: @milabu9
______________________________________________
Tools Used:
BB Bumble and bumble
Thickening Hairspray http://seph.me/1yKlU9C
MetaGrip Blonde Bobby Pins http://bit.ly/1BYuyCK
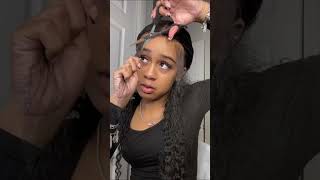
Hi everybody welcome back to my channel today. I will be sharing with you a really fun and easy braid style, a messy full hog edge braid, let's begin so. This hairstyle does not require that messy tousled wavy look, but if you have it go with it, it's gon na look really pretty, and if you have straight hair it will work as well. This next step is totally optional. I just wanted to add a bump in the front of my head before I start the break so to do that. I just added some dry texture spray, tease it to add more volume and texture and then just pinned it back with two bobby pins and by the way, the buzz bobby pins ever are sold as Sally beauties and I'll actually have a link down below to which Ones I use and which ones I prefer alright, let's begin with our braid process, some part. So what I did was I separate my hair. Well, first, I get the flexion and I start from or the bump ends, and I go all the way in the back and then just separate that section of hair into three sections, because this is a Dutch braid and not a French braid. It'S a reverse of the French meaning you take the outer section, the left and the right and you're tucking them underneath the middle part. I think it's better for you guys to see without me speaking to make it easier and show you guys better. I took that right section and just flipped it over to the front, and I started to add hair. So you, whenever you add the hair to the braid, you add it to the middle underneath all of the either the right or the left sections. And then I just brought that right section back over and you do exactly the same thing to the left section bring that left section to the front and then you add the hair to the middle. So I just want to show you guys without me speaking, because I think it's easier for some people to understand to actually see what I'm doing without me. Speaking in the background and when you get to the very end. Just if you have longer hair, you can just bring it over to the front and just finish with a Dutch braid, because my hair is not that long. I just finished it in the back secure with an elastic, and this is what you should have when you're Dutch braid is finished. Let'S begin to wrap this braid up a little bit, so I start at the very top and I start pulling each end from like both ends of the same time, and this just gives them a volume. It just makes it bigger. It looks prettier and keep pulling until you get the desired amount of volume that you want and if you want add, more texture spray. If you had don't have enough texture, but I already did because it was second day hair and I felt like I didn't need more and if you do have layers like you can see, some pieces will fall out and actually like that. Because we give that nice messy look and then if your ends are not as pretty as mine, they're kind of rough, I just tucked them underneath the braid just rolled it up and then just secure it with a bobby pin and that's it really easy. Really simple. Really fun and I give that nice fun edge on a braid. If you liked this video, please don't forget to thumbs up and check out the other videos down below. Thank you for watching this video


Comments
Carly Ashcroft: You've done it again girl! Another beautiful but easy(ish!) hairstyle for this hair novice to incorporate into my routine. Thank you so much! :-)
Alisha32: This look is amazing.. can't wait to try it!! <3
The Open Minded World: This is beautiful, definitely gonna try it, i think a better way to describe the braid process is to say,you tuck the outer pieces of the braid under the middle piece and continue braiding under.
Tada11: Very cute!! Perfect for Spring and Summer. Love your tutorials!!
Kids Go Smart: I was trying a similar braid yesterday and could not figure out how to add the hair to the side strands and now I see... you add it to the middle section!!! :) glad I saw this!
Marisa Roy: Love this look!
Milabu: Another fun hair tutorial!
HairsAffairs - Ania B: It looks beautiful
Elizabeth: Great hair idea! TY! :)
alarnah robinson: Omg you bring it to the middle!!! It’s taken me years to even understand this dam thing and now it’s so simple?!
Cynthia Madsen: love it
Connor RK900: Perfect!
valeturo: Oh gosh, you are great! I don't think I can do this XD According to you, can I do this by practice? I hope my English is enough, I'm Italian and it's a long time I don't write/speak :-)
Kelsea Kohler: would this work on my short hair? my hair goes down to the end of my neck
Mars and Crew: Looooove!!!!!
Andrey Burykin: :)
Jamie MAC13: What brand and color nail polish was you wearing? Please and thanks!
SuperIrene85: it s wondeful but it isnt clear to me how to add other sections... :-(
MyVlog: its looks so easy but i fail to do it myself