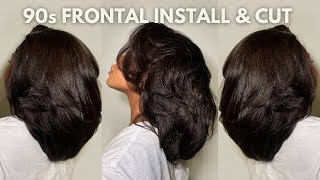
Short Pixie Haircuts & Hairstyles | Short Layered Cut Tips & Techniques
- Posted on 10 May, 2021
- Pixie
- By Anonymous
Learn How to cut Short Layered cuts & styles for women.
Share the best and simplest cutting technique
"I Love Haircut - I Love Hairstylist"
That'S something that ben and i have been following you've been a part of the harebrained community for over a decade or more, or something like that now so super exciting to be here thanks so much for having us we're showing you um what has been delightfully named. The pixie master class by hair brain themselves, so thanks for that as well, essentially, this is a class where we're going to show you a bunch of different mixed up shapes on one like pixie haircut, one short and soft haircut. So you could take any one of these techniques. Combine them all together in whatever order you want to create a bunch of different shapes, so we're going to be incorporating two different types of uh, one of the sides. One'S more graduated one is more layered we're going to show you guys how to get that nice popular melody, vibe of the back of the pixie that we're seeing a lot of these kind of concave moldy pictures in the back and then we'll show you a couple Different ways to incorporate in the top remember this whole thing is a haircut, but each one of these panels is also a haircut that you can do whatever you want with and use at any moment to create your own pixie so step. One of this we're actually going to use i'm going to be using a folding razor for most of this haircut um. You see this is the one that i use with this sweet wooden handle from steps. I love it and we're going to start from the occipital area down. So if we look at this doll from the side, the idea is that we want this shape to collapse in through here to get a little full through the top, but then get flatter through. Here, but keep this kind of like fringy perimeter on it. So what we're going to do is have our little doll head look down here, check where the ears are so we can get this balance and we're going to separate down the center and then comb to the side, comb to the side, and you can see almost This little base melt. That'S on there. Someone has done. You know a little melted base on this. It gives us our sectioning almost right. So we're going to do is then separate from the occipital make sure it's kind of low occipital. We don't take too much weight out of this through the back, so we get occipital down and then occipital up is your main sectioning to the back. Oh also, we've taken out just a simple horseshoe section from the crown around the parietal area. Very simple: just one and two boom boom easy peasy and then we're just separating out the underneath of the back right here and clipping that up in a way make sure you flip it directly onto your clients. Top of your client's ear make sure they're awake and present for every moment of this, and then we're going to take simple vertical sections, vertical section vertical section vertical section: we're going to have a traveling guide. So if we were to look at it, the shape would be curved. It'S going to curve like this, like you, follow the shape of the head and then you're going to curve like this. So it gets shorter to longer this way, easy way of thinking about that. So we'll start off vertical right here: center back is going to be your initial guide. This is a kind of a big moment, because this is going to be the design line for where the rest of this happens. So if this gets too short at the top, this is going to end up real short, so we want to have enough length there to um. I guess we can maybe bring it this way, so you can look from the side to start. We want to have enough length there for this to still kind of bend a little bit if it gets too short, it might poke out and we're going to cut a line like this. That goes short to long, so we're bringing this out just like this. I'M going to naturally just kind of bring my fingers out, so i can save that length and then, with a long movement of this blade, we're going to start to cut this shorter at the top working down longer longer longer through the bottom. Saving that nice melody action there so right away, you start to see the shape come in. I don't know if you can see it on the camera, because i can't see you can all right great. So then, we're looking at that curving down we've got shorter to longer shape we're going to be working around now, traveling guide. So what does that mean? We move with the guide, we're not bringing everything to the center, we're using the previous section as a guide for the next section, so we have to move a little bit in this case. I'M just going to turn the doll you can do it with your fingers. Pointed down - or you can do this with your fingers - pointed up the whole way. That'S the beauty of the razor right one of the cool things about it is that you don't have to change your body position as much. I'M going to slide past my guide and make sure my guides coming out of that and then again i'm working from shorter down to longer. I'M actually sliding my fingers away. So i can save that length down here. So we get this sweet awesome mullet action. If you wanted to, you could make that much shorter it'll give you a very similar shape, but we want to save that mullet, save it from itself and we're going to keep on going. So i've turned a little bit more make sure you don't over direct too much, because if you do you're going to get more like a bob - and we want this to feel like balance we're following the shape of the head using a little of my previous section. As a guide for reference and then we're working from shorter down to longer see how i'm sliding away very very light light pressure with the razor i'm not having to push all that hard, you can see it just really melts that hair right away. Could you do this with a feather razor too totally? You could do it with feather razor. We can grab one right here and we can do it with the fender razor easy peasy. So we got a nice little feather razor happening here. We can do exactly the same thing. The only difference is the feather razor guard is going to kind of dictate a little bit more of, like all the texture that comes off and everything, but when you're working with it vertically this way it doesn't change all that much so again, it's like we're coming In we're working shorter down to longer shorter down to longer sliding my fingers right out just like that, i comb it out to make sure that we're not getting too long. This maybe looks a little too heavy, i'm actually going to come back in and really, i think the difference there is. The feather razor tends to save a little bit more of that hair because of the guard it kind of pushes things away. So you you're less aggressive with it. That'S one thing that i really like about using a folding razor is that the whole blade is exposed so that you know i can be a little bit more direct. It'S not saving as much now here in the corner. We want to make sure we keep a little bit of this weight, so if you go around too much you're going to take that away, so i'm going to over direct a teeny bit more in the corner, maybe not exactly square back, but just out at a 45 and then i'm working that down shorter down to longer, just like that, almost disconnecting that perimeter. So you have that fringy perimeter at the bottom, which is looking at pretty baller, then what we're gon na do now is go to the other side. I'M gon na keep my fingers pointed up just because i can it's the beauty of the razor and it's a free country. Okay, you can't tell me what to do we're gon na pull this out. You see, that's where the guide actually is like. That'S the guide right through there, so i'm going to start there and then with a long stroke. So i'm going short too long, short, too long, short, too long short, too long short long. I'M sliding and i'm kind of curling my fingers out and then i'm almost disconnecting the bottom. I want to save that link to the bottom. You can disconnect it more or less and then i comb it to look like. Is it like sitting in knitting in just like that? You want it to knit in you want this to be like, like what you're like a grandmother on christmas, just knitting right into this shape. So my grandmother did, i don't know you guys now again working around the shape of the head. We'Re not um using a stationary guide, we're using a traveling guide so when we're coming out, it's like this uses that for a guide, this uses that for the guide right. So it's like you pull this here for the guide, then we'll pull this one there for the guide, and you just keep working around like that to the previous section, really pretty simple stuff vertical section we pull back to the previous. We pull past the guide, so it starts falling out right through there and then we're working that down short to long short to long stretch along disconnecting the perimeter bring this out. There'S the guide falls away, you can see it fall away and now i'm working short too long to connect in this corner or directing a little bit more to make sure that i actually save a good bit of that in the corner. I want to make sure we don't take too much of it away we're getting a really kind of a nice concave k-h-a-n. No we've got a little extra weight there, i'm just coming back in to kind of clean that up. If i feel like it looks too heavy in any spot, that's better! You see how that flattens out it gives us this nice sort of like curvy shape. If you didn't like the fringiness at the bottom, you could take it off and still have that same kind of head hugging shape there at the top. Now, through this side, we're going to show you guys, let's say that you want this weight to push forward towards the face, so you have all that softness there in the front. I would start in the back working with a vertical diagonal forward section working from here to the front or still over, directing to the previous. That way we get a little extra length and push towards the front of the head um. So that's what we'll do on this side and then we'll show you something different on the other side, so we're going to take this panel down now. Are you using the flat of the blade uh that time i was not really using the flat of the blade, but i'm not. I wasn't really edging either it's almost like i'm. You was using a slight 45 degree angle, so i get that nice kind of soft feeling, i'm not going straight down and i'm not laying it completely flat if you're, laying it completely flat, which we will do later. You know you kind of start to like peel that hair away like that, you see it's like it takes away in more um like a horizontal kind of vibe, which is a really cool way to decrease weight and length at the same time, which we will do More of that, in a bit, that's for now it's the concave back! That'S what they like! Yes, so we're going to comb this forward, we're taking a vertical diagonal section forward, so almost vertical slightly diagonal, so we're going to be pushing forward this way, i'm going to be working a little bit disconnected. I want to veil this a teeny bit like. I want this piece right here to curve over the occipital bone right, but i wanted this to collapse in. So what the really the in my mind, an easy way to do. That is to take this a little bit tighter and then veil over this next one a teeny bit more. So we get that nice curve. So i'm going to pick up the underneath as a reference point, but then i'm going to come past it like that and now i'm going to be working a little bit less short to long, maybe a teeny bit still, but not not too dramatic. So now we want to keep this almost square layer right now, working that out. Oh she's, moving she's, haunted and we'll calm that out and we look for the shape so right now we can already see that starting to happen even more. We get this curve out. So you get a round curve and then a curve in which is exactly what we're looking for that hourglass type shape now diagonal forward vertical diagonal forward section traveling guides we move a little bit as we go. You know what i'm going to end up like this here, so why don't i rotate this way and it'll make more sense. You guys can see it a little bit more easily smart. I like to put my fingers down when i'm like this high up we're bringing this out. I'M waiting for my guide to fall away like there's my guide falling away, and now i'm going to work this in a bit of a square layer almost, but still with a long stroke. We want to start to disconnect from that underneath piece, just a teeny little bit coming in to disconnect just like that, combing it to check for the shape. I want to see like a curve from here to there and then mulleting out down there at the bottom. I'M going to continue with these diagonal forward sections traveling guide is going to be really important. Why? If we don't travel with this, we use a stationary guide. We start to pull it too far and we get increased length towards the front. We'Re going to feel like an a-line bob, you know which we don't want to be that bobbish with this here's our guide falling out right there. We want to feel more like a pixie, so this needs to get you know, kind of short. So if those pieces in the front get a little dog-ear-ish you're going to have a german shepherd on your hands, will you mention if this is a pixie mullet again or what is the goal here? So um we're gon na, be showing you guys a bunch of different shapes that you can combine together to make like a pixie. However, you want so right now. We'Ve shown you how to concave out the underneath section from the occipital down to give you that pixie mullet feel so that way, you know this is a very popular look at the moment. So it's like you would need to know how to give that nice flatness into this skirty softness. Now, i'm showing you if you wanted your pixie to push forward and give you still a head hugging shape that is soft and fringy in the front that pushes towards the face we're working vertical diagonal sections on this side on this next side, we'll show you how To make it go off the face and then you can decide whatever techniques you want to combine to create whatever pixie you want to create and because of the kind of fun block color base melt, we might get some real funky creative color going on. We can talk about that later. If we, if it even happens so traveling guide notice that i'm pulling this basically out from where it lives just using the previous section as a guide, and then i'm working this in a bit of a square way. You can see. We'Ve got kind of a flat line there a little square line. We have short hairs in here and long hairs here and that's how you know you get the texture that you're looking for making sure i connect all of this in. We got just a little bit more from this panel here and we're going to keep on traveling. So i'm going to turn diagonal forward vertical diagonal forward, because i don't want this to get too heavy. I want it to be a little leaner, a little flatter so vertical diagonal forward. We'Re going to pull this out from where it lives just getting a bit of that previous section as a reference, and then we're going to be working that section square down, just not increasing the length dramatically through the perimeter anymore. You could do that. You could disconnect this right here. Oh, i want some sweet tails on there. That can be fun like if it was ira. You know, ira poke statue would be like. Let'S leave the tail here here and here it looks sweet, so you can see we're starting to get this curve, so it's like you can imagine it without the the mullet. What that would look like as well without the mullet gives you this nice curvy shape over the back or with the mullet uh now um. We can see and tell like what sort of music they listen to a little more or something like that. So we're going to continue with vertical sections. Could you accomplish this with a scissor? Definitely you could, let's show you with the scissors we can do all of that. You know who i see using a scissor a lot to do shapes like this there's a girl named jude that has, i believe, been on hair brain live before, and everything she's really phenomenal and she'll do it with this scissor all the time it's like we want This to be kind of square out, we could be like this bring it out and if you wanted to be soft, like the razor we could come in and like cut out the panels like this and give us these little soft kind of fringy bits. You see how it gives you a kind of a razored feeling keeps that really nice and soft there. You can see, though, that for in my mind, it's like this is giving me a similar result with a bit more work like it takes me a little longer to get that kind of a feeling when i'm working with a scissor. But you can see it's a very similar look, so you can definitely do it with a scissor. It would work basically the same way but you're gon na have to work a lot harder. I think to get a similar look. So what i like to do is if i want something really kind of soft and wispy and frothy, then i will work with the razor straight away because it's just an immediate way of doing it. So now we're going to pull this out again square out slight diagonal forward, working that short to long shorter long trick along you see, we get a very similar texture to what i did with a scissor, but i mean it happened in a moment rather than in A bunch of moments and what is life but but just a series of moments we got to make the best and use them to our uh, smartest ability or whatever you know how they say that we want to work smarter, not uh, slower, slower and more difficulty. What kind of scissors were those that you're using? May they ask? Oh those uh were fancy scissors check it out boom. This is our brain of scissors right here. Fancy scissors they're rose gold, six inch, five and a half and seven inch are going to come out in the summer. We also have a texturizing scissors to match 160 dollars through fancy scissors. You can follow fancy scissors if you want to check them out. Just a very simple scissor for a fancy hairdresser, just like you just like you and then um, we start to see the shape really coming together. Now see it's giving us it's going to give us this little side burning piece too, just by kind of doing that slight diagonal forward covering their eyes. We'Re gon na cover their eyes, and then, when you pull this out, there's your guide, your guide falls away. Can you see that yeah and then we're gon na cut like on that same guide? It'S connected, but it's just you don't hold the guide in your fingers, like you do with the scissor, and you see by doing that slight diagonal forward and layering this because of the shape of the hairline. The hairline goes like this. Like you know, someone's hairline goes like that. So, if you cut this kind of evenly, then you'll get a mimicked shape of the hairline with uh the perimeter the layer creates. We bring this out. There'S the guide falling away, long movements of the razor short, too long, short long short long, just like that, if there's any long ones, you just cut them off, knock them right out, but you can see look at that. I mean we get immediately. We get this like really nice sort of shape, bring this out now on a doll. You usually have a really thick hairline the front. Hairline is crazy, thick on a doll, so oftentimes i'll end up bringing it forward and maybe just knocking out a little bit more of that weight there in the front. Just because a doll you know just i don't know why they make the dolls so thick there. In the front, but they do but yeah you see what that gives you. It gives you like a soft kind of um contour, it's not too too flat, and then we get this moldy feeling you could do it without the mullet and get more of just a standard pixie feeling we could do it with the mullet to get more of, Like a boho, uh, alternative kind of vibe, now, we've shown you how to create a concave shape from the occipital down that you could use either with the fringe or without then we're showing you how to connect to have things push forward, but still in a head-hugging Way see it curves and hugs the head and then it pushes forward. So you get all this softness through here now, what we're going to have you see next we're going to switch off, give these poor old hands of mine a rest and then ben is going to show you guys how to create a little bit of more round Shape through the side, building the weight rather than having to push forward having it push it back. So we'll close this up. That'S the nice safe way to hand someone a razor and pass it off to ben and then um. I guess you could use your own if you want by either way - and here we are we're back ben's gon na show us hello people how to connect this in. Yes, what we want to do uh for this side, you would normally want to do the sides. The same yeah most likely, but for this lesson, since it is a master class, we got ta get in everything that we can. So we want to show another direction that you could go. This side is pushing all forward. This side is going to be pushing back. So we're going to use a vertical diagonal section going back this way and remember guys if you have any questions for me or ben, ask those questions and we will pretend to have all the answers. We have some answers, uh, one of the things that you need to consider on this side. The first section is going to be the one that makes it so really. We need to make sure that we have. Since we previously cut this side, we have to make sure that we can use that as our visual reference to see how long we need to make this side, because if you make this one too short, then you're in big trouble you're in big trouble. Mister. So i'm going to lean it forward just a little bit the same way that jake just did i'm going to use the blade to go this way, i'm going to try to work this out in a short to long way, a little bit so that i save A little bit of that side burning part, and that way we can double check on this side and see if we need to shorten it in, and we do someone says um. Would the sides be cut at 45 degrees? Would they be cut um as far as the elevation at 45? I guess it just depends on what shape you want to make. You want to make it a lot heavier and build that weight even faster, then sure you can cut like upwards at 45. We'Re doing a diagonal back to kind of continue to hug the head, but really thinking about it, pushing back off the face more and not necessarily building up like a big wedge like firefly type wedge on there it'll still be pretty collapsed, all right, so we're really Cutting this kind of in a square way really and that's going to give us a build up of weight, but it's going to the diagonal back. Sectioning will push the weight away from the face. Exactly can the razor be damaging it can be damaging? Yes, of course, you can use every sharp cutting tool to your detriment. I like that, but yes, you can, if you're, using the razor in a way like this, that is gentle and very, very light pressure. This hair has been bleached and everything. It'S you know crazy white whatever, so it's been through a lot, but if you're, using a very light touch and gentle pressure and moving the blade in a consistent way, you're not ripping through it you're. Just really laying the razor in like the weight of the blade, is enough to do the cutting. Since it's a new razor. It'S sharp. We change it every time, so you can see that you can just lay this in and keeping the blade sort of parallel with the hair, rather than this way, this way, we'll scrape it listen that is damaging. So if you're scraping it this way, you are going to damage the hair and it's going to have those little white bits on the ends, and that is no good yeah. If you'd like to leave the blade a little bit more parallel to the hair and get it moving and then just rotate it slightly, it will begin to cut and that way it's making clean little cuts every time, and that is not damaging. That will just be sliding through the hair in a soft easy way. So let's take a look at that, starting to build that weight up. So if we look at it from the front here, you can see that we're starting to get that build and this side we're kind of pushing forward in a little bit slightly flatter way. It'Ll be even more noticeable in just a few more sections. So yes, continuing on as we move closer to the back, i do like to click just comb, this away, each section so that you can keep track of where you are and know exactly what hair you have cut already and you need to cut so i don't Really clip it a lot, but you can keep yourself organized as long as the hair is wet. It'Ll it'll stay up there. So, each time i'm going to move this right out from where it is lay it out and we're cutting in that square way. So we're short to long short to long short, to long short to long and moving right through this section, and you will see that when we hold this out, it kind of still has a square feeling. Once we have cut it all there, we go square feeling, but then, when you comb that out, it's giving you that round weight and then it hugs right in at the bottom beautiful. We have a few more people asking about uh the razor and split ends and damage you guys. Something to remember just like ben was saying is that a razor can totally cause damage in the hair, but so can a scissor. So can a clipper um? Yes, we are using a traveling guide for the uh gallant beauty who just asked, but anyway, fire yeah, fire and blow. Torches can also cause damage, axes, machetes and samurai swords which i've seen all of these cut hair on the internet. But the beautiful thing about a razer - you guys is that if you know how to use it, it can be a really awesome tool for creating a lot of different, interesting textures and movements and feelings without damaging the hair steps that we take to not damage the Hair would be to make sure you're using a new razor, make sure you're using light pressure. The right angle of the razor to the section and the hair is damp enough for the razor to work without causing that damage. So it just takes a little bit of practice. You can definitely, you know, cause damage, but if you know how to use it, it can be a beautiful tool to use, and it is really about a very light touch - light consistent movements of the blade. That'S what keeps the hair safe and healthy and happy safe, healthy, happy hair! That'S what we're looking for guys. A very bob ross approach, as we continue through the diagonal back sectioning, is pushing this weight away from the face to keep keep the face more open, but it builds this weight and then it hugs in right on the underneath very nice and then flips out, because We have this crazy, mullet yeah, you could have the mullet or not like we said, but i think it's just nice just to know the option of the mullet when you want to cut it because, right now we get asked for it a good bit. I think it's cool to have the fringiness at the bottom. Like ben. Has it sort of going on on his own head? You get it uh for free. If you just don't get a haircut in a while, it happens automatically. That'S that's my method. We are using a traveling guide, still yeah. Each one is pulled just to the previous guide and then cut in a square way through the back with a long movement of the of the razor, so that it does remove a lot of weight through each section. As we're cutting and we're just continuing traveling, i'm moving myself with each section, so you can see like where he is in relation to it is now standing in the back where he was before was standing over here in the front. So he's worked his body around. So that the guide is consistent as he goes, it is traveling it's safe to travel. Now the airports have opened, most countries are open. Now you can go anywhere, you want mostly someone asks. Can you make the like fringy part of the mullet thicker like, or is that a possibility, obviously not after we've already cut it, but if we were going to make it thicker? How would we go about doing that like if we did, if you wanted more here, i guess? Oh, you would just not have con you you when we were cutting this front section. It was kind of getting really tight through here and then just kind of disconnected the bottom to leave the skinny tails. You could just do that higher up. You don't need to yeah just take less out of that concave area, if you just held it at a total square here. You just wouldn't have removed all of this, but then that would be making this part a lot. Thicker. So it'd be like more clunky sort of like myself, but if you like it to kind of hug in like yeah, then you need to remove that where through there, we wanted that to to really like tighten up hug in the back of the head. So you get that kind of curviness you know, but you could definitely just leave more length there, no biggie yeah. So what we want to do to double check this there's not as real, not really a lot of cross. Checking that we're doing when we're cutting with the razor, but you the the cross, checking, is kind of visual, so you want to just comb this backwards and see if there's any clunkiness anywhere coming forward. You just want to be able to see it move and interact with each other and all be you know just blurry. You know you don't want to see any any chunks anywhere and even though this color is sort of crazy now you can see that it does kind of blend together in any direction and just for anyone who's just tuning on we're, showing you different techniques in each Panel to create a haircut of your own, so we should have first showed. Oh there's a truck going by here. You go, you go, give us a talk: okay, so yeah anyone who's just tuning in just to review what we've done so far. We took from the occipital down vertical sections and cut short along like this concave, which gives you a flatter feeling in the back with this fringier um perimeter on it. You can see that gives us a really nice, even like fringy perimeter and then we're showing you different shapes that you can make. So let's say that you want your pixie to push forward towards the face and be soft in the front. You can start in the back with a vertical diagonal section, which is what we did on this side, and this will naturally have that feeling of moving forward. You can see that it just very easily wants to push forward, or if you wanted your pixie to push back off the face, you could come to the front with a vertical diagonal back instead of forward work from the front to the back, and you get this Push back off the face like that, so one is sort of building in this way and one is sort of collapsing forward in this way. So, whichever one you prefer, you can mix and match, you can do the same thing on each side. You can do exactly this and get a slightly kind of asymmetrical, asymmetrical distribution of weight there, i'm just going to go ahead and bust out ben's razor. Now we're going to show you um two different ways to do the top a way to like connect in the crown and the sides and then a way to change the fringe. I think we could even work a little curtain fringe right now, curtain fringe, which is um. This will be more of like a um. What'S it called when you have short curtains, i don't know like a like a duvet. Well, that's on the bed. Oh ira has come on and said: hello hey. I was just talking about you earlier. We were talking about having some tails and stuff and i say that ira would have some tails on here. So now, what we're going to do? You guys? We'Ve shown three techniques on the side: uh diagonal backs diagonal forward and then concave vertical sections. So you can use those you can mix and match those now. What we're going to do is drop down the top literally you could be like. Oh i'm done. This is the pixie. You can see some pills speaking of another tail, there's one right there, you could raccoon stamp. That thing out, if you want, but what we're going to do is connect things in a little bit a little bit more so from here we're going to take a crown section. So just literally come across that separate out like really thinking about. What'S going to sit in the back of the head naturally, and what will sit in the front you know, so i don't think anything more than that unless you're forcing it to the back is going to go there thinking, maybe slight apex area to the crown we're Just pushing that to the back now we want to connect that in so. Let'S clip the rest of this up, so we're just mentally focused on just the back. For now from there we're going to subdivide this out again down the center just like this and then take horizontal sections dividing it again, you can clip this up. If you want, i think it's totally fine, just to kind of have it fall out like that, then we're going to pull this out we're using this crown as a guide. You see this. This is our guide right in here at the crown now we're going to use the flat of the razor completely down at about 45 degrees. Maybe not you don't want to get too low, because if you get too low it's going to be too shelf-like, we got to almost pull it a little higher, but maybe slight 45.. You can always take some out where, instead of working like this, like, we have been we're going to lay this down flat on there and just sort of lean this in a teeny bit and with very very light pressure. We'Re going to start to skim this weight and length right off only working with what i can hold comfortably and have good tension on in my fingers. We'Re skimming we're skimming or skimming, and then you can see that will like very nicely like melt that in to what's underneath. So you get this kind of visual connection that nice little kind of blurry visual connection there and this doll it had a base melt on it, which i think is going to just be interesting. We'Ll get some creative, some creative color on it. So again, now we're going to keep on connecting. This is a stationary guide. For the first time of this haircut, we've got a stationary guide pulling this out, i'm looking for. Where is my guide? It'S basically right below there and we're going to skim so we're removing weight and length, at the same time short to long short to long charge, along light pressure right off the top kind of cutting the square back right now, so you're going to get a little Increased length here in the corner, which is okay, now we're combing that out, you can see it gives a really nice seamless blend into the top. It gives you this really kind of soft um. You know wispy airy kind of feeling, that's what we want and then we're just going to keep on bringing that down connecting it in so pull this out. Let'S see it from this direction. Another way that you could do it like, you could kind of tip through it like this. If you wanted it first like work through it to lighten it up. Some, if you wanted to like be like. Oh, let's have some big sections come out for more texture and then come and plane it through. You know which i think on a person at the very top section. I don't often do that, but on a doll, because this again like right here, all the hair is sewn in so thick, so we can take a little more out there. So now, i'm just checking for that movement is it blending. In nicely i mean, i think, we're getting a really nice kind of feeling there. You can see you get that increased length here in the corner, so we've got our concave mullet feeling and now we've got this increased length through here in the corner. That can we can work into the sides or take off we'll do the same thing over here horizontal. You could do side to side if you want, or you could just resection and grab a little piece like it doesn't really matter it. Doesn'T you can do whatever one you want bring that out? Here'S my guide slide slightly past it then i'm going to lean this razor in a teeny bit short too long short too long, we're skimming off the top, so we're taking weight away until it gets all the way through which then it takes a length away, and We check for our guide still looking good we're going to be pulling square back. I don't want to work all the way around this, because i don't want to take the corner off. Keep that in mind when you're doing it, i'm intentionally keeping extra length here in the corner, so by doing that, i'm just pulling back rather than working around, i'm just going to pull it right back we're bringing this to a kind of a light. 45 shallow 45. It'S about a 38 yeah, maybe something like that, and then we're just taking this out, taking this out again skimming off the top removing the length and the weight at exactly the same time, something that is difficult to do with a scissor not impossible, but difficult to Do with a scissor now we'll bring all this together. Just like that making sure i have good clean tension. I want good, even clean tension using the fine teeth. There'S my guide right over there. You can see it falling out of my hands and then we're going to skim that away skim that away so we're removing length and weight all at the same time until we've connected those two now again uh you can even tip through after the fact, if you Like sometimes this crown just gets so heavy, so i just like to do a little tipping through the crown here on a doll that you may or may not do on a person. Keep that in mind. It really just depends on the density of the area in which you are working, so we got increased length here. I can check for my balance. That'S looking pretty good, we can see like. Are we getting that kind of like curvy moldy vibe? Actually, the color is starting to look cool. I think it's like starting to work in um. You know the color was not part of this. I think honestly. I think it made my little teeny so we're going to grab a spray bottle. If i left over here. Of course, it's my halloween spray bottle. It'S a scary, ghost skull. You only use it for would this work on curly hair, uh yeah. It would, but what you would have to consider is the uh, like a recoil of the curl, might shrink up a lot. You know, depending on the formation of the curl, so you have to think about that and maybe oftentimes i maybe don't make things as skinny on the ends with curly hair, because i don't want it to get too frizzy or wispy. But you know definitely could work for sure. I think this looks a little heavy from what i did underneath. So i'm just going to take that in a teeny bit there you're right what's the best way to reduce weight in the hair with the razor there's. So many good ways to reduce weight with the hair with a razor. That'S a great question that you asked who asked that question that was, of course, dee senga, the hair always coming through with all of the best questions always always so i'll. Show you a few different ways to do that. This is not part of the haircut now. This is just um an example moment, 4d. So there's a few different ways we can take weight out with a razor one way is tipping where we can lift to just the tip of the razor and then very lightly work through like this, you can see it starts to like nibble out a teeny little Bit of weight, it's it's like can be aggressive or can be very, very light, and you can see what that does. Is it takes out some of that weight? Making this section look a lot skinnier. You can do some more bold kind of tipping for more. You know extreme weight, removal and definition, so you can see we get some bolder sections of weight, bringing this hair together at points giving you slight more definition. You could also do some skimming or planing or using the flat of the blade to take out weight at the same time, all the way across the section you can do that fast or slow like this would be my like, probably my like regular normal speed of Doing it, you can see just slowly skimming out that weight until it disappears, so that's pretty fun right, pretty fun right! Sorry, i'm sorry anyway, we're gon na take this out. I get too excited and then we're gon na use a guide from the back here. That'S why we have that increased length in the corner, because it was back here, i'm bringing it now to the side. I'M gon na use that as a guide, maybe we'll come up over the top for this and then i'm going to start cutting this still in a bit of a square way, with a very open blade. I want to make sure that i'm not getting too long. I don't want this to become a bob see. I think this is still a little too long like it curves over too much. It feels like a bob. So what we'll do is take it a little shorter, coming up like this and then i'm using a long, long long movement of the blade to get a lot of softness in there on the side. That'S much better, bringing this kind of flat out. I don't want to drop it too low because again i don't want it to look too heavy too bobbish. I want to feel like it's pixie and i'm just working this around just like that. We got one little extra long, one there you can see. That starts to connect nicely into the side visually kind of blends together melts together. There, we'll probably only have a couple of sections of this so just going to keep working until you've run out of hair that reaches you could work to the very center or you can work your way across. You could even start it in the front. Now that you have your guide established because you're kind of cutting a like a even square shape, so you work in either direction pulling that out. If you want to take out more weight, we could plane that in just a teeny bit right through there and comb that in to see, are we getting a nice blended connected feeling, maybe just a little extra weight removal here in the front cool and then we'll Do the same thing on the other side look out and then we'll show one other way to connect in the top and the bangs or the fringe, whichever one, what do you guys? Call it bangs or fringe quick quiz bangs are fringe go so here's our guide again from the back. We got our guide, we're going to bring this up on this side. The only difference is my razor is now going to point up towards the ceiling, because i'm working in this direction using long motions to make sure this is very, very soft. I want to make sure this gets really blurry, really soft, a lot of fun texture. No one took the quiz, no one's, taking the questions. Oh there's, one fringe range. We got one from anna banks. Oh and fringe is up two fringes more. We got two more fringes: oh and a fringy, and a fringe fascio bangs are back, things are back, bangs are back in style, everybody, oh wow. That was what an incredible thing. What a rush we're still about, even i'm, totally digging it, though you can see, we've got our nice connected end feeling through the sides. Now here's our diagonal forward side, i believe, and then we've got that kind of softness. You can see it naturally, once you push forward in a very soft way towards the face. We'Ve got our nice melody fringiness through there and now what we're going to do again to give just these old these old gams in mind. These stems on my arms, a break. We'Re going to have ben come back in and show us one way to connect in the fringe and to layer through the top your razor's over there, everyone's very particular about what they want to use yeah, i'm the same way like i want to use this comb. A lot of the time right ben wants to use this comb black. It'S bigger this one's green and it's smaller yeah all right. So you can see. We'Ve got a pixie, it's there. You could stop right now. Really, if you didn't have these pieces, you could stop and call that and that that's good what what we have been seeing a bunch of are these kind of little curtain fringes on on the short hair, pixie thing you know, everybody's been doing that a whole bunch And we do it a whole bunch too um. The way that we kind of like start with that is is find a little triangle section through the front i like to find where the front hair lives. The fringe section, i think fringe, is what we maybe all settled on. We had a lot more fringes than did me. Was it so fringe won that debate? Okay, it did, i think it did. I think you sound more cool or something like that when you say that you sound more uh official yeah. So i'm going to split this in half and i'm going to find a length for my fringe by taking a little horizontal right there and i'm going to work myself from the center out. I'M going to use the back part of the blade so that i am not giving her a free nose job because she did not pay for that yeah we're going to charge more for that yeah. If you're cutting with the top of the blade, then you're going to be bonking into her nose right here with the back part, and that is no good. So we want to think about that use the bottom part of the blade so that you're exposing less of it to the hair or to the skin and everything and you're working that, in a short, a long way, a little diagonal down short to long. I'M going to do the same thing on this side. We have a question here: what's the best way to introduce a client to a razor if they have had a bad experience with one of the past. I think that's a great question. We'Ve all had people say: ooh, don't touch that razor to me. You monster. I had a bad experience like most deaf says in fast and the furious or something like that. Maybe i don't know i think it's with dogs uh, but anyway he scared dogs in there. Oh, you know what it is: it's um it's um ocean's, eleven. Oh there you go well good anyway. Razors are great too. I think the thing is um. You are the thing that we usually get into is we will say you know you may have had a bad experience with the razor cut in the past, but it is not necessarily the razor's fault. It'S mostly that's very true user's fault. They, like we mentioned earlier. You can do a lot of bad stuff with the razor. You can really break the hair off by scraping it like this and stuff like that. People sometimes will just be whacking it through there making a big mess. You can make a big mess with the razor for sure and the the way that i kind of drive that home usually is. You can think back to sometime when you had a bad haircut with scissors. Also, most likely very true you could you don't blame the scissors, it was just the person that was wielding them. That'S that's the problem, so i think that if you can use the razor in a competent way where you understand what it's doing and you are not exploiting it, it really can help you a lot and it can give you a very beautiful, healthy, soft result that Will not leave any damage in your hair, so it is, we love whacking it through yeah. You can whack it, and that is fun, but sometimes that does not leave the hair in the best shape. Oh so we're already starting to get the shape. You guys have like a little bit of a v shape there or uh, and it should push out really nicely a little pyramid. If you find that it's not, you can also come in on the back side. You can do a diagonal back this way. You can scoot yourself over to here, bring it the opposite way and you can use the tip of the blade, as jake did a minute ago and just kind of soften out just a little bit of weight through the underneath, because when this hair sits, that is Going to be underneath, so all the texture will live on the underneath and the top will still look smooth. If you come through like this and do it that also works, but you will be leaving these little short bits on the top. So sometimes that may not be what you want. You can hide it. So if you think about what hair is going to live on the top, you can come on the opposite side of it and do it on the underneath, so that you will be doing. Maybe ghost layers is that you think that's what that means. I'M not sure you hide. It'S called ghost texture. We just invisible coin that phrase right now. You see that fringe coming in really beautifully ghost picture, oh look and she has some real eyelashes. Anybody seen that on a mannequin lady blank blank, these are too long, i'm gon na shorten them yeah. I also we love using a razor on all sorts of different textures. There'S just you know different things you have to think about. As far as like you know, what how much weight are you taking out? How much pressure are you using how what what sort of dramatic difference um of like short to long links, are you creating certain textures that may not be the best others, it's great, so you can use a razor on everybody. You just have to really think about what you're doing and why? Yes - and there are maybe some techniques of using the razor that are not appropriate on every type of head, but i think the razer as a tool you can find some use for it. If you really want to, but sometimes it's not the smartest or fastest, like the reason why you were using it earlier, and we were saying because it makes it easier than doing the same result with the scissor, you can get a very similar result with a scissor. But it's harder and it takes longer so our whole goal. The reason why we pick it is on on a time when it would be sensible and just make our job easier. So that's the main main thing: we're trying to land here and a lot of time for these soft short pixie looks especially on a texture like this, the razor's the way to go. That'S the way we feel so i'm just continuing on with these kind of vertical sections and bringing them all the way forward, just to just blend the top part of the all the way back to the crown and i'm just kind of again just kind of using The flat of the blades to sort of plane off a little bit of that extra weight to make that lay in, and you see this real cool fringy bit, i mean look at the fun shape. We get all of this concave melody action. We get this disconnected kind of vibe here in the side we get some soft little corners and we get a kind of kourtney vibe fringe, which is just so cool. I mean i really love the profile of it is so beautiful as well, so we're looking good. I think um we can maybe i'll go over a little bit of if you wanted to come in and detail a teeny bit with a scissor, because we can see like some someone says, razor and dry hair means they cut. Oh yeah, i think you're right you're sort of right. We don't really like to use a razor on dry hair. A lot of people do and get cool results with it, but i think you just really need to know exactly what you're doing we prefer damp to wet hair is best. I love this shape is really really fun. It kind of also reminds me of another person who you may have seen on her brain named brianna. She is a friend of ours and has a very iconic look very similar. I think to this fringiness right here without the mullet, but then um here we'll show you. Let'S say that you're kind of new to using the razor a little bit and you're worried that you've put in some split ends. So all we have to do is you? Can come back over it with a scissor and look for like let's see? Is there anything? That'S like a little too skinny like? Is that a little too skinny? Maybe then we can come in and just tighten that up just a little bit.
Comments
annie fredrickson: Is planing the beginning part of your cutting stroke? Meaning you still keep the blade parallel to the hair, but don't follow all the way through?
Carol Reynolds: Hi guys, are you using a feather type blade or a smooth one. I have used a razor for 30+ years and love it, I'm glad it's becoming popular again. TY
HWH: Thank you dude...this gives me an idea on my next haircut...
Lourdes Flamenco: Muy bien
Carol Reynolds: You guys are awesome !!!!!
Sue Bloom: Do you blow dry the sides forward or back? What is the name of this haircut?
Vivo Phone: So beautiful haircut
Vera Mici: Where is your salon located...you are the BEST !
Veanus Snapp: Can you blow back this hair style, having different look for Women too?
Veanus Snapp: Can you blow it back to if you want a different look ?
Rosemaryiao3gz2 Wolfenbarger: Fringe