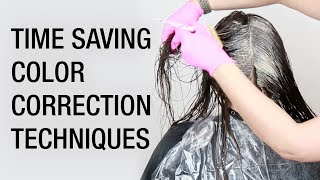
Violet Hair Color And Pixie Cut Transformation | Kenra Color
In this video, we'll show you a pixie bob hair cut, coupled with a violet color palette and dimensional gradation color application.
We'll teach you the entire hair cutting and coloring techniques, including formulas using all Kenra Color, so make sure to watch until the end!
You can learn more about Kenra Color Violet Violet series here: bit.ly/VioletVioletSeries
WANT TO WATCH MORE TUTORIALS?
Watch blonde to brunette hair color transformation video here: https://youtu.be/lcjF7jiVtyg
Watch HOW TO: Babylight Level 1 Hair: https://youtu.be/pCd-QpgVBic
If you enjoyed this video, make sure to give it a thumbs up and tell us in the comments below what you'd like to learn next!
SUBSCRIBE NOW: http://bit.ly/KenraProfessionalSubscri...
VISIT OUR WEBSITE: https://www.kenraprofessional.com
About Kenra Professional
We are a purely professional brand dedicated to understanding and serving today’s stylists. Our passion is developing best-in-class innovations, delivering superior and reliable results. Kenra Professional strives to elevate the stylists’ artistry and craft.
CONNECT with US
FACEBOOK: https://www.facebook.com/KenraProfessi...
INSTAGRAM: https://www.instagram.com/kenraprofess...
TWITTER: https://twitter.com/Kenra_Haircare
Violet hair color and pixie cut transformation | Kenra Color
#violethair #kenracolor #haircolortutorial #pixiebobcut
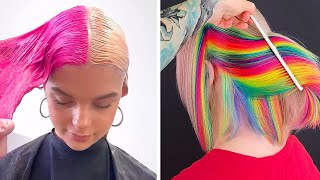
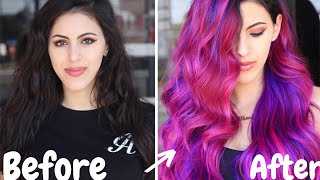
In this video we'll be showcasing a fresh, exciting client transformation, showcasing a pixie Bob haircut, coupled with a violet color palette and a dimensional gradation color application to stay up-to-date on all of our educational videos, make sure you subscribe to our channel and hit the bow before We get started to learn more about camera. Color click, the link in the description below. First we'll start with our consultation. My client has fine textured hair and a shorter length that comes just above her collarbone to really change up her look we're gon na do a full color cut and style transformation, starting with her cut we're gon na give her a fun fresh, short, pixie bob. That'S really gon na bring out her personality and her style additionally for her color, our desired palette is violet, so taking a look at her starting canvas, her natural level is about an 8 in the front and a 7 towards the back, while her mids and ends Are closer to a 9/10, this makes her a really great canvas for violet and to create some contrast and depth, we're gon na formulate with a 4 and 5 at her base, and then level 6 and 8 throughout her ends to really give that dimension and pop. Let'S start our transformation with our clients, haircut, national artistic manager, Oliver short-haul is gon na start by doing a really nice short pixie bob. That'S gon na accentuate her facial features and really bring out the best in her natural texture. The haircut is setting up our canvas for color to ensure that there's a ton of movement and that each accent throughout the color will really stand out. If you want to see more videos in education on cutting make sure to comment below now that we finish, this amazing haircut, we're ready to formulate an apply, color I'll, be formulating with camera colors VB series, which provides a demi-permanent range of true violet shades. This gives my clients the opportunity to have a wearable, yet vibrant violet end result for my client I'll, be using all three of our BB series shades formula. One is for Vivi mix one to two with nine volume. Formula 2 is for VV + 6 BB mix. One to two with nine volume formula 3 is 6 VV mix, one to two with nine volume and formula 4 is 8 VV mix one to two with nine volume, all of our BB shades are demi-permanent, making them a fantastic deposit tool for someone who has previously Liked hair, additionally, our my permanent shades do not contain ammonia, which will help maintain the integrity of the hair and offer a healthy, high shine and results. To start my dimensional gradation, I'm gon na work in 3 main areas on the head and section the hair on damp hair. The first area is going to be in the bottom Nate portion of the head. Where you'll see the most steps, then we're gon na have softer depth towards the parietal Ridge of her head and throughout the top. I'M gon na create a teardrop section with a point working off of where she parts her hair, where we'll have some intense, vibrant accenting. This section is going to be rounder towards the back to really complement the cut and the natural shape of my clients head to begin. My application I'll start in the back nape section of the head. What I really want to take a look at to complement the cut best is where the progression of length changes, and there is a slight disconnect from this nape area, to where this top section starts. So that's where I'm gon na start with my base formula, which is the deepest formula R for V V, a pro tip anytime, you're, applying color to a fine hair clients. Hair line is to make sure you're being very gentle to just feather in that color, because this is vellus hair and it is a little bit more fragile and fine. It doesn't need to be over saturated so to avoid unintentional, staining, just make sure you're really technical and light in this area to continue my gradation. Now I'm going to work in the next section applying my second base color, which is equal parts 4vv with 6b, be a pro tip anytime you're. Applying a base color for a color mount on shorter hair is to make sure you apply very little to the base. Leaving you plenty of room to create your mouth or gradation as I'm working my base through this entire section. One thing I like to make sure to do is take the end of my tint brush and work it through. These ends just continuing to make sure that all of these are nice and clean so that there's no bleeding and no unwanted color on these later ends. Where I want my lighter accents now that I've completed the base application in this second section. One thing I want to point out is that I've totally left out her hairline here so rather than basing this with my deeper formula, I am gon na use a lighter formula because they are so fine and it is a little bit Bellis. My next formula, I'm gon na use, is our 6vv, which will melt and gradiate from this 5vv that we've intermixed and created a pro tip anytime. Your color melting on finer textured hair is to work in larger subsections and, additionally, I'm gon na use triangles. This is really gon na help me make sure that everything is evenly saturated and, additionally, help me work really cleanly to make sure these ends are all saturated properly. With the right formula before I begin, my color application of my second accent I do like to comb through this base tone just to bring it down a little bit. This is really gon na help create that progression in that soft transition from one color to another. Anytime, you're melting, it's a really good idea to over emulsify colors together. So I do like to take my fingers and really work these two colors through to create that perfect, gradient, a pro tip to ensure optimal blending and a really seamless transition from one color to another is when working in triangles check all three surfaces, including the underneath. So I really like to lift and over direct my sub section working each color into one another, just to make sure everything's perfectly blended and evenly saturated for this overall end result. Our target is to really create a softer gradient if you're looking to create a higher contrast gradient. That'S where your application may not be worked through quite as much but anytime you're encouraging softness. You really want to make sure to work through that color as much as possible to encourage the transitions to be really seamless on fine hair, particularly when you're melting one color into another. It'S a little bit easier for the transitions to get lost so to make sure that we're maintaining a nice gradient just keep everything really clean, anytime you're working with a demi-permanent color, especially in this way, it's important to remember to maintain a consistent, moisture level just like When we're cutting hair, moisture level can totally change the end result, especially with color, so make sure that you're staying consistent so that the end result is fluid. Now we're ready to move on to this top teardrop section and just like I did in the below sections, I'm going to start by applying my base at the base here, we're using our 5 V V, which we intermixed four and six to create and just like Below I'm gon na make sure I'm really focusing on creating a little bit of a shallow base so that I have plenty of space to create that progression. Keep in mind on this top teardrop section we're really incorporating some of our lighter accents. So here it's super important to keep everything clean and make sure there's not any unwanted bleeding. I like to really just recommend to take your time working through this section and focus on keeping each independent sub section really clean as we progress towards the front hairline. Remember that we're gon na leave that area for last, because the hair is veles and very fine, so it's gon na absorb a little bit differently, leaving it last is a really good idea to ensure it doesn't pull too dark. Now that my base color is applied, I'm ready to start my mounts. I'M gon na continue working in triangular subsections, but my lines are gon na, be working at a diagonal towards the front of my clients head again. Diagonals encourage softness kind of similarly to when we foil working in these diagonals is going to ensure a really soft inner sole throughout these subsections, I'm going to be melting, a couple different formulas just to create the perfect amount of dimension and pop. My first formula is going to be that 6vv and that's gon na be my depth formula that I can pull through. Some of these ends just to encourage that depth and create a lot of movement, and then I'm also going to be melting it into our 8 V V, which will be a nice light, vibrant pop of color, just like I did on the bottom, I'm gon na Start to comb the space down a little bit to encourage soft progression and I'll diagonally divide this in half to create my first two triangles in my first subsection. My gradient is going to progress from that base 6 to our 8 V V, and this is where the application gets really artistic, so you can be creative and very visual as far as where you're putting your duct pieces and where you're putting your lighter pieces. This is also where it really helps to have a really nice foundational haircut to start because you know wherever the hair is moved and placed, it's gon na create a really soft diffusion of color because we're working with a violet palette. It'S really important in formulation to remember that your canvas will totally dictate what levels you can use in. Our violet series make sure that anytime you're using a violet, the hair, is properly lifted so that that violet deposits and doesn't just neutralize so, for example, if my client wasn't lifted to a 9/10. I really couldn't use this 8vv without it just neutralizing to create a softer blonde if you're looking for optimal vibrancy, pre lightening is always a great idea anytime. I'M doing freeform transitional gradients like this. I do like to kind of take each subsection and map out where my partings are going to exist. That way, I can make sure my spacing is aligned with the length of the hair and the previous subsections that I colored to really create that beautiful movement in the end result on this subsection. I'M gon na pull my base down a little bit further, just to create some different progression from the previous sub sections and some strategic depth and then on the ends. I'Ll apply that 8 as we're approaching the front hairline. This is a great opportunity to create a depth piece just behind where we're going to have brighter pieces. So what I'm going to do is actually create the 3 fórmula progression going from the 5, the 6 to the 8. That way, her ends are still bright, but you have this interior depth to really allow the hairline to pop. Now that we've reached this front face frame piece, I'm gon na make sure that my progression is starting from our level 5 base cascading into this 8vv. This is gon na give her a really bright pop of color right towards her front face frame, which I think will look perfect with her haircut to finish off our application. I'M gon na apply my 8vv to her Veles baby hairs at the hairline, a pro tip. I like to speak to is always use a clean brush when you're working at the hairline just to ensure there's minimal staining at the scalp, especially towards her face, and to keep your application really clean. Now that we've completed our full dimensional gradient, color application we're ready to process our clients hair. If you need a reminder of how long can recolor demi-permanent processes just open your camera, color voice, assistant, Alexa, open camera, color welcome, color, processing time, damn I know that's it. Okay, thanks for using blue color pathan here's our finished and result from our fun, exciting client transformation. You can see this haircut really brings out her facial features and her fun personality and the color complements the foundation. If you loved this video, you want to see more make sure you subscribe to our Channel and if you have any ideas on additional education offerings and videos you'd like to see make sure you mention it in the comments below
Comments
Collin Aubin: The color came out beautiful but I’d love a more detailed video on the cut!!
Deanne P: Love it! Yes to more cuts. She looked so fresh with a slight edge LOVE
dead acc bye.: that came out really pretty !! your doing great :))
Alida Cesena: Absolutely gorgeous❤I love the colours and techniques❤
Preston Reitsma: More cuts please that cut was awesome!
Leticia B: Beautiful!
Nikochic: Yes, I will love to see more videos on cutting
Martha Swanson: Beautiful!
Marketa Jilkova-Dumas: Amazing transformation
Makayla Shaffner: Stunning
Cưới hỏi Xuân Quý: kiểu tóc rất đáng yêu
J St Anders: The colour is beautiful.. Wow..
lisa kosinski: Great cut!
Ruthcarla Dore: Beautiful
gypsy violin: More cutting, please!
gypsy violin: Why did you apply this color on damp hair and not dry?
Salon Bellissima: Beautiful color ! Where can I purchase the kenra Alexa?
Lorraine Van Loo: I have the same color now. But it has home darker in my hair
vsaluki R: I've never seen any woman that looked better as a crayon head.
Victoria: More cutting videos please
Angelise Pierre: Is it just me or does the model looks like she's half asleep while she was talking
acotojest: Looked better before the cut
Kendra T: From aspiring Karen to the inventor of the next anti manspreading chair.
Kacie W: Sorry but are you sure that this girl isn't a mannequin that can blink?
Angel Perez: *The classic feminist haircut*