Mould And Style My Pixie Cut At Home 2 Ways|| South African Youtuber || Bontle Phore
Hello I come back
Happy Spring
I hope you enjoy this video
All the music in this video is from a reputable subscription music site Free for creators
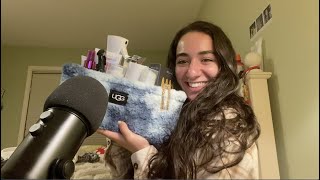
Hello there darlings and welcome back to my youtube channel. My name is vince and thank you so so much for coming back to watch another video by me. If it's your first time here, then a very warm welcome to you darling. I'M super excited to have you here um. I hope that you'll stay long enough to eventually subscribe and join our lovely family um. Today'S video, we are molding our pixie and building styling wrapping our pixie at home. I'M giving you a few tricks and tips on how to sort of maintain a pixie um at home. I know i know having a short haircut like mine or having a pixie like mind is literally high maintenance. This, i feel, is literally the most um right after an airflow, the most high maintenance hair that you could ever have, but i'm sort of i'm sort of showing you how to easily manipulate your hair when you're at home and what it is that you would need Sort of maintain and style your hair at home. If that sounds like something that you really want to see, please do continue watching. Let'S jump right into today's video, i'm going to start off by showing you everything that you need just in case. You want to follow along on this video, i'm going to show you all the products, as well as all the tools that you need to achieve, or that you need and we're going to start off with the most important thing, which is mousse um. You need the moves to wrap and set your hair, and i love this one. This girl is also hard to find um. I don't know i don't know, what's happening with you guys or what you keep selling her out, or maybe you guys understand her magic. Just as much as i do before i cut my hair into a pixie, i had natural hair short natural hair. That'S because i'd cut my hair before when i had a big flow, but that's besides the points um. I i learned in my natural hair journey that my hair loves olive oil, and this is particularly why this hair product is for me. I know there are people who are um for coconut oil. That'S not for me. My hair breaks like crazy, but i've come to learn when i was looking for this product um online and this product also has a coconut oil variant for the girls who are pro coconut oil, and you can look for that. One, and that is the orange olive oil rap seed mousse. You can't slightly fix your problems when you can, but it's not going to come out the way it should it's not going to be sleek. It'S not going to be made. It'S not going to be set. So you need yourself a good mousse and my ultimate favorite and the one that i stand. The most is this um ors olive oil website mousse. We will know the magic i've already explained it to you. I like healthy hair - and this also helps and aids, and keeping my hair healthy because of the um, the fact that it's olive oil infused and then some more olive oil to keep to give your hair a healthy shade. I use the olive oil or is a nourishing sheen spray. I use that, obviously, after i've styled my hair just to give my hair a nice shina, also because i'm a big fan of healthy hair, whether your hair is short, whether you're wearing a wig, whether your hairstyle keeping your hair healthy for me is very important and Therefore, i like this, every true heat, protectant serum. It is infused with vitamin e and argan oil, and that is why i like to use this, and i know a lot of people - don't use a heat protectant when styling their hair and girl. That heat will cause your hair to break anyway. Let'S move on to tools that you will need to achieve this number one. Should you not because i know it's tough to find and wrap wrap strips in sme, but i just see that on take a lot. But if that's what you like to use, you can check that out. If not all of us have either a d-rag or a satin hairdresser, i have this dude okay in black. You need this. To set your hair, that's number one um! Should you want to start your hair? When um you haven't washed it, you will need a spray bottle with water and, if you're like me and you believe in healthy hair, put some leave-in conditioner in your water. So that's what this is and then you're going to need and then you're going to need a wide tooth comb. I have these, i'm sure all of us or a lot of us have this at home and then you're also going to need a red tail. Comb. Um i just remembered that our fave youtuber causes a red tail comb, but yeah we need a red tail cold. Then you will need a straightener. I have this one by safeway. I'Ve had this for years now i use it for my wigs. However, i entered the market for a new one and because i am in the market for a new one. I came across this one, which is what i want to plug you guys with. I got this from clicks and it's the cutest little thing on the planet. Now, depending on the cuts that you have when you where to get your pixie some parts of your hair, maybe none normally um. Some parts of your hair will not take to this, because this is too big and i was looking for a smaller straightener until i came across this baby. Isn'T she the cutest thing on the planet um? This will work for the smaller parts of your hair or the shorter parts of your hair um. As you can see, the plates are really small, i'm not sure if you can see, but this my hair i've got a small hand. So this is my hand and that's the straightener. Can you see how small she is? Isn'T she the cutest thing on the planet, so yeah, you're gon na need that for the shorter parts of your hair um and that's literally all you need. So, let's jump right into styling. I haven't done this in ages. So excuse me guys. You may see me looking everywhere, but the lens. So i don't know i don't know. What'S going on i'm trying to get my my roof back? Okay, let's get into styling. Should you like, i was saying: should you want to style your hair um without having it washed or in between washes? I suggest you get yourself a spray bottle with a water, conditioner and saturate your hair with that just to try and protect my hair strands. I like to use water and conditioner just like that, once your hair is wet, you can go in with no loose um. You can go in with your mousse, but i like to coat my hair out first, before i put in the loose for the first style that we will get into the heatless style. You will need to part your hair in the opposite direction that you usually like. Your pot to be so i like my pot to be this side generally, if i'm really moving, and i want a side part, this is the side way my part will be, but for this style you need to party on the opposite side of where you usually Like your cotton to be so, we will do it on the side. Um. Excuse me. If i'm not looking at the lens, i am trying to see myself in the mirror. You will need to purchase your hair on the opposite side. Okay and you can go in with your red tail just to make sure your part is clear just like that, trying to touch your hair with one hand, it's actually tough, just like that, and then you can go in with your mousse like so mousse is very Messy guys, i'm sure all of us know this put the loose on your hair, like so just to make sure that even the hair, that's underneath get some of that goodness, just like that, um don't be afraid to continuously go in with your nose. This is the most important stage i feel when it comes to styling your hair, and just like that, just like that, keep flattening it keep working. It just make sure you take your time and you sort of mold your hair in your desired style. Okay, i think also it's uh, almost mandatory for your hair to sort of, and for you to sort of what do you call this? Lay your edges or sort of finger wave. Your edges like this and make sure you take your time and hold your hair in your desired into your desired style, because this is the most important stage right. It sort of sets precedence for watch your hair or how your style will come out, and it can be a little difficult to take your time, make sure you and it's a little bit harder to style than long ahead. So take your time once you've achieved your desired molding. Sorry guys down here, it's just the mirror. I hope that you can see how you know what it is that i was doing. Go in and flatten your hair with your hands like that, okay and then you can either pull out your wrap strips or your jewelry, with your satin head, wrap and put that over your head just so that your hair can sit. So let me do that quickly. So all right and now we need for our hair to dry and sticks in that particular molds that you've sort of done to your hair. If you're in a hurry - and you want - you - don't have time to sit around and wait for the air to dry, you can take your hair dryer um and put it on a low, low or medium heat. Setting just go over your hair and over your duke or your your head rip with the dryer just so that it helps and make the the drying process faster. But if you're like me - and you aren't necessarily going anywhere and you have time on your hands, then you can just sit like this until you hit your eyes but another. Another thing that i am looking forward to purchasing is the hooded dryer. Once i get that, i will show you guys and plug you on that too. I don't see one that clicks. I can't remember how much, but that also helps your hair dry quicker. So if you're trying to style your hair you're going to an event - and you don't have time to sort of wait around for your hair to dry - you can either use that hair dryer or that hooded dryer that i am talking about. I might just put an image of that here. Just so you see what i'm talking about but yeah. For now we wait so i'm going to quickly go off camera and beat my face and then i'll be right back once my hair is drying and we can continue with styling okay. So now that our hair is dry, i'm back and my face is a little bit beat we're gon na. Take our wrap strips off by cutting them off all we're going to take our satin satin um red off. So your hair needs to be dry yeah, just like this, and then what you do. Is you take your um, your comb and you sort of fluff it out? Okay, but because we are doing that, heatless style that i'm trying to show you. This is how you achieve it now remember. I have said that you um sort of punch, your hair on the side that you don't usually um pot, your hair, the opposite side that you like now you're going to slowly comb your hair in the direction that you actually like your parting to be so slowly With a wide tooth, cold comb, your hair, like this like that, hold this - let me find my small brush you're coming out like that, and then what you want to do is move your hair in the direction that you actually want. Your pot or your your side, sort of part to be slowly. What you're going to do is: okay, just get your hair out of the mold and slowly move your hair in the direction in which you normally part your hair like. So. This is an easy, quick and easy sort of heatless style that you can do. Should you not have time to um, should you not have time to curl your head? Slowly, move your hair in the direction in which you, like your parts or your just like this. Like so is like so so, and have you play how you words, if you normally, if you were doing a side pass like so, should you want bangs, i guess you could easily just comb it into um, but that is just like so and hahaha. So so, don't be afraid to use your hands just so the hair is how you would want it to finish the hair so that it sets how you would actually want it to don't be afraid to use your hands just keep going. Keep it fluffy by using your wide tooth comb, also um fluff out the hairs that are laid flat with your white toothpick finesse, the hair, to set how you would like it um. Also, when styling your hair, i'm the kind that likes my hair to not look too dumb. I like it to look like it's a hairstyle, but not too eyelashes just came out of um the salon chair kind of for me, the pixie looks best the day. After always looks basically after you had it freshly done, that's my kind of pixie. You can always just lift these little. What you've had me flat just to give yourself some shape and just like that, not too neat but styled, and that's how you could quickly, without any heat style, your hair, but today this is not what we are trying to achieve. I'M going to be showing you how i style my hair using my flat iron alrighty, so once you're done fluffing your hair out using your white tooth comb. This is sort of what you'd be left with. This is what your hair would look like. So what you need to do now is to reach for your heat protection um, just a little in the palm of your hand and run that over your head, just like so like so don't do too much with the heat protectant, because you don't want it to Weigh down your hair right, so this is how you prep your hair for um, the styling for heat styling, just like that pull it through. If you want just like so um just like that, and now you can reach for your your flat iron, i'm not sure if this is hot and you can get to styling. So what you want to do is sort of style, your hair, by sections. What you're going to do is lift your hair with your comb like that and then curl that's what we're trying to do. You lift and curl lift and curl left hand curl all right, let's get right into it, so what you want to do is going to be tough, so i'm going to be looking down here, just so that i can see what i'm doing what you want to Do is lift a section of your hair like that, like so pull the rest away, and then you want to sort of curl your head outside, like that. Don'T worry! This is not how the hair is going to stay. We are definitely going to comb it through and that's the rest of the styling process. So then the lifts like so and then you're gon na continue that process throughout the rest of your head. Just like so like all right. Another section um continue to do your that my hair, i'm gon na continue this process. So all right, so i'm going to continue the rest of the process and then come back once i'm going to style this part of my hair, alright. So now that we have curled the base of our hair right around, you cannot start styling, the top part of your hair, your crown um, depending on how you want your hair to fall, whether you want the style to go up and sit in the middle of Your hair or you want your hair to fall to the side. You will curl your hair in that direction and i think it's easier to style this part of your hair than it is any other. So i'd say start at the back at the back of your crown. Oh sorry about that. Let'S say start at the back of your crown: pick up some head back of your crown and then curl that in the direction that you want to fall, i think also at this point it's appropriate for you to like pick up your bigger um, hair flat. Flatline decided to get my bigger straightener and what i like to do is sort of start at the back. Like so start at the back and then curl the hair towards the direction in which you want your head to fall and like so like this and continue to curl until you are done so so now that we are done curling all of our hair, i mean, If you want to look like auntie, you could, but because we are young and fresh and we aren't going for an anti-aesthetic. We are going to use our wide tooth comb to comb our hair in the position that we actually wanted to sit in, and i feel like this is where the magic happens. When you start combing out your curls um, let's start with the sides, so i just calm even so slightly even so lightly, just so that it gives you the desired shape that you are looking for like so then you can start combing out the curls in the Front of your hair, so so so, and just like that darlings, you have literally styled your pixies at home um. If you're anything like me, you would go directly in with your sheen spray, but if you want your hair to last um in this sort of hold a bit longer, you will go in with your firm hole, spray um. I have this one by trisme and the long lasting finish firm, hold spray, but i'm not worried about it. Sort of sitting and staying in this position because, like i said pixie, looks best once you sort of slipped it out like the next day. So what i'm gon na do is go in with my my sheen spray, just like that and we are done, and that is the finished pixie at home. I really really do hope that you enjoyed the video and, if you did please give it a massive thumbs up and drop me a comment down below letting me know what else you'd like to see on my channel and whether or not i should continue doing hair Videos - because i really did enjoy this, although it was a tad bit difficult - i really underestimated how difficult it would be to sort of style your hair, while you're recording, but nonetheless i had so much fun and i do hope that you'll come back and watch another Video by me, until the next one
Comments
Jazzy Pages: Wrap strips are the most annoying part of having a pixie. So much waste. I was searching all over for an alternative to the strips and scarves (they don't stick as closely to the head) and you just made me realize a durag is the PERFECT alternative. Thanks! Love the way the style came out.
Mpumie Skhakhane: This video was so helpful I was struggling stunning.
honeydew gem: This was so helpful!! More videos like this please!
Khothatso Sekhoto: More of these videos please
Zime Mahlaba: Oh so beautiful. Will be cutting my hair soon and this will be my new style.
Refiloe Hlahane: omg this is stunning
Palisa Key: Hey. How often do u relax and do you do it at home or go to the saloon? You're stunning BTW.
Lindokuhle Charity: Can you please enable us to download this?? Please
Deborah Joseph: Do you have a relaxing on your hair
Sophie Gwandira: We're did you get your iron and how much?plus brand name
Anele shongwe_: How much did your pixie hair cut cost
Lerato kobedi: Do you wrap it again at night or do I just sleep and just comb it again the following day?
Lois Jenkins: Way too much talking. Come on.