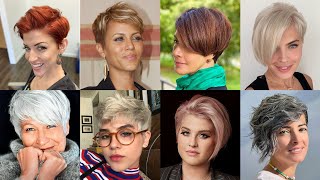
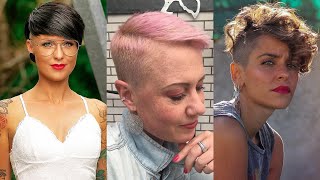
Creative Pixie Haircut On Asian Hair Made Perfect
- Posted on 04 March, 2020
- Pixie
- By Anonymous
How to cut a creative pixie cut with Lee Mukes, watch as he creates a marvelous pixie haircut using hair layering, graduation, bias cutting and scissor over comb.
Yeah here we go our SS technique. This is actually one of my favorite cuts to teach for my basic my standard 2-day, hands-on seminar. I saved this one for last, because it's um it really tests. Your skill sets for different techniques put together and it's a really interesting approach to cutting so anyhow I'll start off on both sides. Do the side areas I'll be cutting in a quite steep graduated ankle, almost at about like say, 85 degrees, just borderline right angles for a line layering, okay, so to the right side again, cutting like very steep graduation at about, say, like 85 degree, borderline layer. Now I should absolutely do this technique cutting square through the sides. It'S a lot easier said than done um in the majority of my classes. When I teach this final look - probably 75 %. They don't get this side square, so it's always essential that every portion of the haircut you nail it perfect. So there's certain aspects that you can pay a bit more attention to which will assist you in cutting square. Do your best to stand in front of what you're cutting um again, you can allow your center of balance to assist you to cut square. Second, make sure that your comb is set at that section. So that way, you just have to like pull that comb straight out without it deviating, and you know your your over directly in the hair is just straight from the hip. Second, which is should be a no-brainer, is to come always come back and cross-check. You can cross check and make sure you're cutting square and then always like the angle of your fingers and doubles. So that's right. A lot of people get kind of jammed up during the hands-on session. Just do the sides and I've been doing this technique for quite a while. So I'm saying my probably 70 % have a little bit of a challenge on the size. Just cutting square chicken comb, the hair, the natural fall, make visual assessments. Now, as I get around to the bend of the head, I like to stand again exactly in front of what I'm cutting so, if you're on a lot parallel to the shoulders, I'm cutting a super-high, acute angle and I'll break this section into more manageable pieces. I want to control my stroke count. I don't want to comb this type of section like four five six times. There'S no need for that. I just need to have strong intention comb it out once or twice and then hit it okay. So this next section I'm over directing slightly forward just just start building up wait, do the back aerial I'll start, building up, wait and late get and what kills most people, and I'm when we're doing hands-on with this cut, is that the back area from the occipital Bone to the crown I'm cutting like that high 85 degree angle, right borderline layers and then from the occipital bone below. I change my acute angle, so I got it and I'm cutting much deeper graduated shape. So I go from a higher angle, graduation to your lower level of graduation with which is a lot more challenging so make sure your elbows fingers sections are square. Make sure the parallel make sure you that your body as you cut the right side, is a bit slanted. You also need to become that acute angle which will give you the greatest amount of control on my finger angle. Changes now do them from the crown to the occipital bone. I'M cutting in that high steep 85 degree angle, still combing the hairs out a bit still cutting in that high graduation and then now, as I blow into the area below that I'll Super Puma. I changed my angle or the fingers and that angle gets a lot tighter and remember. Do the back technique, I'm elevating each section slightly. So I'm building up my link also so my final section from the on the back will be longer than the loop link to the sides because, as the hair to drown, I began to elevate and build my leg bo / direction. Standing in front of the section. Come in here out, I'm mimicking the angle that I intend to cut. I have my fingers follow my cone to the guideline always make sure your guide line is super super clean and now from the occipital bone below I transition into a much steeper graduated shape. Remember with each progressive section, I'm elevating the hair slightly don't rush us. This technique is really challenging. It'S better to take your time and get it right and then next time you do it you'll pick up on the space and you'll be organically, become better at it. No good, though, left side I'll be cutting the exact same technique so through the sides. It'S a really high acute angle like graduation about 85 degrees, borderline layering, I'm standing in front of world cutting elbows fingers, shears sections all parallel. Okay, so next section come here straight out: watch your stroke count! You don't want to come out deception too many times line up you come to that section, pull straight out. I have my own limit. The Angra intend to cut - and I just popped my fingers in there just to secure that hair in place, so that will minimize my margin for error. If I haven't musing my fingers too much I'll, probably blow my shape, so I'd rather use my comb because it comes a lot more stable, like as I'm coming out of section my finger tips or my knuckles. That can bend sometimes without you, even knowing it Macomb. We'Ll never been, it will always be the exact same shape sore thumb. If my tension is a cut perfectly clean straight shape, then intelligence disks states that I should follow my comb as opposed to my fingers. Okay, standing directly in front of what I'm cutting cool calm collected, you have to have a super, strong intention in your mind or what I mean like this is what I'll play game with myself, so what I usually do before I even come out that section. I just do a quick run by in my mind of me, cutting that entire section perfectly once it sets in my mind and that clicks and my intention is super clear. Then I actually physically go out and do it and I've improved dramatically just by picking up the habit, and then it takes me like what a second or two to sue. You know fast play it through my head before I actually cut it. Okay, so here we go on the sides. Remember here, as a head just starts to brown, I'm gon na start building up my weight, so I'm over directing forward just slightly because it's the first section where I'm actually building up length so from the occipital bone to the crown area, I'm still cutting in that High graduation and then anything that lines up below that occipital bone. I'Ve dug Mike the angle of my graduation, who knows how many fingers just went quite tighter, so this shape on the transitions from my tie to graduation to a higher graduation. So my next section is mothers vertical side which is slightly diagonal, elevate, higher and again from the occipital bone to the ground. It'S a high grab and as I hit that occipital area, a transition, my fingers and here I'm cutting any tighter level of graduation, make sure that your elbows scissors comb fingers to all parallel. That will assist you in to cutting the shape more perfectly because if you drop your elbow, your finger angle will probably change okay, so notice. This angle is much different than the angle from the occipital into the crown, but we can still transition okay. So next section remember T will be elevating the hair slightly higher, which will allow us to build up our length in the that's, an intention that we want high graduation elbow high finger, slow, I'm standing in front of what I'm cutting my body actually is shifted. My left, shoulder is high right. Shoulder is low, I'm actually an acute angle as I do this cut now. For this the shorter lengths remember to drop that angle. We have a nice fluid transition from it lower degree of graduation into a higher degree of cap graduation. Without really heavy bump, graduation through the back is really cool because the principle of graduation is structure here, finally long hair. So I looked it and kick it around so I'll get a tremendous amount of structural integrity from the occipital bone down and then from the occipital bone to the crown. I still get that graduation you're still king, that look and the size and the back will actually support the top portion of the haircut Allah. There'S a increasing elevation watching your stroke count make sure you always see a super super beyond super clean guideline. If you cannot see that guideline go back, take a smaller section take more guideline. If you still can't see it, maybe go back a couple sections and find out where you started to make your mistake and then from that point, go back and start fixing stuff. Remember it's always the key recommended to as you're cutting have a very keen sharp eye, and your focus should be on the technique, the shape and always be looking for errors, the more errors you find during a haircut the less errors your haircut actually has. I mean for me at when I cut that's what I do. I'M always troubleshooting if I think a haircuts good, that's nice, but you know I go back and it busts it down a little bit. I will always find some errors, and a difference between a mediocre cut is something that's totally super awesome. It'S after both have errors, just as super-awesome has less errors than a mediocre cut, and if you're always training your eye and you're, always like constantly looking for errors, you will improve because then, when you find an error, you have to figure out. Why did that error occur? Nerissa? If it's habit or technique, then you know your gaps and you can go back and work on that final remedy and then that way, you'll improve. So I find that troubleshooting actually gives you a tremendous amount of growth. Okay, so now to the top area: Isles, I'm coming out of section under separate the back and the front area, and the section lies from like the mid of both ears, so I'll break this top area into two portions, so I'll work. The area from like the mid ears back to the crown in one piece, so here I'm going in and I'll be cutting square I'll, be finished square layers through that crown area. So I'll take the length the guideline from the longest portion through the back and then from there I'll go in and I'm gon na hit this 90 degree square shape so come here straight out. Watch it over direction, cutting square okay! So I'll come up. The next section, and as I cut the rock side of that head, I'm standing on the left side, I'm setting on that opposite side cuz. That now will help me to over direct the hair more properly so getting connecting from the longest piece in the back, come in the hair straight out and I'm cutting square to the top make sure you always can see what you're working on when I'm, when I'm Cutting you always sit down. My eyes are in a very close proximity to the area that I'm actually working on, because at that point I can see every single, tiny detail connecting from the back cutting square make sure you comb the hair super clean from roots to ends super clean. Being that the hair that you comb is parallel to the teeth of your comb, that's not the best indicator can still working. This last section come in here's where it straight out. Elbows fingers cheers parallel. Okay, so now that the right portion is done I'll, take my guide line from the opposite side now be cutting the left. So when I cut the left side, I flip my body position now. Staying at that right sides shoulder comb, the hair straight out notice. You see that guide line from the back so make sure you're always connecting that guide line, and if, from there you go in and cut it in a square line check for symmetry and balance next section again will be cut in the same manner we're combing square. If you have a problem, you be fine combing, the hair square is a bit challenging to set your suction, as you come here, set your cone right on that section and just comb it straight out without that comb moving and that's like seriously, it's like a no-brainer. That'S like the very best way to you like comb, the hair straight out. If you don't want to think about okay next section again in the same manner, and as you comb the hair, you want to watch the stroke count. You don't want to have to comb that same section too many times make sure that the hair that you comb there is clean in it as parallel as a teeth of you comb. If you get any snags in that in those strands, that means that whatever you cut, they will not be even you'll, have longer links that surpass your guide lock, just because the hair wasn't comb properly, so it just bees a super heightened sense of awareness on about These particular details, it'll, really save you out there when, once you pick up these habits um, it's just a matter of like a fraction of a second, like my eyes, will do this really quick while strips like once everything checks in and then hoping my scissors will Cut, if I see something that's not on, then how I won't open my sister I'll go back and make the perfect and then okay to them front top area I'll, be working with horizontal sections and I'll over direct these sections back on to the longest portion of Those square layers so over directing back following the square, the next section again is over drafted back the following the guideline from that very front portion from the ears, the crown and with this area after our first section, we'll start to get a bit of disconnection and As we progress forward that disconnection will increase once a hair's travel can check in as much as we want that gives us an open plan throughout this cut. You can looking forward over directing back onto that same guideline, some building up the link via over direction and make sure again. You call me the hair super clean from roots to ends and at this hairline there's a little bit finer. So you should slack off on the attention just a little bit again. The opposite on the left side. Is your same exact technique going to consist on taking a little bit of the guideline from the right. So now I have three guidelines to apply a piece of the right to have the back and have some of the side come in here. Elevating back onto that same point, watching the stroke count, you really don't need to scream out that small of a section too many times after looking at a few points or twice with that intention, if you're, not thinking about what you're doing you'll find that your stroke Count just goes crazy. You'Ll be tell me that count that left that section out, like four five six, seven eight times with intention, you can nail it down to once or twice and the great thing about intention. It makes you work cleaner, faster. You lose you use less effort and get better. Results is like that 8020 rule, because you're using your brain, your brain is your number one tool. It'S way better than your scissors, so just get in the habit of using that brick and just push that thing. Okay, so again in this final section, just a little bit less tension just to allow for that jump in a separate down. Other hairline push it hair around making visual assessments and I'll start my blow-dryer whip up for the blow job, I'll, just go and I'll I'll. Just flap wrap this entire, I'm not looking for any artificial proof, I'll be pushing the hair in tons and tons of different direction or one like organic natural shiny, and I want a crazy amount of movie. Okay. So now that the hair is dry, I'll, go and clean up my outline so ago, Rufus but hairline and the sideburns are cutting like a nice little angle. There you know for sure, go and clean up around the ears. The cleaner. This line is the overall. Your your your detail, work like those longer lengths will look a lot stronger if the outline slightly messy and like food everything else, no matter how perfectly you cut it, it'll have a tendency of looking very look. Isn'T a good thing. You don't want a look, won't increase your retention so still working now, cleaning out that outline to the bath alone to make your hair look heard Nick longer. So, just like cutting a steeper angle, if you want her hair wat to make her neck look wider, they're, not cut at the more of a square angle, but longer next look more attractive. So that's why I chose those longer angles, not just to the hairline there. I'Ve got an inspired side just so I'm gon na go and cut it a little a little loop like it. I'M gon na cut that nape area, so I'm not cutting in a hard line. I'M cutting in a curved line which is more challenging but aesthetically. It looks a trillion times better than a nasty square line. Details always show we can just working at those monkey here. It'S just and when I worked in this curved line of just using the tips on my shears now going to the top, I'm just temperature rising cross-checking, removing wait now for this area at the crown I'm gon na break it up a bit more than I normally. What just because I wanted to naturally pop up - and she has these two awesome cow - looks that will also encourage that, and you saw looking still texturizing and now I'm going here, not just like open and close my shoes really quick and I'm aiming at like roots To mid ends, which again will give me a lot of lip, so there's a lot of different ways to temperature. The hair just make sure the technique that you choose fits the end result that you're aiming for it's all about intention all right. Well, I hope you love this cup, it's one of my favorite, the SS technique and joy


Comments
Faye Xiao: Love this!!!
Kalua Lauber: Gorgeous!