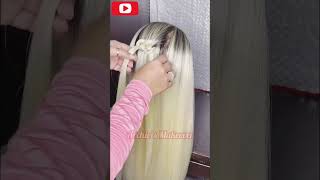
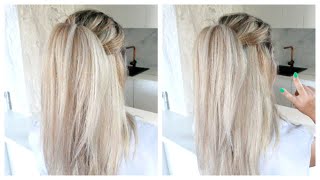
Make Your Own Clip In Ponytail Using House Hold Items !!!! Easy To Create
- Posted on 30 March, 2020
- Ponytail Hairstyles
- By Anonymous
Learn how to make your own clip in ponytail using some household items, easy to make and looks high fashion !!!
All you need is a sock, old hair extensions or new hair extensions, a shoe string and needle and thread !!
Keep yourself busy during this isolation period with this easy to make your own clip in pony tail
let me know how you get on in comment box below :)
Please be kind
Also please follow my instagram page @bhaircreations for more tutorials and videos
xxxx
I said welcome to my second ever youtube video I absolutely loved making this one. It has been so much fun. It'S a little bit different to my last video, where I was talking about usurp my social media and stuff. So this one was a little bit more creative and you guys are gon na love it. So I was cleaning up my house yesterday and I came across my old hair extensions that I just kind of shoved in a cupboard somewhere and for I might need them at a later date. I guess what I did so I decided to well. I was thinking about it and I had a room before and I thought I'm gon na just try it and if it doesn't work then oh well, never new guys wouldn't even know any different, but it actually works, and I was really really surprised at myself. So I made a clip in a ponytail piece. I usually so impressed with. These guys is so good, and I made it out of out of hair extensions, two bobby pins, a sock used. Definitely thing, I think, is definitely clean, a black shoelace needle and thread so stuff that you should hopefully have at home and you might need to buy the new door for it online. But don't worry you can get that easy off of ebay or something so yeah. That'S kind of it now I'm gon na show you how I made it so watch on and see exactly how I made this ponytail peace. Hope you enjoy right. So you want to get a white pencil white eyeliner pencil and make your markings so we're going to do the little lip which is at the top front of the sock. And then you want to mark a semicircle that goes just past. The halfway mark on the back of the sock, then you cut this little area out like so and Chuck away the extra bit and then you want to take that bit where the back end of the sock and in the top. You want to cut that little lip like so, and that is where your string is gon na go right there. So you lay that flat. You want to grab your shoe string like so or shoelace, and you want to thread up your needle. So I'm using a curved needle and some cotton thread now you wan na double over your thread and tie the end. So this secures the thread nicely onto the needle grab your string, and then you want to start sewing little little stitches to the back edge and your shoelace. Now the seam that I am sewing or the stick, the type of stone that I'm doing is and you're threading the needle through and then you are looping the needle through the excess loop and put in tight. Now I've just got all that film, just showing it styling the edge of this string now to the back edge of that sock. So so, in that tight, like so pulling the needle through looping, the string around now trimming the excess string. That'S so and knotting that cutting the excess off and there so your string it now should they sound tightly to the back of the circle now to start sewing the left on now. The shoestring is sound to your sock template. So now I'm just going to type this down just to keep it secure, which makes it a little bit more easier for me to sew the wefts onto now. Don'T worry about that slight bulge in the material, because we will sew around that. That is what sits around the pony. Are you around your natural ponytail so marking where the wefts are going to go, or my first left anyways and I'm refraining up so I'm putting further wear now through the material and pulling it through the weft again just securing that wife nicely onto my material. I'M just making it sure that it's nice and secure in place now I'm gon na skip a couple of the rows that I sell as well. Just because there are few rows to be sewn, so the video would be a little bit longer. But as you can see, I'm now selling that wept on to the piece of material. I'M looping it around pulling that needle through the thread and just sewing that weft onto the piece of material like so pulling it round. So I get to the other edge. Now I'm market just so I know where I'm going and making sure that I'm staying on point with my Selim, I'm looping the strings through the weft and the material and then I'm moving the needle round that piece of bread feeling tight, making sure it's all secure And tight and then sewing to that next point now, I'm just securing that nicely like so making sure that I pull through cut the thread and the only excess off and double knotting. Now for the next layer, I'm making sure there's about a two centimeter gap in between. So the bottom row was a little bit curved. Now, I'm going to start sewing straight so reef, reading up again now pulling through the weft again and then sewing on to the material after this row. I do skip a couple of them rows which you don't see in the video, but I will explain so I take the piece of material off the table and I start molding the material with the weft so instead of sewing it for that, like I'm doing it Now, I'm just making sure the weft does go around that can't kind of um bulged our area, so it doesn't sit flat, but it does sit more like rounded. So when you do place the the ponytail onto our own natural ponytail, it's it's more around your ponytail. Then rather flat, so, as you can see, and I've gotten a lot nearly enough at the top now I've done about two other layers underneath those extra. So this is just skipped fast forward. So, as you can see on now and place my finger underneath and making sure that I am sewing the weft around the material, as you can see, I am molding that around a little bit securing that. So I am you can see I've molded it around. So I just keep going making sure that it's not too, that that it's working around that curved area there like so and this is the top bit. This is pretty much on top of your own ponytail. Now on this next clip, I am going to skip to the top area. There will be enough of row that goes on top of this and then finally to the top area. So I said the other row now I'm starting on my last area as you can see it's a little bit closer up to the top. So, instead of working, how was before now wan na work a little bit differently towards me, so I am more so pulling the thread through the weft this time. The rubber around the website just want to make sure that that top piece is really secure to the top lining of the the template. As you can see, I'm just pulling it through making sure that it's nice and tight nice and neat as well, nice and secure it doesn't need to be horrendously neat because you will be wrapping a piece of your hair around this area once is secured onto your Own hair, as you can see, the ponytail is now starting to take shape. This might take a little bit of time. Don'T rush, take your time if you feel like you've, messed up start again really take your time really perfect. On yourself in can be quite difficult to society, especially if you're not been used to sullen. So don't worry too much as long as it's nice and secure. It doesn't have to be horrendously neat that top row. You just want to make sure that it's a little bit more nice, oh just just because it looks a little bit nicer and tight as well, making sure that the wefts are nice and secure to the material. Now I'm just coming to the end, and you just want to make sure that it is secure and you cut the excess off and in your tie and that string like so now for the next part we'll be sewing the bobby pins on, as you can see, That the ponytail has started to really take shape, I'm just showing you the rows, the different kind of levels between the rows, so the two centimeters as you get towards the top. Then you want to make it a little bit more of a gap just to spread out the West nicely now to secure the bobby pins. You want to take your piece and just look at the halfway mark, so you fold it in half and then just look where the two top bobby pins need to go at the top. So you want to place them about two centimeters apart from each other right at the top. This is what secures the top of it to your own ponytail, so I'm just sweeping around the bobby pin and then placing the other bobby pin. Next to it. You just summon that round as well as you can see that mostly at the top of the WEP and that's on the material underneath not on the top, where the backs are so securing that like so and now, pretty much should be ready to try turn it. Right-Side and what's pretty much done right so that should pretty much have it figured out on how to make it if you do need any help. Please comment below and I will answer any questions now, I'm going to show you guys how you actually put this on. So what you're going to do is you're gon na grab the ponytail you're going to get the two pins and you're going to stick it in your ponytail, underneath your hairband like so to keep it secure. Now, you're gon na take your bits of shoelace and you're gon na wrap it underneath your ponytail and you're going to pull tight yeah. So you want to be real, tight and then you're gon na wrap it around loop underneath and pull tight again. So you want to make sure that it's really tight. This is actually probably the most secure ponytail I've ever had then you're gon na wrap it around and underneath you're gon na then tie your shoelace and you're gon na double knot it and pull tight, but I'm going to knot it once tighter than the second knot. I'M gon na do a bit loose because you, you obviously want to be able to get this out at the ends. The night. You don't want your shoelace to be too tight. So when you do your second knot do type, but don't do it like that tight! So, just so, you've got that secure knot, as you can see like site that looks now. As you can see, you can see the shoelace there, but don't worry what you're gon na do is you're gon na grab a piece of hair from underneath and then you're. Just gon na wrap it around the shoelace, getting your Bobby's hair little hair. As you can see, there's your ponytail. It looks brilliant, I'm so honestly so pleased, but this it looks so good. It'S probably the best ponytail I've ever had. I don't want to sit back a little bit. Obviously, if you can, if it really annoys, you can really see these. You can clip these up as well, but I'll just leave it for the moment. Cuz I'm not going out, but if I was going out, I probably would just clip them out of the way yeah. I really impress actually can't believe how good yeah she is yeah. So let me know if you enjoyed that video make sure you like share with your friends subscribe on my page and definitely leave me a comment. Let me know how I got on and please no horrible comments. Cuz, I'm still a newbie, so I'm still getting use this whole YouTube thing, but yeah. If you really likes my pony to which I'm actually so chuffed with it. Let me know: thanks guys, see you say:

Comments
Radhiyyah Sabera: Such a great idea, the shoe lace wrapped around actually looks like a hair tie
Kirstyanna Brazier: Why did I not think of doing this literally saved me spending nearly a £100 on a pre made one! Thank you for sharing this! X
Navneet louis: Best ponytail video on YouTube! Takes 1 minute to put on and works amazing x
Sarah Holquin: Genius! I"m so impressed you took simple items from your closet and made something from nothing! Brilliant! Can't wait to try this now! Thank you dollface!
Mpho Ngoma: This is amazing...love the idea! Doing it!
Lily T: Very crafty! I've been wanting two small ponytail clip ins for pigtails, but can't find any. I might just try this! If it doesn't work I can always just snip the threads and I'll only be out a sock. Thank you!
Heather Flaa: I think I will give that a try! You also kept us viewers interested with your creativity and charismatic way of presenting your video! Thank you for sharing your very awesome DIY with us!
Insaf Moussa: This is by far the best DIY That I’ve seen so far thank you so much for this
Tracymarie: Thanks so much for this. I have so many hair extensions laying about and now I have short hair I think I’m gonna give this a go
Tabitha Joy: I've been watching tutorials for an hour and was totally disappointed until I found yours!! This ponytail tutorial is the best I've seen! Thank you so much!!!!
Karen A: Thank you great video. Just what I was looking for.
Bella: OMG…love it. And it looks amazing on you!
Myriam Vargas: Excelent job!Congratulations
LittleChicHeart: I love it thank you
Jodi: Wow! Thank you!
Awilda Lafontaine: I will try this ,for sure I am going to love it
Gisselle R: awesome!! trying this !!thanks for sharing
KMALSS: this is so smart!! these are selling on websites for $100+ !! just saved me alot of money, thank you
lowkey chillionaire: So clever and beautiful
Siphelele Maswangane: So gorgeous
Edidiong Uffort: Lovely!
D K: Brilliant thank you thank you
Blanche: Wow!
Chia: Look beaut as always!
Christina Valentine: Thanks; great video
tylah ryder: Wow genius !!
gillian lee: Thanks for sharing this technique. You should try making a diy bun scrunchie
Luciana Oliveira: Brava
Video Playlist: This is genius
1426roz: I will be trying this as well
Sun Burst: U ARE A LIFESAVER!
Jake Rayl: okay i have layers, so in what way should I lay out the wefts?
JENNIFER BROWN: What kind of hair did you use?
Nicole Pollock: What brand of hair (weft)
Dedra Skipworth: No, not your hair cutting shears on socks. Where's the scared cry emogi.