How To : Clip In Bun Using Yarn / Wool / Best Clip In Hair Extension / Natural Hairstyle
- Posted on 05 December, 2021
- Ponytail Hairstyles
- By Anonymous
HOW TO : Clip in Bun Using Yarn / Wool / Best Clip in Hair Extension
clip in bun, clip in bundles, clip in bun short hair, clip in bun natural hair, clip in bun hair pieces for short hair, clip in bun hair extensions, clip in bun human hair, clip in bunny ears, clip in bun extension, clip in bun hair piece
#clipinextensions #clipinbun #bestclipinextensions #clipinbundles #yarn #wool #braidedponytail #braidedwig #naturalbunhairstyle #naturalhair #naturalhairstyles
best clip in hair extensions, best clip in hair extensions for black women, best clip in hair extensions amazon, best clip in hair extensions for thin hair, best clip in hair extensions uk, best clip in hair extensions 2021, best clip in hair extensions for short hair, best clip in hair extensions for thick hair, best clip in hair extensions for black hair, best clip in hair extensions for natural hair, corn rows, natural hair styles, make-up artist, hair stylist, faux lock, trending hair styles, new hair styles, lip gloss, highlight, bridal hair styles, 4C hair styles, DYI, Hair tutorial, make-up tutorial, crochet, eye lashes, stitch braids, wedding hair styles, traditional hair styles, porny tail, bun, lace wig, closure, bang, natural bun hairstyle,
-~-~~-~~~-~~-~-
Please watch: "DIY Ponytail Extension without Sewing Machine // Ponytail Wig // Clip in Extensions"
https://www.youtube.com/watch?v=75GuGe...
-~-~~-~~~-~~-~-
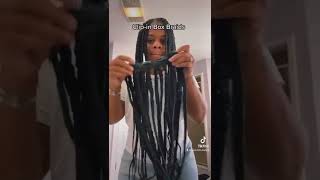
Hello guys welcome back to my channel, it's your girl miss sunday, so today's video, i'm gon na, be showing you how to make this clip in bone from start. To finish, trust me guys. This is something that you definitely want to learn how to make this on a budget so yeah. I actually made like two different types of clip-ins but i'll, be showing you how to make just one of them, which is this so yeah. This is actually the other one that i did with a drawstring. So if you want to see how to make this, because i'm going to post in these on my channel um. So if you want to see how to make this do make sure to hit the notification bell so to get updated when i post new video, so you'll be needing um a week home, i'm going to be making use of just one week home for this and Then i'll be using a brazilian bull. If you don't have a brand way, you can make use of any braiding extension of your choice, but i just chose to use a brazilian, because this is something that anybody can actually use to slay on a budget and then you'll be needing a needle and a Thread - and this is the template that i'm using - i got this from the thread like i showed previously the tray that i just showed you just now. That is where i got this template from and then i measured just three um inches from that. So this is the nest that i'm using. You can use any form of fabric. For this trust me guys any form of fabric will do it doesn't really matter. So you want to place that um like so or you just want to wrap it like so the material that i'm using is not enough, so i wasn't able to just place it on top like that, so this is just how i did it, so you want To place it round like so, and then you use your t, pin to just hold that in place and then, when you're done, holding that in place we're gon na um secure the upper part guys so just keep watching so with the needle and thread we're just Going to secure the upper part, this is just to create a base for the clip in because you want to make sure that that clip in is well secured as possible, so we're just using a needle and thread to just create the base uh. So from this part, i'm just going to take the brazilian bowl and then i'm going to fold it into two parts and then make sure that i have a lot a lot in my hands like so and then, if you want this bigger, you can take as Much as a brazilian wool, as you want or any braiding extension as you want and then just fold it into two, because we're going to be creating a twist with this, but before we do that well i'll, be using a needle and thread just to um secure The middle parts of the um brazilian wool, like so so after doing that, then i'll be creating the twists. So so, from this part just take a strand of brazilian wool, and then you secure the tips of the twist afterwards we're gon na be making use of this to create our clip in fun. So you just want to place that, on top of the base of the the base that we're using for this and then you just tap that make sure that you tuck it first before you start wrapping around. So i'm using my needle and thread to just tap that in place. Don'T worry about it, showing because this is not going to show. This is actually a black tread and also because of of the texture of the hair. So it's not going to show at all. So don't mind the thread, so you just want to make sure that you tack that properly with your needle and thread like so before, twisting so um from this part after twisting after wrapping it around. You just want to use your t, pin to just secure that in place and then i'll be making use of the noodle and thread just to make sure that this is well firm and secured to the base of the clipping. So, while sewing i'm making sure to use to uh use the needle and thread to um hold the net that is inside of the base, just to make sure that it is attached to the base before bringing it out. So i'm gon na be making use of my needle and thread to tack it like so so guys just keep watching and see how i was able to do this and also see the method that you can use to tack this properly to the base. Wow from this part, i just took a brazilian wool just to secure the tip of the extension before tucking it in and then after securing the tip. You just want to make sure that you, you create a twist just wrap it all the way around, like so just to make sure that the end is smaller or should i say, yeah smaller, actually so we're just going to tuck it inside the clip in and Then, after tucking it inside then we'll making use of the needle and thread just to tuck it like so so, and then we'll be placing this like creating a fold. That'S creating a fold with the nets just to make sure that it is as neat as possible, and then you make use of your needle and shred just to secure it to the um extension like so, and then afterwards i'll also be using my weak comb. Just to create a clip in and yeah, but that is actually oil, so guys just keep watching to see the method. So so - and this is basically how to make the clipping that you saw previously in the beginning of this video and yeah, i'm going to be showing you how to make this twist in my next video so do make sure to hit the location bells as get Updated when i post new videos, i'm gon na show you how to attach this clip into your hair, like so guys, so just keep watching. Do you


Comments
Florence Maduka: This is a great idea. Thank you for sharing
Noelyn Beauty Empire: Very beauty I love the outcome
Dee Naurei: Wooow... Thank you aloooot
DopeMamoe: Wow! My Christmas hairstyle. Thanks. New sub
MR & MRS IBO SMITH: This is