How To Enlarge Scrub Cap With Ponytail Pattern For Big Hair - Free Pattern
- Posted on 07 May, 2020
- Ponytail Hairstyles
- By Anonymous
This is a step-by-step tutorial on how to enlarge my scrub cap with ponytail. If you are making these for someone with lots of long hair. Also step-by step cutting and construction. There is a small bit about how to use a serger to finish the seams.
Download my FREE PATTERN. PLEASE, DO NOT SELL PATTERN. You may sell the caps you make.
TO GET THE PATTERN DOWNLOAD https://myhallcloset.com/scrub-cap-wit... and subscribe.
YOU WILL NEED TO SUBSCRIBE TO MY EMAIL LIST ON MY WEBSITE TO GET THE PATTERN. When you Subscribe you will get a CONFIRMATION email with the password to my Free Good Stuff Library. Then go to https://myhallcloset.com/free-good-stu... Use your password. You might just find some other things you like in the Library.
I will not flood your inbox!!
I have also made a video with some extra TIPS about using this pattern. https://youtu.be/pGK-TXfx454
Be sure and check out my Face Mask Video on batch sewing https://youtu.be/tev98mn_Idk
If this helped, please SUBSCRIBE to my YouTube Channel.
For my other DIY projects visit my blog https://myhallcloset.com/
Follow me on: Y O U T U B E… https://www.youtube.com/mywithallmyart...
F A C E B O O K... https://www.facebook.com/NathalieKelle...
I N S T A G R A M...https://www.instagram.com/nathkelley/
P I N T E R E S T...https://www.pinterest.com/nathkelley/
P I N T R E S T...https://www.pinterest.com/myhallcloset...
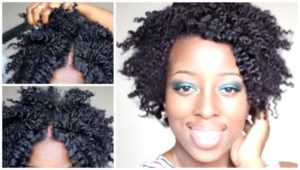
Hey there, it's Nathalie - and I bet you're thinking how much mileage is she gon na get out of that pattern? I y'all y'all, have been great. Y'All have downloaded this pattern like right at ten thousand times so uh and I'm making this video per the request of several subscribers. One is the to enlarge it. I mean I've got like little thin flat, hair, fine, thin hair, but some of you have like really been blessed with like lots of hair and big fat ponytail. So I'm going to show you how to enlarge this pattern. You go over to my hall, closet, calm and subscribe. If you have an issue, just send me an email and I will send the pattern to you, but you need to subscribe. Okay, so I have the pattern I've already downloaded for me. I'M going to show you how to enlarge this kind of like used to be on the simplicity and the cost patterns they're little instructions about that. But anyway, it's gon na be really simple and then I'm going to also do a real-time stitch through some of the areas that y'all were having trouble with. Okay, so don't go away! Okay, once you have the pattern downloaded you're going to want to go to in your printer settings and print actual size and you're going to want to double check and make sure that this little square, that's on the crown piece is actually one inch, and this is One inch square, so we know that it's the right size and I'm going to cut out. I have cut out both of these are both of these safe number, one should probably say number one at 1a and 1b, but they don't in since it's already been downloaded. Like ten thousand five, almost I'm not going to worry about it at this point anyway, so I'm just gon na cut this whoops get in there and I'm going to leave a little bit at the top here on this on the ponytail section, and on this part I'M going to cut this off okay, and so this is going to get taped together, you're going to match those two little hash marks and this heavy line I'm going to use scotch tape. You can use whatever kind of take you want to. So you would be surprised at some of the comments and questions that I get. So if I sound real, I don't mean to sound snarky or sarcastic or anything like that. I'M gon na try to be as simple as I can now. I'M going to show you how to mark your paper, it doesn't have to be purple either you can use pink. You can use green. You can use white if you want to, but I'm going to show you purple just so that you can see how the enlargement is gon na go now, I'm going to do a one inch, all the way down and a one inch across and I'm going to Do a one inch, enlargement on the crown, also, okay, so what I'm going to do? You can use a pencil, a pen, a crayon or a sharpie, I'm just using a sharpie, so you can see what I'm doing now, I'm going to move in a half an inch, and this doesn't really matter what's going to matter. Is you want the one inch mark to be distinct, okay and then like? If I was going to go ahead and go ahead all the way across my paper, I would do another half inch. This is going to be my cut line, and then I would do another half inch so I'll have a little bit of an allowance, I'm going to go ahead and do another inch and in just a second, this is going to make sense. I hope - and I cannot tell you how many times with like some of the questions that I've gotten and I'll type out an answer and I'm like. I hope this makes sense. I hope this makes sense and some of you you like comment back. Yes, thank you for helping okay, so I've got these. Let me go ahead and cut so I've got. This is my one inch. This is gon na, be my gap, and so I've got me a little bit of a wiggle room here. So I'm gon na cut that, and this is the same way I've got a half inch space, one inch and another half inch. This is my extender and I cheated. I'Ve started some on the other side, so I'm just gon na flip over you don't have to do the other side. I just started this and I thought I've got to talk you through this okay and this worked out really well. So I've got my one inch gap here here here and on this one all right remove those to the side for just a second. So what I'm going to do is I'm going to come down the middle of this? I could add it out here. That'S an idea, I really actually could add it to the front, but then it would mess up my buttonhole markings and some of those markings. I'M not going to worry so much about the button marking, but I am going to just go what I was originally going to do, which was going to be fold it down the middle and you can measure it. If you want to to make you sure you get it folded right, I'm just going to go to this. Where that fold is off that little line. There is almost on that dip. Let'S put it right on the dip, and I'm going to do this one first on my cut here and line this up tape and tape. You need another little piece: let's just go ahead and do that, so I'm gon na take this piece and line it up. Alright, and do you know what, because I'm going to cut across this, this is straight and then it starts to go to a curve. So I'm going to go ahead and do this expansion in the straight part and not in this curved part. So I'm going to fold this down and let's see, let's just say, that's three inches all right so fold that down three inches make sure I've got some tape right in that little section right there and then I'm going to cut across. So this is going to give us some some more room for the crown of the head, so we're going to do the exactly the same thing. Take this line that up on that edge to the one inch mark. Okay. Now I am NOT going to do this on this one, but I might tell you that if you've got like a really fat ponytail once you come down, you really need this curve to make the crown work, but you can come. You can swing this out like and down if you need a bigger fatter, ponytail area. Here you go like that. This is going to give you more room on the top of the head. You could actually, if you wanted, to do a half inch here, split this and do a half inch down here or another inch down here that, but this is how you enlarge a pattern now, since we've enlarged this, we also need to enlarge this, but this is Not going to fit it's going to be way too, tight, okay! So we're going to split this, so that's about it that D about it middle way. In that D, this is going to be another long, video, because anytime, I do real time. It'S going to be long. I'Ve watched some of these that they do them real fast and I'm like I'm, not sure how they get it done so fast, I'm a pretty fast so or two, but alright, and let's lay this 1-1 up. I have this pretty butterfly pad fabric that I bought from a vendor on Etsy and I'll link, a description, her link in the box below the description box below and when you're when you're cutting it out. It does not matter whether it is pretty sides up or pretty sides together when you're, only when you're stitching it but cutting it doesn't really matter so there's a little bit of a salvage right there. I want to get off of that a little bit. So I'm going to scoot this down, I think it's probably about 19 inches. Now you could just put it on the fold of the fabric, now I've already washed this fabric and hot water to make sure that it's all shrunk. This is a 10 percent cotton on this up. I folded this on the cross grain, the cross grain. This is a straight grain where the selvage is where it has like the pretty little designs and little colored dots and all that stuff, and I just made a little self into bag in my last video, but the cross grain has a little bit more stretch in It the straight grain, does not - and I like to cut this, so that it has a little bit more stretch as it goes around your head. I think we're going to be okay, leaving our buttonhole, where it's at for this, but if you wanted to move it up a half inch, you could, but it's actually for the for the strap, the drawstring that's little work to buttonholes, while on the right side, one On the left side, but it'll only go through one layer of fabric. I have this cheater sheet that I have made, and so let me show you how this works, so this is different than the first video that I that I demonstrated on and so I'm gon na Marcus on the right side. I'M still folded, it says front. It also says bottom, so what I've done is I've just cut me a piece of cardstock measured, my buttonhole. I think I've moved it in just a little bit, but so here's the bottom and there's the front and I'm going to use this as a marks begun. You can use a pencil, you can use a friction. Pen, probably don't want to use a sharpie, but this goes away with water and I'm going to mark my buttonhole and then just flip this over and the reason I mark the front is because that's not going to transfer the same like that because now this is Not the front anymore, this is the front, so I did the same on the back side, so it says front in front. So when I flip this, then I've got me a cheater spot to mark my buttonhole there and that's going on a little green butterfly. But I can still see that mark all right, so that gets this ready to put the buttonholes in and move that to the side and go ahead and cut our crown. Let me see if I got a spot in here that that'll fit. I don't think that'll. Just going to fit in any of that spot, that's gon na fit right here all that extra stuff out of the way. Now then, the other thing you can do is, if you want to, as you can just take a piece of copy paper and fold it in half and cut you a like a full take a piece of copy paper fold it in half. Take this and you can either draw it or just cut it, and if I'm cutting multiple caps, I have several of these full ones cut so that I can lay them this way and that way in this way, all right. So this shows me that my full size that I'm going to have I'm gon na go ahead and already have this on a fold. So I'm going to use this and again it doesn't matter at this point. It doesn't matter whether it's the pretty side up or the pretty side together, because this is just the cutting it does matter. If your pattern has a up or a down like, if all the butterflies were flying up, you would want them all flying up, rather than all down, you're still going to need about 1/3 of a yard of fabric for this cap, and I may show you how To make a drawstring and not use elastic, so I think I will do that. I'M going to put a little notch right in here in the top of the crown and on this one I mean was that other way on this on this curved edge, I'm gon na put a little notch right there in the middle right there and all those Will be by match up places whenever I see it ready to sew these so there's my crown there's the little notch you can see it right there there all right so to make some draw strings. I'M gon na cut the fabric 2 inches wide. That looks like a pretty good straight edge right there, and so I'm going to need this to be probably about 18 inches. Now you could actually do this first before you cut your cap, if you wanted to but make sure you have enough for your cap too. This is 2 inches, and this is a this is 18 inches long. So this is going to be just right. I think they're starting to get some elastic at Amazon, different ones. I ordered some the other day. It ended up being the wrong size. I ordered 3/8 and I got quarter-inch so we'll just make do. But I'll show you this just in case you don't have elastic or ribbons. If you were going to do this with ribbons, you have ribbons, go ahead and do like you could do a yard of ribbon and then just sew that through but I'll show you you don't have to sell the ribbon. You would thread it through the drawstring hole. I thought it felt like it's skipped to make my drawstring. I took the two pieces, put them pretty sides together and I stitched a little quarter inch seam there, I'm gon na open this out and I'm going to open this and press it. Then I'm going to fold this in half and press that the length the whole entire length and then half again on both sides. So you're going to fold the edges into the fold and do both sides and if you need to turn it to do the other side you can just whatever is more comfortable for your hands and your with your iron and I'm gon na. Do that the entire length, but I'm not going to do all that alright. So at this end I'm gon na move the iron out of the way. So, at the end that in about a quarter of an inch or half an inch, I mean give it a press. I'M gon na do that on both ends, press that in the other side and fold it in half and then we're going to just press that and we're going to take this to the sewing machine and we'll just do a little edge stitch on this. So I'm gon na go ahead and catch the other end fold it in half to the middle, fill the edges to the middle and press and the same thing with the other side, I'm gon na press that half way again just to make sure that that's folded Right and pressed in give it a little shot of sting. Okay, all right, I have it pressed all the way, the entire length of this, and now we're gon na go to the sewing machine. Okay, the first thing I'm going to do before I stitch anything together, learn this the hard way is go ahead. It'S a lot easier to do this at the very beginning. I have concede my mark and I've got a little piece of interfacing and I'm going to stabilize this with the interfacing on the back side. So what I'm going to do - and hopefully you can see this - I can hold this to the light and I can see the interfacing through that. I don't know if you can see that or not, but I'm going to pin that in place now depends on what your buttonhole attachment is like the buttons and this buttonhole have nothing to do with each other. Okay, so the button is only to hold the mask on and the buttonhole is for the drawstring to go in and out of, okay, all right and so there's my other one. I'M gon na turn it this way, so I can see through it and get that so you can sort of kind of see through it and get that piece of interfacing pinned in place. I'M going to pin down the middle of it. This works well with my buttonhole attachment, and so whatever, however, your sewing machine works, then you can figure out your way that you need to mark your buttonholes. Whatever your instruction manual says, okay and I'm going to stitch with I've, got these little black lines that are in here. I'M gon na stick this in black. I could stitch it in white, but I'm a stitch it in black, and I already have my attachment set to the link that I need this to go. And so I know that I'm going to line up this little mark and there's a little inside mark with this center mark and watch my cross place, set that needle in make sure this is kind of straight across the back. Pull that one out that one out. I don't want to stitch over my pins. Mine works with this little reverse thing, so I'm going to put that in make sure I don't get my hand in your way, so you can see, and sometimes, if I'm doing like last night, I did eight or ten caps or something like that, and I just Kept, I didn't cut the thread I just kept going kept going. Just you know kind of pulled it out a little bit and kept making buttonholes and then went at the end and cut everything apart and that little blue mark will go away with a little drop of water. I'M going to trim away the excess, because all that was for was just to stabilize the buttonhole, give it a little extra support. While I stitched keep it from rotting up because sometimes it'll do that and then and I'm gon na do this with the other buttonhole. Two and then cut this I like to do it from the backside. You can do it from the front or the back do a little clip and then clip to the to the edge okay right to make the drawstring I'm going to go ahead and it's still trying to start at the edge which is okay. But some machines. Don'T like to do that, so I'm going to put my needle in place and do a couple of stitches forward and then a couple of stitches back and then go forward, get to the corner. Give it and we're just going to stitch right close to the edge shift it on me. You could stitch down this other side too, if you wanted to, but I'm not going to just this one side for right now. This is kind of a stretch anyway, because your average watch time of my videos is 5 minutes. So I know some of you stay with me till the end, but if you need to fast-forward through, that's, ok you're not going to hurt my feelings about that. All right, I didn't mark my dot because I've made so many of these, but you would mark that little dip that little dot in the dip all right and then you're going to have one on your on your crown too. But you're going to match those. Two dots together and you can pin it if you want to. It, has a little bit more stretch, so I usually stretch the bottom and not so much on the top and just kind of move you like that in and so I'm going about a presser foot. Why that's it's a little bit more than a quarter of an inch, but not quite it's not quite 3/8, and I'm pulling on this bottom part and I'm going to watch as I come around the curve, because I want to pay attention to my notches. Not so much pulling on the bottom, giving it a little bit more on the top. Do the same thing with this other side, so they'll come out even so, not so much pool right now, with it more pool across the crown and as I come down, I start to pull the bottom. You can pin it that works, as I have put these in my Etsy shop. I'Ve made enough of them that I don't really have to pin them now, and so, as I get down here, I can see that I'm pretty close on my matching here and here and again you can pin that if you want to just make sure you don't Stitch into this part, okay, so we're going to match to that we're going to stitch down to this point right here. This is stitching the crown in place. Now I had one subscriber that wanted to know, because I usually either surge this I surge. You can zigzag it or you can just leave it like that too. I mean, if you're trying to get them done, get them out there and hopefully, hopefully, that we prayerfully. We are at the end of this shelter-in-place and co vid thing doing. Of course, I know they're predicting like a second worst round, and I just really would like to rebuke that. But anyway, that's another other thing: let's go to the serger, I'm not going to teach you how to use a serger had a thread of surgery. I'M just going to show you how I surge so I come in. There'S the the crown part you can do it from this side, but I like to do it from the top side where the band is and so what I'm going to do. I'Ve lifted up my presser foot, get these strings out of the way and I'm going to bring that dip right to the edge of where those blades are okay, just right in there and because those blades will cut pretty easily, and I don't want to do that. Now I have my stitch length set it like a four. I don't know if your settings on your serger are I'm kind of watching this notch and that step thing and I'm sure that you could probably surge, and so at the same time. But that's you - and this is me because I can't get down into that bit the way I want to with my serger. I can do this for the finish as I get down to this again to the little dip, I'm going to move. Make sure that I don't catch anything underneath and I'm going to move this kind of fold that out of the way and I'm gon na swing it because I don't want to cut that off and I don't want to stitch it down. So I'm gon na swing that out. So then it's free like that all right. Why am I asking you all right, of course, you're gon na say all right. I got it I understand now. So that's what it looks like at this point so now back to the sewing machine to do the ponytail part on the ponytail part on the sewing machine. I like to start from this straight edge. The curve is down here line that up we'll do a little back stitch. Okay. Now, as I get down to this section, I want to make sure I don't catch this little piece. In my same so I'm just going to reach in there and just kind of pull that up and those extra threads get out of there come here. There we go and then I can feel underneath there and I'm going to match this stitch to this little area. Right here and back to the serger, I'm gon na come in right here. I'Ve got my presser foot up and I'm gon na mooch that close to where that other stitching stopped to start with. My surging you'll always want to look in the comments, because there's a lot of times that there are real helpful suggestions from people who may not have YouTube channels, but they they know what they're talking about. So be sure you check that out all right. So now I'm going to trim off this and show you from the front side. So there's there's the where the crown is surged and the ponytail part is surged, and this is how we look on the right side. Alright, trim that thread right off there TD. All right now we're ready to do the casing. Part we're through with the serger to form the casing, you're going to measure in an inch and 1/4 and turn that, and I just started at the buttonhole just because you don't have to, but you can see buttonhole is going to be good, so an inch and 1/4 and then we're going to turn under a quarter of an inch an inch and 1/4, and I just turn that under as I go, but you can certainly turn it under and pin it to start off with there. But it's really easy for me to just turn it as I go so inch and a quarter we're back to this other buttonhole. Let'S do one more pin in here just for y'all. I just appreciate y'all support so much, I'm almost at 10,000 subscribers - and I could not have done this without y'all, and it is such a blessing to be able to be a blessing to those frontline workers. This was such this is so cool to be able to use it since I'm not a nurse or EMT, or anybody like that. It'S so neat to be able to use my talents that God has given me to be able to bless those who are serving alright. So we're gon na go now back to the sewing machine where they're going to do a little edge stitch on that inch and a quarter. Let me get my machine back over here where you can see it there we go and I like to start at the center back, but you don't have to start there, but I like for my extra threads and you know where a back stitch to kind of, Not be in a real obvious place like I'm, the top of the head or something like that. Alright, so get that started back stitch, and then this is what I'm talk about. I just kind of couch that under it's about a quarter of an inch I mean I've sewed, I'm almost sixty Moonwalker years old and I've sewed. Since I was probably eight seven right - and I guess if you wanted to put the drawstring in first and then just avoid it, you could, but I don't like to do that - I'm always afraid I'm going to stitch into it. Then it won't draw okay. That gives us a pretty band there: four nice big hair and then we're going to put our drawstring through. So I'm going to use a move that pin use a large safety pin and pin into the end of my drawstring. Now you can also use ribbon or you can use a bias tape, we're finally getting a few supplies back into our Walmart store. I actually even saw a couple of sewing machines the other day and so feed that in okay now on this one, since I'm using a fabric drawstring, I'm going to feel with my fingers for the fullness of that seam. That'S the center seam. But if you were using a ribbon that has no center seam, so I just felt it pop through there. Then you would just measure in half and so I'm going to show you how to do that too. So, okay, so I can tell. I can feel that seam is right there, but if you were going to use ribbon, then you would just measure to halfway get that out of here. So make sure that there's not any gathers up in this find your halfway of your ribbon and adjust that to the halfway to the seam here and that's where you'll put your seam and that's to keep this from pulling out when you're putting it on okay. So just get this back over and I'm gon na stitch in a couple of stitches back and forth here. So in case you have no elastic now. You can actually draw this up. However far you want to draw that up around your ponytail okay. The next thing is to put a button on: I'm not going to show you how to do that, but because we did the adjustment on this now, probably just personally, you could figure this out, but this is my. This is my cheater for my buttons and it actually measures in two and three fourths, so we added an inch, and I think I would just come down like a maybe a half an inch from here. Let me just flip this over I've got this at six and a half inches, so maybe seven inches down and 2 and 3/4 inches in I've got this under the buttonhole thing the other day. So that's where I would put my buttons, but if you're so wonderful, like your daughter, your niece or whatever, then you know you can measure and see which is going to be the best, the best fitting for that just some place where it's up off of their Ears, alright, I think that that's going to get us. Thank you so much for watching. I love it that you're liking and subscribing and sharing and be sure you hop over to my hall closet dot-com. So you can get the pattern and I will see you next time. Bye,


Comments
Irishgrace Gumba: I just want to say thank you so much for all the tutorials, I haven't use a sewing machine for like 25 years and when this crazy pandemic happened I started making face mask and scrub caps for me and my co-workers and friends and family and your video and patterns are so easy to follow, and the fact that its on real time is just super awesome and they are not boring which is a plus. I love you by the way, so more power to you and I am looking forward for more videos and tutorials, Maybe a video on how to make scrub tops perhaps? LOL... God Bless and Stay Safe always!
Linda I in GA: I love this pattern!! It’s my go to for the longer haired ladies! I’ve been using elastic in the ponytail part and for the ends I use the soft elastic with the little silicone toggles. My nurses love it!!!!
dre3796: Thank you, I’m a nurse that works in the hospital and we need head coverings which I’ve been making for my fellow coworkers. But a lot of my coworkers have lots of long “Locks” (dreadlocks to some people). Thank you the grading of the pattern
Carol Frazer: Great job Natalie. I did the same thing with face masks
Christina Wood: Great tutorials! One question. If using ribbon how wide is the ribbon you used?
Linda Gutierrez: Received my pattern. Thank you so very much. I love to see and help the frontline people. Thank you amen
HASSANA Jomaa: Can I surge my fabric before I start my sewing the pieces together?
Michelle Hatchett: I would like to know how to line the cap with satin.
Linda Gutierrez: Thumbs up thank you ❤️
ABC XYZ: Great update. And your fabric is very pretty.
Flor de Maria Gonzalez: Estan muy lindos ,quisiera saber como descargar el patron ,gracias
Brigida Vallejos: Buenas noches, hermoso trabajo, será posible que de las medidas por favor,gracias
Kiana Kingsley: Do you sell items? I work in construction and could really use this kind of thing to protect my hair and the big size would be great for all my hair
kimber ontario: Thank you I have thick long hair and a big hair
Liliana Gutierrez: Is there a way to just enlarge the pony part
Blanca olga Alvear: mi niña me hace el favor de de facilitarme el patron muchas bendiciones
Johana Arredondo: Cordial saludo me puede facilitar el patrón
Lucky Linda: I second your rebuke.amen