How To: Easy Diy Tape-In Hair Extensions (Very Detailed) | Jenise Adriana
- Posted on 18 January, 2023
- Ponytail Hairstyles
- By Anonymous
Hi my loves Here's a new video for you. Trying tape-in extensions for the first time! Check out the video to see the process and how it turned out. Hope you enjoy ✨
Please don't forget to leave a comment below and let me know how you like the style.
Also give this video a thumbs up and SUBSCRIBE
TAPE-IN EXTENSIONS (coming soon) — twelve22hair.com
Raw S.E. Asian Tape-Ins 18” (80 pcs total, 300g)
Instagram: @twelvetwentytwohair
TAPE IN TUTORIALS I WATCHED —
https://www.youtube.com/watch?v=GB3ZId...
https://www.youtube.com/watch?v=EQwQ7r...
Connect With Me |
Instagram - @xoxojenise
Tiktok - @xoxojenise
Business Inquires |
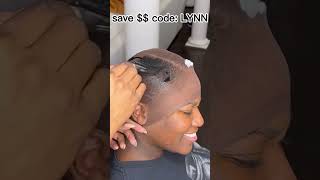
What'S up guys and welcome back to my channel if you're a returning subscriber, if you are new here, welcome sis? Thank you so much for clicking on this video today. So today's video is going to be a fun one. We are trying tape and hair extensions for the first time. Okay, I've never used never tried, never actually wanted to do tapings. To be completely honest with you, I didn't think that they were going to work for me. I work out a lot, and so I was like that doesn't really sound like something that would be manageable for my lifestyle, but I was like you know what, let's give it a try. I am in the mood to do a lot of different things with my hair right now, so I wanted to give them a try. Um, I watched a few YouTube videos on how to do them before I got started, and this right here is one of the tricks that I learned from the videos that I watched when you're parting off your section. You want to take the end of your rat tail comb um and cover it, try and cover your natural hair over the comb, and as long as you can't see the comb, then that lets. You know that you have enough hair left out to be able to cover your tapes. I hope that makes sense so just switching to the other side and using the same Theory just making sure I am leaving enough here out to be able to cover my tape. So that, if I want to pull my hair up into a ponytail or a high bun, you will not be able to see the tapes through. My leave out um remind y'all. This is the first time I've ever done tapings. So I am honestly, I feel like I'm trying this and making all the mistakes so that y'all don't have to honestly. I didn't get this perfect um and I do want to caution you that if you try Taping that home, you do want to be very. Very careful because your hair is essentially going to be sandwiched between two adhesive tapes and if you do it wrong, or you know, I just don't want you guys to mess up your hair. I do think it's super easy to do, but you do want to take your time and be cautious um, so the tape is that I'm going to use are actually going to be from my hair collection. I am going to be. Selling tape ends real real soon, so I was putting them in to test them out and they came out absolutely Flawless, but um. All that information will be in the description box below so now, I'm just going to remove the adhesive tape cover and you're gon na use two tape ins for each like section that you do so. You want to be careful to not place. The tape ends right on your roots, right up on your scalp, because that would make it really hard to flip them over or manipulate them into different styles. You want to leave it a few centimeters off from your roots. Honestly, looking back on this video, I think I could have placed it a little bit further from my roots, but that's okay, um, because I can still maneuver them. So what I'm going to do is I'm going to place that first, one flip it up. If there's any excess hair, I'm just going to remove that hair away from the tapes all I need is whatever hair is stuck on that first tape. Then I'm going to take my second tape and literally align line it right up on the first one and sandwich them together, make sure they are nice and secure together with my fingers, and that is it honestly super easy, like I said, but you do want to Be careful because you don't want to get your hair caught the wrong way Tangled snagged um, you just want to make sure you're protecting your natural hair in the best way possible. Like I said, I could have placed these a little bit further from my roots, but I am still able to maneuver them without causing, like any pain or any tension. So I think I'm okay, I'm good, like I said, I'm making all the mistakes so that y'all don't have to so wish. Me luck. So I am going to get to a certain point in this video where I'm going to speed the clips up. Just for the sake of this video not being too long, but I'm going to show you guys a few more pieces before I Speed the video up so same concept apply the first tape away from the roots, a few centimeters down and then make sure that is Nice and secure flip that tape up whatever hair gets caught on that tape. Stays with that tape. If there's any hairs that aren't caught on the tape, move them back down and then take your second tape and sandwich it against the first tape and then just keep going. If you notice, I'm not placing these two tapes like right up on each other side by side, leaving just a little bit of space just so I have like enough breathing room for my hair. I guess I don't know. I learned that in the videos I watched so don't place them right up on each other, but um close enough, so that you'll have like some fullness in your hair foreign. With these angles. I had to do a lot to be able to see the back of my head. I was having to switch this mirror back and forth and I actually ended up dropping this mirror and cracking the bottom of it. So I did a lot for the sake of this video, but y'all are gon na see me flip back and forth a lot um, but you really need to see the back of your head. Actually, you have to see the back of your head in order to install these, so just make sure you have a good mirror set up and you can see the full perimeter of your head um, very well, foreign. So the way that I did my parts was at an angle um. That way when you flip, when you go to flip up the tape ends, they lay seamlessly. I don't know how to explain it. I learned this from a video I watched, so I'm gon na link all the videos I watched in my description box below because I feel like they explained it better than I will um, but it just makes the tapings like lay a little bit more flat, um And you can manipulate them a little bit better when they're laid at an angle and also too, when you're wearing a middle part, even if you're doing like a sew in or a quick weave, you always want to lay the tracks at an angle, because they'll fall Better in your face, so y'all know how sometimes like if you have shorter hair and you wear a middle part, your front pieces won't blend if you lay them at an angle. They'Ll blend a lot better. So that's why y'all see me parting, my hair at an angle, foreign foreign here, I'm just going to make sure to section off my edges that way everything can be nice and covered. If I want to manipulate this style or wear up in a ponytail, then I'm just going to place the tape in where it would be. If I flipped it up just to make sure it is fully covered and then I am going to continue with this row, I do apologize y'all. I actually filmed this on my iPhone because it was just so much easier than to do my whole setup and I needed to do it in the bathroom so that I can see in the mirror and my phone ran out of storage. So the video call cut off um, but here is how I finished that row you can see it is at an angle. Um. You can see the space I left it see. You see how that hair got caught. Um it got snagged, that's what you don't want. So again, like I said, take your time at doing these make sure nothing is Tangled everything is nice and flat. So for my next row, instead of going from Perimeter to Perimeter, I'm going to start to fill in the back of my head um. So I'm just gon na do a straight line right here. I don't even know how to explain this just kind of pay attention, so you can see what I'm talking about. I'M not going all the way from my edges to the other Edge anymore, or at least not for now not right. Now I'm just gon na do a straight row across so I can start to fill in the middle of my head to make sure this style comes out, nice and full foreign foreign all right. So I think I did like two rows of just filling in the back and now I'm going back to going from Perimeter to Perimeter so from edge to edge essentially, and then it's just gon na continue with that pattern of parting at an angle and same method. Nothing'S changing just parting at an angle, um and then laying the tapes. Thank you. Thank you, foreign. So this is what we're looking like after I finished that last row. As you can see, this is not Blended, so we're gon na add a few more rows. Gon na add, I think I added two more rows to the back so again, just straight across to fill in the back and then after that I added two rows on each side, either two or just one row on each side. I can't remember um but yeah. I'M just gon na add a few more rows so that it Blends a little bit better foreign. Thank you. Thank you. Thank you, foreign foreign and remember to as you're, going make sure that you are leaving enough hair out around the perimeter around your edges to be able to cover the tapes. That is super critical super important. So don't forget to check that as you continue on with your style. Thank you. Thank you. Thank you, and so I'm done with the installation of the tapes just playing around the hair here to see what it's giving to see. If it's really invisible to see. If it's really taped where and it is um, I just have to make sure I brush my hair in the right direction and make sure everything's fully covered, but y'all I've never had an install this flat like this is wet. I don't think I've even realize the tape right there, but this is literally wild um yeah. This is super flat like this is. This is crazy, super crazy, just seeing what it's giving in a ponytail and then in a bun. It is giving Flats all right like this looks so so so good and boom baby we are done, have to go, throw on some makeup real quick, because I was feeling real Dusty without it um no I'm kidding, but we are done. I did raise it. My hair just a little bit on the side off camera because I feel like it just needed a little bit more um like fullness and definition so off camera, but y'all, look how yummy this looks like this looks so natural, it's so flat, these tapings blend. So so so well so these are actually Vietnamese um tapins, Vietnamese hair Southeast Asian hair Blends a little bit better with textured hair texture of Vietnamese hair and Southeast Asian hair is a little bit more thick and a little bit more coarse. That'S why it Blends a little bit better. Also, I really love that I did not have to color these extensions black. This is their natural color, so that was so super perfect y'all. I ended up using three bundles in total, so each bundle that I offer is 40 pieces. 40 pieces is essentially one bundle, it's 100 grams, so about three bundles in total you all. This is giving okay, like you literally, cannot tell me. Otherwise, all right ignore my deodorant up under my arm, but everything turned out so well, I'm so happy with the end result leave a comment below. Let me know what you guys think I will be doing a removal video because honestly girl, right now. I have no idea how to take these things out, but we gon na figure it out I'll. Have that uploaded for you guys when I take these out and thank you so much for watching see you next time.

Comments
KISHA ROSE: Love it! It came out so nice
Makiria Janae: i so love you i’ve been watching you for years !! because of you i’ve mastered doing my hair by myself ❤️
Faatimah Young: Hey Girlllllll!!!!!! Love love love. Your tapes are flawless. Love the texture and thickness. I am ecstatic to try your tapes when they drop. I’m in hair school right now and your hair line will be my go to for my clients. Let me know when the tapes will be dropping, can wait to purchase. You and your mom are bomb hairstylist❤️
ATLSTLCurls: Beautiful! Blends in flawlessly!!!
Licia Bates: I’ve been waiting for this!! ❤ I have the same reservations. Your results are amazing. As always ❤
Ashlee Marcus: Ohhh I love love love!!!! I've been following you for years and my quick weaves are definitely my go to's but these tape ins sis!! I need to try! Plus these curls are beautiful I can never get mines right lol thank you for the video❤️❤️❤️
Monique York: Omg it looks soo good! I’ve heard good things about Vietnamese hair. You made the install look effortless.❤
AwakeTheWisdomWithin W.GabrielleEther: Girl no you described everything easily. And this hair is everything. The texture. The ending results. So bomb!
Ana Léa: Looks so natural and beautiful
Susana Diaz: So gorgeous. Cant wait to get my hands on this hair. So question, how many bundled did you use?
Sheila Thomas-Spencer: It looks beautiful!
Beautiful Key: Looks so good! Let us know how they last please
Rita Horne: I like the new technic. Seems easier than the quick weave.
Brandy Kenoly: Girl you got the best hair videos. Thanks for sharing with us. So fun watching always.
Teri Taylor: Omg! I’ve been waiting on you to make a video like this I love watching all your hair tutorials.
ΚJӨПΣƧ92: Do you ever do other people’s hair because your work on your own hair is phenomenal?!
Shania LaShae: I been waiting on you to do some tape ins your hair loooks so good!
Inez Hudson: Amazing ! Please consider going on a tour with your skills in the future. Selling tickets. I'm in the UK. Your hair tutorials are out of this world. Bravo
RK Custom Builds: Hi(: how do you razor your hair extensions? I’m super curious, it blends incredibly well with your short hair!
Reuel Lara: OMGG!!!!! THIS INSTALLLL ISSSS SOOOOOOO YUMMMMMMYYYYYYYY!!! please do an updated how to curl your hair video!! the curls are PERFECTT❤❤❤❤❤❤
Kaitie J.: I’ve been waiting for you to try tape-ins! I was not going to do them until you made a tutorial lol
Brandy Hunt: I have been looking for some tape in for my wedding in September 2023. And my love I gotta get these bundles
Candice Demmons: FIRE ! Wow this looks so good!
Ashley Dixon: omg this is perfect
Anjelica Lopez: When is the launch?! I NEED THESE TAPE INS
Joely Hailey: How do you take them out without damaging the hair that was stuck to the tape?
Quannas Touch: Sooo beautiful pumpkin!!!!
J J: hi. will you have bundles in this same texture as the tape ins ? i noticed on your site the bundles are not in stock
ZariaMonèt: will there be jet black tapes ins available whenever you do launch ?
Oz Nicole: Yasss Girl You Did That
Imani Williams: Are they comfortable? Lightweight?
K Lynn: Wow!!!!
Markita Sade: Please lmk how this hold while working out because i want some but i work out so much and sweat from my head majority of the time. But they look sooooooo good
Gen S: Can you do clip ins next?
Latina Charming: How many sandwich did you made ? Do you think 40 sandwich are to much ? My hair is mid length of my back and I have 300 grams or 40 sandwich my hair kind of medium or thin .
Sunshiyne Atkins: Love
Beautiful Key: What’s the length?
VALI H: Are YOU NATURAL??