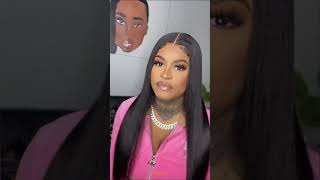
High Flip Ponytail W/ Slick Side Bang Ft. Pink Cut Crease
- Posted on 06 November, 2019
- Ponytail Hairstyles
- By Anonymous
High Flip Ponytail on a 360 Lace frontal wig w/ a slick Side bangwatch glue down the back of my with with precision and ease, 3 bundles added for fullness♀️ •
Pink Cut crease tutorial At the end for an added
bonus✨
Follow my other social medias
Ig: @bombchellebeauty_
@thebombbb_
•
#youtube#youtuber#hairandmakeup#hairandmakeupartist#pinkeyeshadow#pinkcutcrease#pinkmakeup#highponytail#flipponytail#sidepart#sidebangs#sidebang#blondewig#customcolor#customwigs#makeupforblackgirls
Hey y'all is Rochelle, and I'm here with another hair and makeup tutorial for you. If you're new to my channel, welcome, welcome in this video I'll, be showing you how to achieve a high skip ponytail with a slick side, part bang, all on a 360 lace unit. Then I'm gon na come back and show you how to achieve this pink cut crease before that go ahead and follow me on Instagram and Facebook. Also don't forget to Like comment and subscribe to my channel anytime during this video okay. So first you want to clean off your entire hairline area. This is to ensure a longer and stronger hold. Then using the bold hold active, you're gon na be spreading that product all across your hairline, making sure not to get any of your actual hair. Then you're gon na be taking your finger and spreading that product evenly across your hairline. Now I'm going to be applying three coats, but I'm going to let the second coat air dry just to give me some time to tint the lace now repeating step two with the third coat okay. So now, when it comes to letting your adhesive dry, you want to make sure it is completely clear before you apply the lace this way when you go and you press down on it, it's not turning white, and so with that being said, you want to work Really quickly so starting from the middle and working our way down each side, you're gon na go ahead and line up that lace with your adhesive and continue to press that lease into the glue now you're going to take a call and you're gon na comb through The hair, but you're also gon na, be using the back of the comb to press down on that least even more and repeating the same steps in the back you. So when it comes to the back, you want to make sure you're doing the same steps that you did for the front. But when it comes to this bottom part, you want to make sure you're tilting your head forward to make sure you're giving yourself enough stretch. So that when you bend your neck for it, naturally you're not tugging on the lace. This is what causes your lace to live, and so, as you can see, this lace is going on pretty flawlessly, mainly because I worried already the first time I were. I did not plug it. I just plucked it before. I started filming this video, but the lace is already pre-cut. So that's why it's going on as easily as it is now. You'Re just gon na go over the front light me with a hot comb. Take a handful of mousse and put it all over the front, I'm going to take my elastic band and put it over the front of my hairline and across the back as well, and this is gon na help. Me melt my lace as well as keep it down while I brush everything forward for that: high ponytail, okay and so using the straightening comb in the back is critical for a flat ponytail in the back, especially when it's a 360 and not a full lace. Wig. After 10 to 15 minutes, this is what you should get close up and now you're just gon na part out that side, part for your side, swoop, bang, and so the goal here is to make that part as round as possible, and then I'm also parting off The back of that lace over the track area, if you guys know what I'm talking about this is a 360. So it has those tracks right in the back of the lace in so you want to cover that make sure that it's fully covered so that it's not showing at the top of your ponytail, and so now, I'm just gon na be taking some soft spritz and Spraying it over the base of my ponytail and smoothing out all the hairs just to make it as neat as possible heat protectant. Then I'm gon na take my handy dandy, hot comb and I'm just gon na use that to smooth out the front area. This is an important step because it's gon na determine how flat your brain area is gon na be, and then now I'm just gon na take the hair piece by piece and mold it into the pain that I want and as I'm going I'm spring product into Each layer just to make sure that the whole thing is sticking together, if that makes sense. Okay, so for this part I slowed it down just so, you can see how careful, on being with the front part, you just want to make sure you take your time and mold it exactly how you want it before you put it into a ponytail just because, Once you spritz it and you blow-dry it, you don't want to have to reform it, because then that's where you're gon na create creases, and you don't want that. You want it to be as smooth as possible. So just take your time and make sure that it's exactly where you want it to be when you put it in a ponytail and then again do the same thing for the back making sure everything is that smooth as possible, and that back is hard. So don't let my sped up video fool, you! You have to really take your time and go through that back to make sure everything is smooth. So I remove that first ponytail and I did another one now, I'm just gon na make a braid so that I can have a base for my ponytail, because I'm gon na be adding a whopping three bundles of hair. So I'm gon na take my sanding strips and I'm going to wrap that around my base using the white bonding glue and you can put a little drop and then a couple of more little drops as you wrap that ponytail and then you're, just gon na be Wrapping the rest of your hair so as you're wrapping your ponytail you're, not creating frizzes, and so now I'm just gon na be putting glue on the track and then wrapping that track from top to bottom. Now. What you don't want to do is what I just did you want to put the glue as you wrap, therefore, you're not getting glue everywhere, okay and so now, working on the second bundle, I'm just going to clip that first bundle up just to get it out. The way so it can be easier and then I'm putting hair up and soothe the clips, as I go to make sure it's out the way - and this is the last bundle now for your ponytail wrap. You want to always pull that from the back, so that the part where is jagged isn't showing directly on the side of the front. And then you want to comb it out to make sure it's flat. Make sure that it's enough to wrap around the base of your ponytail, because if it's too skinny it's not gon na wrap, it's gon na fold under so just make sure it stick enough and you just wrap it and seal it with a little dab of glue. No drive it and there you go for the back okay. So now, I'm just gon na flat on the ponytail, I'm gon na be using the icy heat protectant and for now I'm just going to be going straight down. Just because I'm going to be doing my makeup and then using mousse, I'm just gon na be styling, my one single baby, hair and so to start my makeup. I'M just going to be wrapping my bangs so that no foundation or any other product will get on it, and I will talk to you guys at the end of this video. You, yes is, oh, my god guys. I'M loving this look already, but just to make the top a little higher I'm gon na take my got to be free spray and bump it a little bit at the top. Then I'm gon na just tease it out and wham bam. Thank you ma'am! Oh, my god guys I had so much fun filming this look, it's so cute and sassy, and it's given me everything from Cordy to the first lady in this pink eye, shadow baby. I look like a chocolate coughs cranberry. Thank you so much guys for watching. If you're still here, please be sure to LIKE comment and subscribe to my channel turn on your notification, so you can receive notifications on my future. Video updates yeah. I don't know whatever doing me.


Comments
Naomi W.: This color w that style is everything. Can't wait to try it.
Brb_steel S: Beautiful ponytail I love that look
Vonna VonDrake: Beautiful !
C: Cute asf