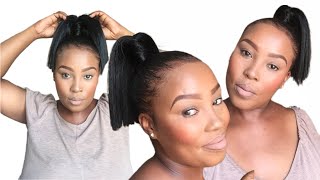
Sleek Long Braided Ponytail | $5 | 4C Hair | Easy !! Budget Hair
- Posted on 18 November, 2019
- Ponytail Hairstyles
- By Anonymous
Thanks so much for watching !
Instagram: @uchechi_
Snapchat : Uchechi12
_________________________________________________
Hair in Video
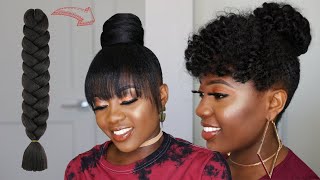
Outre : Braid babe : OMRED
Kanekalon Braiding hair 1b
_____________________________________
Products used
Eco styler : Argan oil hair gel ( red lid)
Style factor edge booster, edge control
All hair products from samsbeauty.com / my local BSS.
Hey everything, Lydia love, witness! Yes, what's up guys welcome back to the channel today, I'm gon na be showing you guys how to get a super sleep long, poppin, affordable, braided ponytail. This look only takes 30 minutes and yeah. I think I sold you already. So, let's get right into it: okay, so first things: first, if you have a coarser hair texture like mine, you want to make sure that your hair is stretched out like it can be blow-dried. It can be in a twist out. You just want to make sure that your hair is stretched, because if you really really want that sleek look, it's gon na look the best on stretched or blow-dried hair. Okay, so y'all the secret, like the real secret secret, is going section by section with the slicked back. So what I'm doing right now is I'm splitting my hair into two sections a front and a back we're gon na sleek the back first and then make our way to the front later. That gets our hair, a girl, okay. So as a base gel we're gon na be going in with the eco styler, mine has the red top. So that means that we're using the one that has some argan oil in it and next we're gon na use a generous amount of gel and just flick that ish back. If you have a Denman brush or a paddle brush or a brush that could really handle your hair like really smooth it out. That'S the brush that you want to bring out, because you want to make sure that your slicked back is slicked like you're, not missing. Any hairs when we're done with that we're gon na put our hair into a low ponytail, how we doin y'all, not too bad right, not too bad so far, not too bad okay. So next we're going to slicked down the front since our hair is gon na, be a middle part. Slicked down, I'm gon na first make the middle part, and then I'm going to split the left and right side of the middle part, because we're going to split those sections of hair into sections. Okay, so we're gon na start with my left. Okay in your fray and I'm gon na make my first section then select that ish down then make my next section then flick that ish down yeah. You feel me like it's a pattern like little by little slow and steady wins the race like don't do too much, sis don't slick the whole thing down. I was okay yeah, I'm gon na go to the other side and come okay. Our hair should look like this super sleek. Next thing that I'm gon na do is I'm gon na add some baby hands. I love love. Love, love, love, love me some baby ears. If you don't like baby hairs, you can skip this step, but it's do then whip out your toothbrush girl and let's get it on and talking wavy baby. Next, I'm gon na go in with these rap strips just to make sure that my hair is completely dry and set before I continue the rest of the style. These strips are awesome and they're reusable you don't have to because it comes with a million in a pack, but they are reusable and they're really cheap. This pack was like two dollars: two dollars for a pack of 40 and I'm gon na use. Two strips on my hair, just because one strip isn't enough for everything: we're gon na put 20 minutes on the clock and yeah for this style. You can obviously sit for longer than 20 minutes, but your girl got ish to do okay. Next, I'm going to braid my hair, that's in a ponytail and get it into a very, very tight bun, make sure that the bun is as small as it possibly can be, just so that it's easy blending into the ponytail okay, okay, okay, we like 60 % There 60 % there. Next we are going to hook on our braids first things. First, we want to make sure that our hair is connected to a hairband. This is how we hook the braiding hair onto our ponytail. The hair that I'm using for this look is by ultra braid babe, it's in the color Umbridge Harry. It'S like I'm an ombre from black thread at the top. I added a little bit more black hair just so that it's not so red, because the ombre cherry color is very, very red. Make sure you guys leave out a medium piece of Kanekalon hair. That'S gon na be the hair that we use to conceal the bond and make the ponytail look natural at the end. Now we're gon na use that band that we attach to our ponytail to just hook it on to our bun our fake ponytail. At this point should be nice and secure next we're just gon na braid it up and we're gon na use a rubber band just to seal the end and make sure that it doesn't unravel. Then we're gon na go in with our scissors just to clean it up clean it up. So next we're gon na accessorize, our ponytail, you know make it a hot ya pony, yes, y'all we're taking it back to Girl Scouts, so we're gon na make our first knot with the string I'm going for a goddess vibe. So I want my gold string to be very, very tight and close together near the bottom of my braid, but then I wanted a little bit spread out at the top right of my braid I'll. Show you so now I'm going to begin wrapping, my braid from the point that I made the knot to the bottom of the braid once again, y'all you can make this personalized. You don't have to do it exactly how I do it. You don't have to do it at all. I just wanted to throw it in there because I think it should pop in so I'm gon na not up that bad boy and then cut out the excess string, and I'm gon na also cut out the excess string from the nock that we made in the Beginning now, I'm gon na use some more ghost ring and also add it to the top portion of my braid. It'S not gon na be as close as the bottom part. It'S gon na be a little bit more spread out, but it's still gon na give that really nice golden goddess effect. You know next we're going to go in with our perm rod so that we can really spice up the ends of our braid and make it you know curly, give it a nice little girl. You know just so that it's not all straight after we turn rotted. All of the hair, that's on the bottom, we're going to dip it in hot water and I would say, leave it in the hot water for about. I want to say, maybe 45 to 60 seconds, just to make sure that it really curls and then let it air dry for about maybe like 10 minutes. If you have time, if you don't have time, you can air dry for like two minutes or you can just like put it to a towel, but just make sure that it air dries just so that the curl can really really really become defined. All right. So we're gon na finish off this look by making the ponytail more natural. So what we're gon na do is we're going to head right back to the bun and we're going to move our braids up and then basically put it over the bun once the braid is over the bun. We are going to bobby pin that in place. Next, we're gon na use that small piece that I told you guys to leave out and we're gon na use it to wrap around the bun and the beginning of the pony. So that gives such a sharp clean look. You know like it just makes your ponytail look so much more professional when you're done just bobby. Pin it bobby pins are your best friend and voila. There you go pop and pony hi guys. I hope you guys enjoyed this tutorial on my braids. I love this. Look is so cute sleek super stylish like come on. It doesn't get any better than this. It hit that like comment subscribe, you already know the vibe. Someone already know what it is. What I do and follow me on Instagram follow me on twitter. Follow me on all platforms, because we about to get so active before the end of the year, like we're, ending it with a big word.

Comments
Leah Collie: You’ve made this look so easy and cute. Def trying this!
Nashikah: loving the content sista, keep it coming!!
Ungieikem Ugbong: Loveee all your videos
KurlyPhro: