// 7 Bomb Ten Minute Or Less Styles For Jamaican Bounce Crochet Braids
- Posted on 13 February, 2023
- Ponytail Hairstyles
- By Anonymous
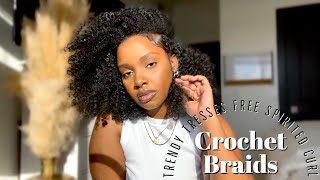
Stay tuned to see 7 different styles that you can do with your Jamaican bounce crochet braids!
These curls can get very frizzy and become a tangled mess, but this video will show you a few fun ways to style these curls for when you need to switch it up every now and then!
Don’t forget to watch my previous Jamaican bounce videos where I show you how to install the crochet braids and how to take care of them on a daily basis! (linked down below)
As always, thank you so much for your support and don’t forget to comment, like, share, & subscribe!!
Also, while I have you, be sure to follow my IG page: @this_is_quinee for more day to day content! ❤️
DON’T FORGET TO WATCH
//How to Install Jamaican Bounce Crochet Braids::
• https://youtu.be/B56HtPwcm40
//Daily Maintenance for Jamaican Bounce Crochet Braids::
• https://youtu.be/L4uUPuwJm9g
What'S up everybody and welcome back to my channel and before I get started, I just have to give the biggest thank you to all the people Jamaican bounce video. Yes, those numbers have skyrocketed over the last couple years and I'm officially monetizing. You guys have been a huge blessing to me with that video. If you haven't already check out all my other videos since then check out my new Instagram. I have it linked right here. I'M trying to do big things y'all this year with all the content creation. So I just wanted to say thank you. Thank you. Thank you before I even hop into this video okay. So for today's video, I'm gon na show you guys seven ways that I style these Jamaican bounce curls super cute super easy and super fast. If you're a mama bear like me, you need something quick but cute for on the go when you're trying to get them little ones ready so yeah, let's go ahead and hop into this video before I get started. I do just want to. Let you guys know that this style is about a good two weeks old and personally, I think crochet, I'm sorry, Jamaican bounce crochet looks so much better the older it is because then you don't see your parts as clearly it kind of Blends. In a little a little bit more people are like. Is it a wig? Is it your hair, like you got to keep them guessing right? You don't want it to be too obvious that it's crochet. So, yes, this style is two weeks old, so for the first style, you literally could just keep it like this. This is just a part down the middle. I don't like how well you can see like that. So what I do is I just pin it the cover up a little bit. Some people like to do their cornrows in the like the y shape. I personally don't no biggie. If you do, I just simply stick a little pin fluff it up some boom. You can keep it like that. I also like to pin this back a little bit just to kind of frame my face a little bit so I'll. Just pull some back, stick a pin in it same thing. On the other side, pull it back, stick a pin in it, and then I just fluff. So now it's framing my face I'll kind of Tuck, this behind my ear, a little bit and just fluff to your desired look, and it just really shapes your face and kind of makes it look a little bit Fuller and of course, we can't forget to do Our edges, I kind of have mine done already from a previous look, but I'm gon na go back over it. Just for you guys and I like to use this myel um Edge gel. It is really good because it has biotin in it and I don't know if anybody's like me, I suffer from the postpartum um hair loss, so this has really been my Saving Grace with getting my edges back, so we just wanna style them edges, real, quick to Your preference and it just really seals the deal with your look, also the more you kind of smooth it into your cornrows, the more natural your like hairline looks, and it looks less crochet or you don't see the cornrows as well. It just kind of Blends everything in together, so this is style number one. Okay, so for look number two! It'S not too far from this style. I like to create a side part. So I start on this side and I just kind of swoop the curls. Over now, I usually use like my last two rows: visible um. But what I'll do is I'll? Take a curl from that second to last one to kind of cover up this part and I'll kind of go at an angle and go up higher because I personally love to create volume, so the higher the curls, the better. In my opinion, so I pin it down right there and this is covering up those parts as well. So it's not overly obvious and then I'll just push this back a smidge more once again framing your face and keeping the curls nice and high and then I'll. Just pin that in place as well, and then you just kind of fluff to your desired. Look I like to make mine at like a keep a shape kind of like this triangular. I don't know what you call it. This angular look and then I'll fluff. This side out and I'll kind of bring the curls over this little ish, so you don't have to see all the parts and things and it just kind of really creates a cute little shape. So this is my side. Part. Look, look number two look alrighty. So moving along for this next look, I am just going to do a simple hi little puff ponytail situation very easy little like trick for me to you, is to use these like goody hair bands because they do not pull the curls too often. You know what I mean like versus those those hair bands that have like the glue in the middle or the little metal pieces. Don'T use those it'll, definitely pull the hair out mess up your curls so use these little guys so I'll just put it over my whole head like a choker, and I just flip forward - see if I can do these with my my Hoops on and I just Pull it all the way up around the curls, and once I have it around once, I just pull it and wrap it around twice make sure I have all the curls and they're good all right, and then I just fluff and once again create the shape that You would like, and I always check from side to side to make sure my shape looks good sideways, keeping the back smooth and this side, and if I had a mirror, I would if I was in the bathroom, I would probably check the back as well. Just to make sure all angles, I ain't looking too crazy. Now, when I did this stuff, you saw my first video. I did my cornrows a smidge differently. In my original video I showed you. I did eight straight backs, which I still did, but this time I Incorporated some individual braids along the side and along the back. So that way, if I wear it up, I'm not too self-conscious about that big chunky, braid um. So just so, I can show you real quick here on the sides you can kind of see or you don't see the cornrows. It just kind of looks like a hair. Just going straight up same for the back now mind you. This is two weeks old, so ignore all the frizzies and the fuzzies um yeah. If you ever want to go back, you can always add more hair to like revamp it a little bit, but I think doing this style of cornrows makes a big difference. So you don't see that chunky braid in the back um. If you do not know how to do this style, like the cornrows or if you prefer just to have that one chunky braid at the very bottom, you can always go back and tie a cute little headband or like a turban type thing. You could always do that as well to hide it. So that's what I used to do, but since I've been doing this style of braiding, I just can wear it freely without it looking too crazy. So this is style. Number three foreign, okay, so for style number. Four, I'm gon na be doing the two puff situation, so I basically just split my hair straight down the middle, and I do have my little chunky section in the back, so I kind of wanna crisscross it if that makes sense kind of like crisscross the hair. So that way, that braid is being covered and you don't really see it too. Well, I'm one of those people where I don't really care too much if it shows some if you're more conscious of it. This may not be the style for you just putting it out there, but I've rocked it. I thought it was cute, so yeah you want to try to crisscross some of those and I'll show you in the back. When I'm done once you have it separated you're going to pull up one side, and you want to try to keep this as flat as possible because you don't want it to look like this and have this extra hangage, that's not cute, so you want to kind Of pull it flat so that way, all the volume is up top in the curls once again take one of your little goodie hair bands and wrap that around as tight as you can and you can either leave it like this or you can kind of take Some of these curls and wrap them around each other to make it a smidge smaller completely up to you, but I like to make mine a little smaller and I'm holding on to that. Little piece that I just wrapped around and I take a hair pin and I just tie that down or pin that down. Unless I tie the dough pin that down and I'm going to do the same thing on this side. And I try to keep mine at the top of my head as much as as possible, like the crown in my head versus the sides, I ain't trying to look like the girl from Chuck E cheese. Okay, I think the higher it is the cuter. It is all right once you have it all the way up and pinned, and I can just kind of fluff now to kind of create a shape and then, of course, don't forget your edges, and now we have a cute little two puff situation. So here it is from the side once again, it doesn't look too crazy with like cornrows being exposed, and here it is from the back, so that is style number four, with the two Puffs all right. So before I continue with the next style, I need everybody to go ahead and pause and enter this Emoji in the comments down below. Yes, go ahead and pause, and do it right now. This way, I know who is still with me, who is Still rocking it out with me in this video and once you're done hit, play all right. So for look number five is the famous half up half down? Yes, so what I like to do is I leave one row still kind of exposed and I grab all the other hairs. Leave one row Exposed on this side and I keep mine. Pretty close, I don't pull Too Much from the back. I kind of pull just enough from the front sorry. This is so hard to show on camera, but yeah just pull just enough from the front, because once again I like to keep fullness with this style and the more full. It is the more it covers those cornrows and it doesn't look so crochet, which I hate. So once you have the amount you want, this section has two little curls on it, I'll just pull one still from the same crochet. I guess you could call it, but I'm pulling one to kind of cover. My part and the same on this side, and once you have the amount of hair that you would like you can either tie it, do a cute little ponytail or you could do a bun, and I will show you guys both the tighter you tie it. The higher the ponytail, if that's, what you're going for, which I kind of do like because it just kind of gives like this cutesy little, I don't know a little puppy dog look, but I kind of like that. You could also take a curl and wrap around your hairband. If you don't want that exposed, I'm not really that worried about it so yeah. This is what it looks like just ponytail style, half up, half down cute and then, if you just want it in a little bun, I just take this whole ponytail. I do a loose twist and just wrap it around itself once and pin that down in the back anything. That'S like sticking out just go ahead and pin that down as well. So you can kind of do this two different ways: ponytail versus the little bun. So this is my look number five all right, so for look number six! We'Re gon na incorporate like a little hair scarf turban, whatever you want to call it. So I'm gon na put my hair back up into a high Puff and when I'm doing this puff, I like to keep the hair more forward. And if your hair tie is really loose like mine. I'Ll just tie a knot in the back, because if I do it twice around it'll push the hair back to like my crown - and I don't want that. So I'm just going to tie a knot in the back or you can always use a shorter goodie band. But this is the the best one that I have so you get it like that, so you got a little bit in the front and then I personally like to do my edges. First, before applying the hair scarf foreign boy, slicked back more slick down, you have them like the cleaner. It looks like that's the look you're going for, if not nothing wrong, if you're not an edge girl, if you don't want it all, slicked down it's 2023, we do what we want, but if you are an edge girl, the Slicker, it is the cleaner. This kind of looks so I just have a regular like neck scarf that I've made into a hair scarf. So I personally like to Bunch mine up or either fold it a few times, so I have it folded. So it's flat so we're going to lay this up against the back and they got ta make sure it's even at the end and just tie a knot. And then I don't like it over my ear. So I'll go ahead and get my ears out and then I'll I'll keep this a little tight and push it back to a little bit of my edges are exposed. If you want, you can push the curls back right now, we'll fluff it later so after I get it to the tightness that I, like I just twist, the scarf over each other kind of like you're, doing like a twist for your hair and then you're just Going to kind of keep twisting it around itself to make a little like not, and then you just tuck it behind. So if you keep it nice and tight, that should not come out, and then I just fix my edges, real quick, my swoop back and then you just push those curls back forward once again the volume and make sure you're still checking from the side this side. I like for mine to kind of like waterfall over the back of the scarf. This is perfect when you're at the end of this style - and you probably should have taken it out days ago, but you just feeling lazy. This is a great little like I'm still cute style. This is totally my go-to, whether I have crochet or not. But yes, this is a cute little turban, hair scarf. Look that I just love to rock with these curls all right. So for our last and final, look, it's pretty similar to what we just did. I'M just gon na do a full, no hair exposed hair, wrap situation um. Of course, you can do this with your regular hair, pretty much any style, but I just love adding this image and making bounce, because once again, I'm a mom times are hard. We don't always get to do our hairs, but we still need to look cute and feel good. So it's sometimes it's just easier. If you're, at the end of this style, to just wrap it all up in a hair, scarf slip down them edges and keep it cute, keep it pushing. So I'm just going to take this knot out of my hair tie and I'm gon na put all my hair up into a like bun. This part really doesn't matter what it looks like I just like to keep mine rounded boom. Once again, you can do your edges again. I just kind of did mine, but I'll go back over it. One more time keep it nice and slick, and then once again, I'm taking a different hair scarf just to kind of give a different effect from the previous Style. And this time you want to open it all the way up and find the center of it. And just put it on the back of your head and this time I like to grab it from the sides as tight as you're comfortable with take the all of that and twist it around itself until it's as tight as you like once you have it at The tightness you want, then pop the little ears out, get it nice and tight, make sure it's not too bulky in the back and then I'm going to keep wrapping this and I'll only wrap a smidge of it. I don't want this too tight and you have like the snake situation around. I just do this enough, so it doesn't slide and because the Jamaican bounce curls are so coarse. That also works to your advantage, so it doesn't slide too much versus just like your normal hair. So I do that tight around like once and then I kind of keep I still twisting, but I'm keeping it a Light twist and I'm making this shape. So you see we kind of have like a little bun for them, I'm still twisting, but I'm keeping it loose and I'm gon na wrap that all the way around and then tuck and now you can just go in that loose part. You can kind of fluff to your desired shape and I just really like seeing that definition of like the bun versus the the slickness going up clean up those edges and voila. We have all of our curls wrapped up in this head, scarf super cute and if anybody knows me in real life, you all know this is like almost my day-to-day look like I love me, a good head wrap, especially if you got some fun. Colors prints patterns matches everything, still look cute, throwing your Hoops. Nobody will know you're having a bad hair day. Nobody will know so this is look number seven, all right y'all. So those are all seven of my looks if you made it to the end of this video. Thank you so much for rocking with your girl. Definitely leave me plenty of comments down below which look was your favorite? You have any questions, any suggestions, let me know down below I'm super open, don't forget to subscribe, hit that like button and don't forget to check out my Ig page y'all. I got so much more fun day to day content up there as well and as usual. Thank you for rocking it out with me, and I will catch you guys on my next one. Bye, foreign


Comments
ShoM: Loved this video .Thank You! My fav was look 6.
PATRICIA SALAME: 8:00 pm Love your video and presentation, will definitely share ❤
ShoM: ♀️
Daiii: