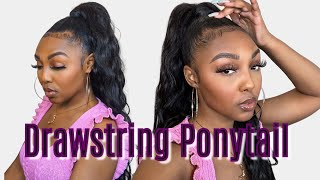
How To Make Afro Puff Ponytail At Home In 30 Minute... Step By Step Tutorial.
- Posted on 21 October, 2020
- Ponytail Hairstyles
- By Anonymous
LOOK HERE LOVELIES
IN THIS AMAZING VIDEO, YOU WILL BE LEARNING FOUR THINGS
1 HOW TO MAKE THE CAP USED FOR MAKING ANY KIND OF PONYTAIL
2.HOW TO MAKE AFRO PONYTAIL
3. HOW TO INSTALL PONYTAIL
4. HOW TO MAKE CULLY FROM STRAIGHT HAIR THAT CAN BE USED FOR MAKING CURLY PONYTAIL AND AFRO PONYTAIL
THIS AFRO PONYTAIL PUFF CAN BE A GOOD FORM OF PROTECTIVE STYLING AN IT WILL SAVE YOU TIME AND COST TOO.
ITS INSTALLION METHOD IT THE EASIEST
TIMESTAMPS AND VIDEO CHAPTER
00:00 - introduction
00:10 - ponytail cap
00:46 - making afro ponytail
06:38 - installation of afro ponytail
07:12 -making of kinky curly hair
ITEMS YOU WILL NEED
STRAIGHT HAIR
STOCKINGS
CROCHET PIN
SCISSORS
COMB
BEAD
ELASTIC ROPE
PLS SUBSCRIBE
JOIN MY HAIR GROWTH CHALLEGE; BIG CHOP BY DECEMBER 2020 WATCH ME TRANSFORM MY RELAXED HAIR INTO A LONG WAIST LENGTH 4C NATURAL HAIR
LETS CONNECT
AM MEKNEX, A NEW YOUTUBER WHO IS DETERMINED TO BRING YOU AMEZING CONTENT FOR YOU HAIR
JOIN ME ON FACEBOOK @ MEKNEX NATURAL HAIR
INSTAGRAM@ MEKNEX_NATURAL_HAIR
OR CALL ON
#afroponytail,
#afro ponytail wig
afro hairstyle
Hello guys welcome back to my channel meekness, natural hair and weak city, where i do have tricks and tips today, i'm going to be making afro ponytail and we'll be making it from the card down to the wig and also the hair. Here i have an old stockings, but if you can afford a new one by all means get it, then i'm going to be cutting it into half and also i also have an elastic rope. I got this one from a shirts and also a bead. This bead. I will tell you the importance later, but it's really important for this afro cap, but you can get any bead of your choice. Okay, i'm going to be making a knot here. You can also use a sewing machine to make this knot, but i prefer tying it because i feel is stronger when i tie all right, i'm just going to be tying it to the regular we retired. So this is what it should look like when you finish tying okay. Now we are going to be attaching this to the stockings by sewing, i'm going to be using a needle and a tray to sew this. You can also use a sewing machine to sew this. In order to make it faster and maybe neat and also be very careful while sewing, so you don't attach the band to the stockings or you can finish sewing before, attaching your buns in, but i like doing it this way. It makes the job just easier and we are done okay. This is the hair i'm going to be using one of my diys and i'm going to be putting the step-by-step method on how i made this at the end of this video. So if you're interested please stay to the end and also don't forget to like subscribe and comment on this video, i'm just going to be cutting it because i'm making an afro ponytail remember so it has to be shorts, but i can make it longer. If i want, but i want a shorter one now, so this is what i'm going to be wearing the cap on when you get this cap, you do not need to stress anymore. Your free ponytail is ready just go round and round with your hair and you're done. You don't need to measure perimeter. You don't need to measure where to put your hair in or where not, to put you just crochet this hair around every angle, every corner, if you want it's fuller, don't leave any space if you want it. Scanty then leave spaces in between your hair. In between your crotchets uh, that's, basically it there's nothing hard here anymore. The only thing is just get your cup right, so you see in 30 minutes. You will be done doing this because you do not need to measure parameters again. Do not need to measure anything. Do not need to know where to put your hair and when not to put just go around the cap and another thing: please don't use these. My crotchets don't use a big crotchet spin for this, because it's going to stress you out use a smaller one. I just couldn't get the smaller one. That'S why i'm using the big one so use a smaller one. I think we have a crotchet needle that is way smaller than this one, so use a smaller one for this. Unless you are ready for the stress like i did guys, you need to feel this hair, it's so soft. I think this hair is the best for afroponics and it costs you less than will be less than anything. You can imagine all right, i'm done and i'm going to be combing now, so i can trim. So i i'll just comb out all the coils that i do not need just come with. Our boards definitely are still going to retain a lot of coins and see it looks so natural, so natural flawless guys. I think you need to try this. You need to try this, and this is the lazy girls hack. You can just throw it on on your hair and you are good to go. We are done see what it looks like see, ready for your hair, just pull wow. We are done. This is a ponytail afro ponytail, so guys, because i'm still on my protective style, the one i did during my last video i'm going to be trying it on on this lovely babe here. So this is just how you install and, and that's what i said about the use of the bead. This bead is just going to help you when you want to take down the rope it's going to help you locate where the rope is so see how beautiful this is. Okay, now we are going to be making the hair we used for this afro. You are going to be needing a straight hair, any kind. This one is an expression product and you are going to be making it look like this. Just like this combat oil leaves with vaseline and go in with your straw, like this. Using this kind of straw is very, very difficult to handle, so you can maybe look for a hard straw or if you are going to use this straw, maybe put a stick into the straw, but i'm already used to making it. So it doesn't take me that much stress i don't put any stick anymore. I just go in that's easily, so i'm going to be doing one more. So you see how it goes. Put your straw in then twist your hair round round round yeah i'm putting but be pain, but the first one i did not put would be pain because i'm already used to making it without anything. So you need your bobby pin it's very important to hold your ends, so it doesn't lose while you are twisting so you twist around and the straws i'm using. They are the ones i've already used over and over and over again. So you can manage your own straw. This way always use it after using it again, you don't have to always buy neutral. I use mine as often and until it burns, i keep using it. So you see you go on and on. You do not need to add anything to the end, because the ends of the attachments can help here. So this is what it looks like i'm just going to hot so tight and then let it dry. You

Comments
Meknex Kingsley: You can also see this video on how you can make your weave on at home here... Quick and easy https://youtu.be/To8MPXJIjCw
Lesha AnnMarie: Wow you’re so talented ! I would have never thought I could create my own ! Great video
ITZ SUE: Love this idea thank you so much
Faith Kachesa: Thank for the tip. Can't wait to try it
Louise Niro: Thanks so much. I just shared with my hubby about this one and he said, “Well what are you waiting for? Make it.” Lol. So here I go . . .
mougiler mougile: I can do this, thanks for the tutorial
EvolutionDynasty: This looks so great, I make head band wigs. You made this so easily. I need to try this. I’m excited to see more from you. I do hair tutorials, vlogs, and lifestyle. When you get a chance come and check me out. Thanks for sharing
Fi Ona: Wow you are so creative!
Itsjustsp: Love your channel
belarl Ishimw: Wow impressive