Soft Loc Barbie Ponytail Hair Tutorial
- Posted on 02 July, 2022
- Ponytail Hairstyles
- By Anonymous
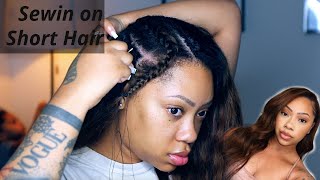
Here’s the tutorial for the soft loc Barbie ponytail!! I hope you all enjoy! Let me know what y’all think
Hair Products used:
Bobbi Boss nu locs 2x: https://www.shopbeautydepot.com/produc...
Spring twist hair 2x: https://www.shopbeautydepot.com/produc...
Blake Jael’s video: https://youtu.be/p3Dt5jx4QF0
—————-
Like, Comment & Subscribe!
Link to my last video: https://youtu.be/MRMv7TCk8us
@tashiraaapril on all socials
Business inquiries: [email protected]
Hey guys, let's jump right into it, you're going to need some rubber bands. I use the bobby boss new locks in color 1b, even though this shows four i had to go back to the store, switch it out and then for the spring twist. Here i used the keema spring twist. I'M pretty sure you can use any kind of spring twist here that you will like, but this is the only one available at the store i usually go to so we're going to jump right into it. Now i left two sides undone because i had to redo the size just to show you guys. Um, you see i'm looking a little crazy, but it's okay, we're gon na be looking cute later so here, i'm gon na do a loop technique that i got from blake jl's youtube page, so you're, gon na add this loop onto your hair with a rubber band And this will make it easier once you attach your lock and also give it a flatter look once you start wrapping your hair with a spring twist here doing my locs. This way cuts down so much time for me, okay period, because before it was taking me a little bit longer, but with this technique it's quicker, i think in total. Maybe it took me like four to five hours to do my locs, which is pretty good. Now we have all the loops in on both sides, so we can begin attaching the lock itself. Okay, i'm placing the rest of my hair back so just to be out the way we're going to grab the loop and we're going to also make a loop in the lock itself and place it inside of that loop bring it down. It will create a little knot. Okay, we're going to do it again, a bit closer. Okay, you see the loop we're going to create a loop, also in the lock itself, you're going to put it right. Beside of the hair you see and on the opposite side, you're going to pull the end of that block, pull it right through that loop to secure it. So it can be a tight knot. Remember guys the braid itself does not have to be perfect as long as it is attaching to the lock securely and excuse my parts. They are not perfect, but again the hairstyle will be cute at the end. Now we're just doing the other side. I just wanted to film it, but it's going to be the same technique. You know, pull it right through the loop and just have it secured. Okay, now that it's all together, both sides have the locks attached. We will begin wrapping. I have my mouse katool, my lovely crochet needle, and then we will pull that through the root of the hair grab the spring twist. You know fluff it out a bit now you're going to attach the flip out hair onto the crochet needle close the little latch and just pull it through and just bring down one side out of that spring twist hair. So we can start wrapping, i'm going to start wrapping the hair with one side of the hair, one piece of the spring to his hair, because i noticed in the back. I was using both sides to wrap it and it was kind of like not flat as i want it to be so this time in the front. I want to use one side, so it can be flatter than before. If that makes sense, once you wrapped it all the way down covering your natural hair and also part of the other lock, you won't have to wrap it all the way down. You can just create a slight knot and cut the rest off. That'S what i'm going to do now now just do this little motion to secure the lock and then we can move on to the next one, pretty easy keep up with my tempo. I keep now that we have one side completed, we're going to go to the opposite side and just complete that doing the same exact wrapping technique just wrap it all the way down do a little knot and cut the excess hair off. Now all the hair is wrapped and please note that the middle of my head was not redone for this video just the side parts, but we're done with wrapping the hair now, so we're just going to start with our barbie ponytail and start to wrap. So i'm taking one in the front, i'm bringing it to its desire length that i want i'm going to start twisting down and once i get all the way down, i'm going to try to put it in the loop. That'S at the bottom, and once i place it in that loop, i will secure it with the rubber band, so it will not unravel keep up with my tempo the same with this one. I wrapped it all the way down. You just get a clear review and then i will try to place the loop with the extra hair through the loop like so like. So i like that and then i will grab the rubber band to secure the end simple as pie. I just wan na. Let go keep up with my tempo, i just wan na. Let go i just wan na let go now. I am tempting to put my hair in the rubber band to create this ponytail. I am struggling a bit as you can see, but you can see that i am trying to make sure that every piece of hair in the back is through this ponytail holder just to secure it. My other rubber band popped. So i grabbed another one. Just to secure it again, i just added an extra rubber band. I tied it in the back now we now we really good after the hairband has secured my ponytail. I will actually wrap a few extra pieces around the ponytail itself, just to bring it a little bit up higher um sort of like a pineapple away. Okay, because now we fill it in ourselves, we're getting somewhere. So next we're going to do the same thing to the ponytail, but we're going to grab two locs instead of one and then we're going to twist them both together. We'Re going to do the same exact technique, bring it up to your desired length and start wrapping down. I just wan na let go keep up with my now we're going to put that little piece, that's being wrapped down into the loop like i said previously, and then we're going to attach that rubber band to secure that first knot in the ponytail. Now i'm going to just speed through this next clip of me just wrapping my ponytail, so you guys can get a visual. What'S going on keep up with my tempo, i just wan na let go, and now we are finished girl we looking good. It is not perfect, but i think this looks really really good just to be my first time doing the barbie ponytail and we are going to add this gorilla jam. This is honestly the only thing that works for my edges. Being a 4c girl just saying we're going to secure the edges on the other side as well, and afterwards we will apply the hair band just to lay the edges for a while, so they can stay all right. Y'All here is the finished product of me. Doing my barbie ponytail lock bob thinking my looks really good. I'M pretty sure anybody. If i can do it, you guys can do it. It'S a very, very easy hairstyle to do, and it doesn't take that long like i said it takes like four or five hours, including parting, my hair as well, so we got it going on. Look at me, girl, looking good, okay, show them that side. Thank you guys for watching my video, don't forget to comment like and subscribe and please let me know if you like, a video of me doing different loc hairstyles, but the locks that's already in my hair. Now that wouldn't be issue at all again. I hope you guys enjoy this video and let me know what you think keep up with my


Comments
Mykeia: Great job! I’m trying this on myself and daughter this weekend
Aderonke Adegbite: came out great . Looks super natural too
Nurturing Natasha: Ugh these look so good on you!!! I wish I could do styles like this right now but my edges are on DND
Petitions Thru Dimensions: Just beautiful
Yaxia Hashi: Beautiful job!
Bobby Addison: I love it..... looks really nice. Now come do mine Love you ❤
Everything Niss: Not me mad bc I’m bald head. u look tf good!!