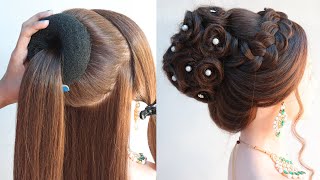
How To Customize Messy Bun Hair Tie And Glasses In Cricut Design Space
- Posted on 30 June, 2021
- Short Hair
- By Anonymous
LIKE THIS VIDEO AND SUBRSCIBE NOW :)
Super Easy, fun design technique.
JOIN US ON FACEBOOK! 410,000 member Cricut group. You will fit right right in-
https://www.facebook.com/groups/397046...
#ad
MESSY BUN SVG SET (Grab this one. you will love it)- https://designbundles.net/svgcrafters/...
ROSE PATTERN SVG- https://designbundles.net/zensvg/12020...
CAMO PATTERN SVG- https://designbundles.net/digital-ocea...
Hi sarah bana spectrum wavers i'm going to show you today how to customize these mom bun images so that you can add whatever you want into the hair tie as well as the glasses super easy, it's a fun trend. So, let's get started. Let'S get rid of some of the stuff that we don't need. Make yourself some room um like this video, but also subscribe to my channel you'll, get a notification when all of the new videos come out just maybe twice a week or so just lots of fun ways to use your cricut, but also to design for yourself. So subscribe and you'll get the notification get rid of that. Also, though, join me on facebook, i'll link it in the description. I have a group of pretty big it's about. 410 000 members, super friendly, all cricket users. Um super friendly super helpful, so i'll link that in the description join us there you'll fit right in we'd love to have you. So what you're going to need um you're going to need a good svg set that has two layers for your um for your hair. Bow and two layers for your glasses, so this is a really good set. This includes one second. This includes all of this and all of this i'll link that, in the description also uh, i only spent a couple of dollars on it. It includes a commercial use license, so you can use it for on items that you make to sell highly recommend this set. Like i said, i will link this in the description make this bigger, and this is something else kind of neat about this set, so it actually comes with two layers for the hair. Also so, if you wanted to, you could make the hair one color and then make um give it highlights with another color. I'M not going to do that for this, though so and i don't want to waste time showing you, but you can figure that out. So we need that we need this. We need this, take this and move it to the back, so it doesn't accidentally grab it. This is just such a cute set, okay and then her hair bow, that's good, just like that. So once you have these, where you want them, you're going to want to take your second layer, move that off to the side, i'm going to make a duplicate of this, because i'll need that a little bit for the next one. We do that over to the side and then take and select all of this weld that into a single layer, okay and now, oops move that to the back right, click send it back for anyone who doesn't know place your second layer where you want it. Okay, now make sure that you're grabbing the actual layer, you'd like to move, move that and i'll select both of these weld, these together, okay and then you're going to want to duplicate that for this one, because this one we're actually going to make it three layers And then for this, one you'll need this i'll link this in the description also, i found this for a couple of dollars the other day and i didn't know what i was going to use it on, but i absolutely loved it and i needed it in my Life - and i think you do too so i will link this in the description. It'S just really pretty. It'S really pretty pattern, so you're going to want to kind of move this around so that you're slicing out the pieces of the design that you want here. I'Ll move that to the back, just so that you can see what i mean so that whatever is covered, that's the pieces that will be sliced out. You want your! You want your the pink layer, the secondary layer, on top so select both slice just give it a second, it's a lot of information that it's processing with the flowers, okay and then we can select this and get rid of that and we can get rid of Our pink layer so now take all of this select all of that and weld all of that together. Okay, and in this case i'm going to turn that white for the sake of the video and now i'll bring this back in okay and that's how simple that is so now you have a three layer, svg that you can cut and you know either in self-adhesive Or in htv and press, but it's that simple so then you would cut this in white this in pink this in black and that's it. And then you have your three layers and you can do this with anything i mean yeah, the flowers are cute. You could do you know if you're a jeep girl, you could, you know maybe do the grill of a jeep on the sunglasses. I'Ve seen that done. That'S super cute um! So now, but let me show you something else that you can do with this. You can also, or tell you at least you can also take say you wanted to do this for sublimation or for a print project. So say you wanted to say your kid plays baseball and you wanted to put a picture of your kid playing baseball in your sunglasses and then do that as sublimation or as a printable um heat transfer material. Something like that on a shirt. All you would do is take that picture of your kid upload that to design space and then take the secondary layer. Take this right here, this layer, the top pink layer and slice that out of the photograph layer that on top select it all and flatten it. So watch what happens when i select it all and flatten it, and now this is all one layer, and that would print so you can do that. Also so there's just it's just a really neat technique that you can do um with these. With these images, it's just it's fun, so let me just show you a couple other things real, quick take this make that bigger. I don't want to take up too much your time, but so this one was super neat also and i'll link. Also in the description this camo that i used, this is also this camo is also a layered svg, so it would be the let's get rid of that one. So it would be the same thing when you um. It would be the same thing with this. With this camo, when you sliced that out, it would slice the same way and then this one this one i just made myself, i just took rectangles. This is all just a bunch of rectangles that i see, but that's all this is. This is just a bunch of rectangles that i put together to make that um super easy, though i mean, if you have any questions, you can ask them in the comments. Um or you know better yet come join the group and ask me directly there um i'll link the group in the comments i'll link. This svg set highly recommend it like i said, for a couple of dollars: it's a fantastic one and actually, if you um click on the link and then click on the designer's information she has another set. That includes all of this, and also a little kid one. Um, you know how you see the the images with the model with the kid um, and so it has all of it. It has all of the mom all of the mom buns and glasses, and that and then it also has all of that for the kid image also with the uh two buns on either side of super cute um. But i'll link that, in the description or i'll link this set in the description, uh i'll link the camo in the description, i'll link the roses in the description, i'll link the facebook group in the description um, i mean like the video subscribe to my channel. Join us on facebook, if you have any questions at all feel free to ask um, and i hope you have a good day bye. You


Comments
Karen Katuls: Thanks so much for this excellent explanation.
dahlia martinez: Loved loved it… just actually working on one, but I could not get my wording on the headband correctly when I printed it
Sandra Carrillo: Love this video. Super easy to follow. What about if you want your frame of glasses to be same as bow but you want an opening IN the glasses to show your eyes or one eye open & the other winking/closed? That's where I'm having an issue
Aimee M: Love this, thank you!! Can you tell me why I can't get "slice" to light up when trying to slice music notes onto the sunglasses? I got the music notes from design space.
Yoli Sand: I am looking for a Texas Longhorn pattern, where do I find one like your rose pattern?
Robin Rodriguez: How can I download this design onto my Cricut space?
Laura Velasquez: I need help with adding a track design on the glasses I can’t seem to figure it out don’t know what step I’m missing
Tonya Dehner: Hello! I purchased the leopard set. So how do I get it onto design space? Ty so much!
Kimberly Craft: I followed this exactly and I can’t get my iPad to even give me the slice option
Patti H: When i cut this is kinda shreds the bun because of all the cuts. Any suggestions on how to print
Yvette Arthur: Hi how do I download this svg please?
Jedi Crypto: if im doing print and cut should i color in the white part of the hairs to match the shirt?
Joshua & Crystal DaVault: Need help. I bought one and how to cut it out with a design. New and never done more
Savannah Hayslip: Sonl i bought and downloaded this set but cannot get cricut to open it any tips