Romantic Valentines Day Easy Updo For Short Or Medium Length Hair!
- Posted on 08 February, 2014
- Updos
- By Anonymous
Hello beautifuls!!! I am back with an awesome tutorial for Valentines Day! If you are in a relationship or just going out with your girlfriends for S.A.D. (singles awareness day) this style is perfect!
Don't for get to check out my blog: www.simplebraidedhairstyles.com
My NEW channel: https://www.youtube.com/channel/UCPpMD...
Would you like to be my friend?
Like My Facebook Page (simplebraidedhairstyles): https://www.facebook.com/pages/SimpleB...
Like My Facebook Page (LexieTheHairstylist): https://www.facebook.com/pages/Lexie-T...
Follow me on Twitter: https://twitter.com/SimpleBraided
Follow me on Pinterest: http://pinterest.com/lexievoelker/
Follow me on Instagram: simplebraidedhairstyles
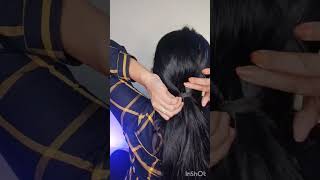
Hey guys, it's Lexie today and doing a quick video on an updo for medium to short length hair. So, as many of you know, I had cut my hair pretty sure it was about in here, and it's growing a couple inches it's about in here, but when it curls it goes right back up. So it's pretty short and what I wanted to do show you guys how to make an updo that it looks full. It looks thick with short hair, so I'm this is the luck. So that is the look I just wanted to apologize, for. There was a couple parts where my head was cut off at the top, and my camera must have shifted a little bit. So I'm sorry for that. But I'm bear with me because it's an awesome awesome tutorial, and this is something that you can do. It'S easy, quick and it's so elegant. So thank you so much for watching and let's get started alright. So the first thing I am doing it's making sure that my part is pretty straight something I do and almost hair every hair tutorial make sure that part is straight and also, as you can see, my hair is pretty curly. I use the wand to curl it. I'M now going to go ahead and tease my hair, give it some volume and you will see I'm going to look crazy right about now. So now what I'm doing is going ahead and smoothing it out and basically just getting it. So it looks smooth on top and not taking out too much of that volume, but just enough so I'll be able to pull it back. So now I'm going ahead and pretending, like I'm doing a half updo with the top and again I'm sorry that this is cut off. But you get the idea that I am smoothing it all out, bringing it to the back and basically making it look, smooth and ready to go for that updo. So now I'm going ahead and gathering it in the back and I'm going to put the bobby pin in add a diagonal and then I'm going to take the other side and bring it over and bring it over. The top of that bobby pin that I had just placed and I'm sorry, I'm smoothing my hair. It'S something bad habit, not really, but it's a habit and then I'm going to go ahead and cross the next bobby pin over the top. So again, that's something so easy and as you can see, it doesn't look any different. So now we're going to go ahead and cover those bobby pins, so I'm taking the hair, smoothing it and rolling it. And now I'm going to put a pin on the inside of that to hold it, so it's almost like a loop so and I'm doing this without a mirror. So if I can do it without a mirror, you can definitely do it with a mirror behind you. So you again you're just going to wrap around I like to wrap around my thumb and then I go ahead and pin on the other side. So the next thing that I did was took these side sections of hair and I just put them into the center part so where those bobby pins were before, I was putting it there and then I pinned it, and I did that on both sides and brought It to the center now I'm taking that underneath hair and I'm making another loop and kind of twisting it, and this does not have to be perfect at all and just make sure that you get it in that center, where those bobby pins are. You need something for the hair to grab on to so the next thing I'm doing is taking half of the hair on the bottom kind of scrunching it up and I'm going to put one pin at its base and I'm not I'm leaving those ends out, because What we're going to do is then roll it, and I did that to the other side as well, so leave those ends out, make sure not to pin them up. So then I went ahead and rolled the hair and pinned it into place and then, as you can see, this is the final look. So thank you so much for watching and have a wonderful holiday, single or not I'll, see you guys bye.


Comments
Yael Blatt: Thank you for posting this! I had a wedding this past weekend and I wanted my hair up because it's hot out. I watched this video like 3 times and it looked great. People were asking where I got it done!
PrettyBlueFlowers: So beautiful and well explained, thank you!
Michelle Wright: Gorgeous style and really well demonstrated thank you
Nakthis: This is a very good one! Thanks a lot, I pulled it off :) Some loose ends here and there but I have different lengths so not a shocker there. Pretty!
Gracey E.: I really like this hairstyle!! This is perfect for the wedding I will be attending this Saturday! Hopefully I can pull it off!
TheRenGirl: this is such a pretty hairstyle!
Sharon La Tour: cute as can be! love it!
MARIPOSA butterflies: Very helpful!
Diana Mendoza: This is a very pretty hairstyle
Rhonda Mancinelli: Beautiful!!!
Nikki G: beautiful!
Daisy D: Very cute!!
Nathapohn Suwannathada: look great!
MissLauraSquared: Missing your videos! It's been awhile since you posted a new one.
kirsty toon: How do you get your hair so shiny and smooth ?
Camisha Fallen Angels: That's what my natural color looks like that shade
MissLauraSquared: You now have 3000 subscribers!
Icy sharks: you're so pretty you look like jillian from workaholics
MissLauraSquared: Do you know if your channel has been having any technical issues? I tried watching your Bare Minerals video and it won't work. Some of your videos will load and some of them won't. Do you know why this may be happening?
aleena francis: The camera didn't point right.
Amelia: I. Love. You. Ok? Ok!!!