How To: Simple Braided High Updo | Kenra
Follow along as Heidi Marie Garrett (IG: @heidimariegarrett) shows how to create a romantic and easy high updo for long hair using Kenra styling products.
Click here to learn more about Kenra products: bit.ly/KenraPro
SUBSCRIBE NOW: http://bit.ly/KenraProfessionalSubscri...
VISIT OUR WEBSITE: https://www.kenraprofessional.com
About Kenra Professional
We are a purely professional brand dedicated to understanding and serving today’s stylists. Our passion is developing best-in-class innovations, delivering superior and reliable results. Kenra Professional strives to elevate the stylists’ artistry and craft.
CONNECT with US
FACEBOOK: https://www.facebook.com/KenraProfessi...
INSTAGRAM: https://www.instagram.com/kenraprofess...
TWITTER: https://twitter.com/Kenra_Haircare
HOW TO: Simple Braided High Updo | Kenra: https://youtu.be/2uXDMRfbEZE
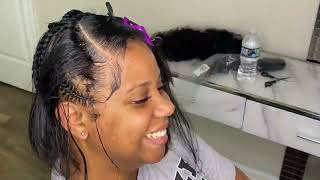
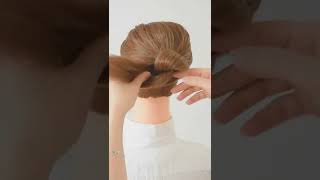
Hey everyone - I am Heidi Garrett and today I'm going to show you how to do a simple braided high up do so before I get started working on her updo, I'm going to use a little bit of kenra platinum, revive oil throughout her ends specifically, but just Distributing it evenly throughout her hair to just tame a little bit of the flyaways and protect her ends. So to begin this hairstyle I'm going to carve out the center portion of her hair. Then I'm going to place this section into a ponytail at the highest point on her head, because that's where I want majority of the updo to sit before moving on to the next step, make sure that the perimeter of the ponytail is about two inches wide. So from hairline to part line, there should be about two inches width. So the next thing you're going to do is split the ponytail into two sections and then we're going to create two separate three strand braids after you finished your first braid make sure you pancake the braid before you place an elastic on the end. If you find that you have trouble pancaking, braids or you're, just kind of afraid of it in general because it can be intimidating, what I would recommend is thinking about unlacing your shoes when you're unlacing your shoes. Typically, you start at the tongue, so you make those laces really loose so that by the time you get to the toe of your shoe, all of the laces are roughly about the same size. So the same can be applied to pancaking braids, so don't be afraid to take the loops nearest your hand and make them really really expanded and really really loose so that by the time you get to the base of the braid. These loops are no longer big and expanded, they're the same size as everything else for this particular hairstyle. I don't recommend pancaking the braid too much. It'S just to create a little bit more fullness for now, and then we will continue pulling the braid apart as we work through the hairstyle. For now, I'm going to secure the end with an elastic rubber band. Now I'm going to create a three strand braid with the other section from the ponytail. Now that I've completed both braids from the ponytail, I'm going to lay each braid to cover up the part line from the ponytail section and also I'm going to be establishing the foundation for the updo make sure. Before you lay down the braid completely that you tuck. The tail in rubber band so that it disappears then you're going to secure the end of the braid with a bobby pin by simply sliding the bobby pin into the braid. Laying the bobby pin down horizontally and sliding it through. Then you're going to repeat the same process with the other braid draping it up and across tucking the tail underneath and then securing the end with bobby pin. Now that I've secured the foundation of the updo, I'm going to separate out the back section from the two front side sections so starting from behind the ear and going forward going to leave those areas out for now. My goal with this back section is to fill in any gaps towards the back of the updo, but also to have a beautiful draped effect from the back sides and to the center start working the back section up towards the top of the updo. And don't worry about any of these soft flyaway pieces that are coming out we'll talk about those in just a minute, but right now, as you can see, as I start pulling the section up towards the updo, I'm now creating a draped effect and covering up the Part lines, then what you'll do is create a three strand braid, with this back section, making sure to direct the braid up towards the sky, so that it can flow nicely into the updo, make sure you pancake the braid before securing it with an elastic band. Now that I've secured the braid with an elastic I'm going to simply roll the braid down and towards the main foundation of the updo, and once I get it into a shape and kind of the formation that I want it to be in I'm going to secure It with bobby pins don't be afraid to kind of play around with the braid. You can make it go straight up into the updo or you can turn it to the side, just kind of see what it looks like and see what shape you prefer. Moving on to the front side sections, I'm going to first remove a few wispy pieces from the section so that they can kind of fall out and lay softly framing her face. Now I'm going to take this front side section and start twisting it up towards the updo. My end goal here is to actually be placing it across the front of the updo, but before I do that, I'm going to spray some kenra platinum, dry, texture spray. Throughout the twist, then, I'm going to gently pull the twist apart to create volume and dimension and the dry texture spray is actually really great for adding in that volume and texture. Once I've loosened up the twist, I'm going to gently drape and lay the twists across the front of the updo, making sure that I'm covering up any extra part lines or design lines that I don't want exposed. Then I'm going to take my bobby pin and first secure the base of the twist against the updo by simply diving, the bobby pin through the bulk of the twist and slide it towards the updo. Then I'm going to tack down the remaining portion of the twist. I'M going to repeat the same thing on the opposite section, making sure again that I'm twisting towards the updo when you're finishing up the opposite twist. You can take the tail of the twist and lift up the braid from the foundation and just simply tuck the tail underneath and then secure it with a bobby pin. What I recommend doing now, especially if you like voluminous updos, is going throughout the entire updo. So all three braids and both twists and pulling out some of the areas that you feel like you want a little bit more volume. As I continued working through the updo just pulling the updo part a little bit of creating some more texture and volume. You want to make sure that you're being mindful of any areas that need a little help so, for example, right here, I can see a split between the front section and the ponytail section from the original foundation. So I want to make sure that I go through the twist that I created earlier and gently just pull it to cover up that area that I don't want exposed.

Comments
Alice Josephine: Love it and every step explained well. Thank you.
HaydeecantaDios.: So so cute I try it and I love it! I did a French braid in back instead seem easier for me! But I was just practicing and it came out super cute definitely will do again thank you
Angela Hagood: Beautiful yet simple style! Would like to have seen what she did with the loose hair that fell out in the back. BTW , LOVE the stylist’s hairstyle! Wish my short hair could’ve looked that cute! Great tutorial! Thanks!
Adrianna Oliver: Best explained updo ever!! Thank you!!
Jonathan Ashby: You are a very good teacher. Im taking my hairdressing class at this moment and watching more of you then in class. Thanks so much! Do you guys ever do some lives?? or shows..?
Hugo Arenas: Hermoso trabajo. Felicidades
Enn: The hairstyle is gorgeous and I loved how clearly you explained with all the steps! But... I couldn't see the BRAIDED part of the updo after it was done
Craft Buggy: This is a a great tutorial!!
JILA YAHYAPOUR: Very beautiful and you are the best teacher thank you so much!
Silver Mont: Great tutorial
Padma Akula: You are such an excellent teacher. Thanks heaps for this video
Tory Setliff: Thanks for the pancaking tip. Very helpful to me!
Moazzama Karim: Lovely ❤️
Waraporn T Azares: Can I suggest you showing the front, so that we can see how the hair also look in the front too? It's always beautiful in the back but we have no idea how the front should look. It really matters how the hair is placed to create the perfect shape for the head on every angle. Anyway, thank you for showing this.
forever bellaMua: Beautiful ❤️
Emiliya: That's lovely ❤️
Jani Ca.: I LOVE the hair colour!!
Fatana Wahab: Beautiful
Tara S: Powerful verse on your arm sis!
Popy Barua: Beautiful. But I think to create the first ponytai you could've done zigzag partings to avoid exposure in the end?
LucylnRealLife: Beautiful
MeliHairStyle: Look beautiful
Lina Walker: Love your tutorials. What belt are you using? Thank you
The Bookworms Nook: This is so not easy even though it's well explained I could never do it.
Amal ali: رررررروعة ❤️
Arlyn mabute: You forget to demostrate the remaining hair around the nape area.
Larissa Secret: Thanks for class. I would like to be able like you are.
Pallavi Jain: Great
Janine Jacobs: I need that tool belt!!! Does Kenra offer it to buy?
Najla Ahmed: ❤️❤️❤️
enternamehere: Love this but what does the front look like??
Shannon Kennedy: Is the model's color the Rose Metallic line?
william gestole: where can I buy that utility belt?
MamaMOB: How to do a simple braided updo on somebody else’s head not your own! Why not tell us that you’re not doing it on your own head? Most people looking for hair tutorials are going to be doing their own hair. I’m not saying there’s no one who wouldn’t benefit from this but the majority of people aren’t looking for how to do somebody else’s hair. Why waste our time?
ANISHA REDDY: Good supar looking
Samantha Charlton: I'd like to see the front