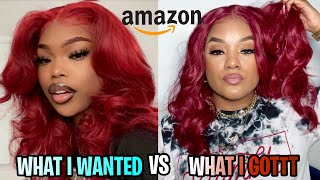
*Detailed* Fix Your Over Bleached Knots| Must Have Affordable 30Inch Amazon Wig! | Samone Emon
** WATCH IN 1080P**
Merry Christmas!! Today i’m showing yall in detail could go about fixing your over bleached hairline.
Wig: https://www.amazon.com/dp/B08MCFVBNM?r...
Bundle: https://www.amazon.com/dp/B08B619MYY?r...
Hair Dye:
Ion color brilliance
Natural black and 30 vol developer
Uh no babe, i would hope you would [ __ ] tell me to take this [ __ ] off before we go any [ __ ], we're gon na, find your car and go home. That'S what i'm talking about you talking about. If i pulled up to the function, looking like this yeah yeah when you park it uh yeah come on babe it's time to go, i'm dead for sure, not gon na. Let me go outside baby yeah. This looks crazy. Look how dense they literally like and it's a pre-plucked. This is this: it's not pre-plugged. How do you pluck it? You just take some tweezers and plug the [ __ ] out yeah. Definitely i like the layers in it, though, that [ __ ] cute. I really wanted to just make it all one length, but it's not gon na be able to do that. But but i like the layers i like that some of the cute ones, there's gon na, be like a little bit thicker just a little bit. Definitely all right not really vlogging. This is going to be a hair review. So i can't watch tv. Do you watch tv yeah, no babe, [, __ ], it's not i'm! Not it's! Not a vlog! I'M not talking! I'M just i'm gon na do a voiceover, because it's gon na be a tutorial. It'S not a vlog, okay, all right y'all! So welcome back to my channel. It'S your girl, simone and, as you can tell by the title in today's video, i am going to be doing a hair review, slash tutorial all that type of thing um, so, basically right now, i'm showing y'all what this hair is. Looking like um, i bought this hair from amazon because i needed some hair, like super quick super fast in a hurry, so i went ahead and bought this hair off of amazon. This hair is by a company called venus. I hope i'm saying that right um. I will have everything listed in the description box below the hair that i use all the products i use. Everything will be in the description box below, so you don't have to worry about that. A 30 inch wig for i believe, 267 and it's 150 density and a 13x4 frontal wig and it's a 9a grade of hair um. I also bought an extra bundle from another company called for show, hair off amazon as well, and that was, i believe, 60 for a 30 inch bundle and the reason why i did that is just because i wanted this wig to be full because see in this Clip right here, you can see how thin it is towards the ends, and i really wanted to be able to capture all of the length of this hair um. This wig has layers in it. It is not all one length so y'all, please keep that in mind. Um it what goes past my butt a little bit, but i definitely wanted it to be thicker more full, y'all know what i'm saying this is the bundle that i bought um off amazon that i said was 60 60. 64. 67. I want to say, like i said, everything will be in the description box below and this wig lost density. Towards the end, i mean this bundle lost density towards the ends as well, so you know, but i really wanted to focus on just putting this hair towards the bottom portion, the back portion of this wig, because i wanted it to make sure i wanted to make Sure that it wasn't bumpy and bunchy [ __ ] be on youtube. Like this all the time, hello, you guys want to see me put the [, __ ] on so far, all right, so obviously to start you're going to want to get some thread a needle and obviously your bundle and section your hair in the back of the Wig to go ahead and be able to sew in your tracks as neat as you can. I tried to do this as neat as possible. The wig ended up still being a little bunchy in the back, but i learned um in the beginning. I realized when i first put this wig on this wig. It'S definitely big head friendly. So if you have a big head, this wig is perfect for you. If you got a small head, you're going to have to do a little bit of finessing and that's what i had to do so i was double wefting, my um, my wefts as well, which is honestly another reason why my wig probably was a little bunchy in The back so once we finished that it's time to go ahead and start our plucking process. First, i'm taking a flat, i mean a hot comb. You can take a hot comb, a flat iron. Whatever you need to go ahead, this is going to help to flatten that hairline out, so you can really get a good visual of what you're working with and um. This is going to help me to keep it nice and neat, and so i can really see what i'm doing okay so boom. So this is what your wig should look like. Okay, very nice, neat flat. You should be able to see that hairline very crisp y'all. Don'T mind the clips that's been going on in this video y'all, i'm just giving out a little entertainment throughout this little tutorial, but my boyfriend had got on my freaking nerves. While i was doing my wig and so yeah, you can see that. But anyway, let's just keep this going anyway. So now, you're gon na take some sections out for your baby hairs and just braid them, and so they can just be out of your way. So, as i said before this time around, i wanted to try some new methods, so i'm trying some air contain methods today. The skip plug skip, plug, skip, pluck method. So basically, what you do is you plug plug plug in one area, one line and um. You skip a space and you pluck another area. Then you skip a split space. Then you plug another area. If that makes sense. So again, when you plug um, skip pluck you're gon na start in one spot. So you see i'm working in one area and i'm gon na drag my tweezers backwards. So i'm going to thin out a little bit behind the hairline and drag it back, and this is going to further help to thin out that front portion where the hairline is starting. I'Ve previously made and plucking tutorial, but if y'all want another in-depth tutorial, leave it in my comment, section below i'm just going to let y'all watch what i'm doing, because i am trying to get better at explaining what i'm doing. But i just feel like i'm getting messed up, like my words, are not making sense. I definitely wanted to mention to keep an eye on how much how much baby hairs you leave on each side make sure it's even because, once you start plucking and customizing, it's definitely going to make a difference in the symmetry of your baby hairs and your plucked Hairline and all of that, the last thing i want to mention is to please be careful to not over pluck, i kind of feel like i over plucked one side of this wig, but it ended up being cute, so it's whatever so i'm just checking in with Y'All, it is 5 45 now - and this is where i'm at where's my wig. So i got a lot of progress. Just need to make sure that this hairline doesn't look. So you know what i'm saying, but i know once i bleach it, it won't look. So much like that um, i actually think i'm going to end up all right, you guys. So, as you can see, i ended up taking my wig to work because i needed to still customize it and i was running low on time. I was getting ready to go to um to savannah for homecoming, so i had to take my way to work, to finish, plugging it and doing what i needed to do, but to keep this tutorial going, i will see my next. Video will be a vlog, but this is preparing for that vlog. So now we're going to go ahead and bleach. The knots um 30 to volume, developer and bleach is all you need and something to mix it and an applicator brush make sure your bleach and your developer is not too runny and you don't want it to be too thick. But you wanted to seep through these knots, something that i discovered about the makeup of this wig um. The knots are super super thick on this wig. Do y'all remember how dense the hairline was when i showed it to you guys and they claim it's been pre-plugged. You really can't even tell it's pre-plugged because they put two three four five pieces of hair in one knot, so i definitely struggled with that a little bit. Typically, i leave my bleach on for 20 minutes and i keep an eye on the bleach and the process. So you know just give yourself a timed set time, because all hair is different and just keep an eye on it. Now by this point, i have bleached this wig, the knots i mean about five times y'all. I kid you not four or five times to try to lighten the knots up, because i was bleaching it over and over and the black the knots were still black. So, as you can see, i bleached the hairline of the wig, but that's okay, because i originally bought some black dye here. It is ion brilliant in the color natural black and i was going to buy this to dye the whole wig, this color um. I ended up not doing that and just using it for the portion of the wig that i over bleach so now, you're, just gon na see me applying this, this hair dye as carefully as possible. Now the way that i decided to apply this bleach, i mean this hair dye and you don't have to do it this way. I chose to use a rat tail comb and just comb it through, so that it would have a nice gradient into the color, because i wanted to obviously keep the knots and the roots, as you know, brown, but not touch the roots, all the way to the. Where the lace is, i didn't want to touch that, because i didn't want to dye my lace with the black, so i used this rat tail comb. You do not have to do it this way, whatever way works best for you, i just felt like i could get as close to the hairline as close to the quote: unquote, scalp or the lace, without actually touching the lace. So this is a great method that i learned from, i believe, loraja andrea, if you guys watch her uh hair videos, she's super dope with the wigs, the hair coloring, the dyeing. All of that. So if you want to check her out y'all look her up on youtube now, if you're worried about getting dye on your lace like, i definitely would recommend spraying your inside of your lace, three four five times with the blow dryer and making sure it gets hard. So that when you apply the dye, it will not seep to your lace and dye your lace. So as i'm applying the dye on this side, you can kind of see where i over plucked this right side of the wig. I was so kind of mad about it, but what's crazy is this side of the wig actually no yeah? I definitely over plucked that side of the wig, because now that i'm thinking about it on my head, that's where i'm kind of missing hair and uh so be careful, plucking y'all! Don'T over! Pluck your lace! Also, please wear gloves y'all! I went to work, looking crazy or actually i went to i went to um. Was it work? I went somewhere looking crazy with my hair with my hands like this looking black from the die, so now i'm just showing y'all what the hairline is. Looking like. Now you can see, there's no brown showing. I touch my lace, a couple little spots, those little green plas spots that you see on the lace, that's the hair dye. So now the wig is basically finished. I went ahead and washed it and used some silicone mix to bring some rejuvenation back to the hair and make sure that the hair is not all dried out from the bleach. The dye you know whatever using my conair blow dryer to blow dry, it y'all, can see the luster in this hair um. One thing that i read on the reviews on amazon was that this hair was shiny. It was soft, it was silky and i honestly could say that the bundle that i added in the hair, the wig were two different colors, but you really couldn't tell the bundle was more black, i would say, and the hair was more of a natural natural brown. You know type color and so yeah it flat ironed beautifully. Like y'all, i was literally getting so excited at this point i put my chi in there made sure to get it nice and bone straight. So yeah, that's basically it you guys um, like i said i love this hair, but like can we please just get into how shiny silky this hair is? I mean like so y'all just stay tuned for part two of the install of this wig and the next video, which is going to be my vlog in savannah for homecoming, because i literally enjoyed this wig so much so yeah y'all, i'm just going to let the Video right out y'all stay tuned for the next video. It'S going to be an install video next then it's going to be a vlog after that i believe and so yeah. Thank you guys so much for supporting me. Thank you so much for tuning in to watch another tutorial on uh hair, on a wig and for any companies looking to reach out or work with me. My email is in my description box below you can directly email me for inquiries. Thank you guys. So much for watching, i will see you all in my next video don't forget to like comment and subscribe. I love you all so much bye, i'm gon na be in the club like this, because our wig is laid honey, and that is the big most first step that we had to accomplish in the accomplishment. This wig did not come this thick okay after i straightened it. It honestly doesn't look as thick as it did. Imagine if i didn't put a whole bundle in this hair. It would look so thin yo and i did not want a thin 30 inch wig like that defeats the whole purpose of having 30 inches. Okay.


Comments
Tyegha Thomas: What do you use for baby hair on a day to day? Foam, gel, edge control ? Love you beautiful
Sammy Da Goat: First Comment This Wig Is Super Bomb
Bryanna Smith: fire!!!