Grwm: Rainbow Wig For Bronner Bros Hair Show | The Pink Playhouse
- Posted on 07 March, 2018
- 360 Lace Wig
- By Anonymous
Hello everyone, and welcome back to The Pink Playhouse. If you are new, welcome to my channel. I'm so glad you're here. Make sure you hit the subscribe button before you leave. I hope you enjoy, please remember to like, comment, share, and subscribe.
Shop on my website for Diamond Kisses and 3D Mink Lashes: www.thepinkplayhouse.com
Link for this hair: https://www.aliexpress.com/item/QUEEN-...
How to make a wig: https://www.youtube.com/watch?v=VZvsSt...
Want $30 off your HerGivenHair order? Use my code: ParisMonet
Want to receive FREE bundles? Sign up with my link: https://love.herimports.com/e0f9c0aa
I Do NOT Own Any Rights To This Music
Follow my instagram: @Beat.By.Paris
Want to do business together?
Email: [email protected]
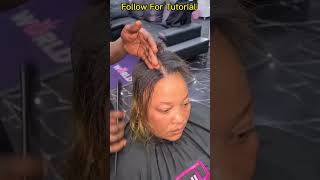
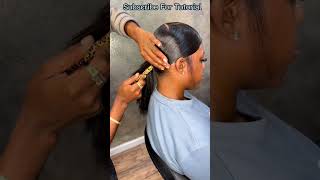
Guys welcome back to my channel. I know it's been a while, but I came back. I'M sure you guys how I made that colorful week that I went to the Bronner brothers show so for this week I use three bundles 28. 26 24 and it's 22 inch. Frontal in the color 613, I got this hair from Aliexpress it totaled up to 258 dollars. I do not know the vendors name, but I would definitely list the link to the store in my description box below. I did not bleach the UM, the frontal at all. It came pretty natural, it came with baby hair and I love that so much about this. So here I'm just lining up the frontal. With the front of the dome cap, you can use a black dome cap or a blonde color dome cap. But if you're going to keep the hair blind, make sure to use a blonde dome cap and also make sure your thread is either blonde or a light. Brown, so that no black stitching shows through - and I'm just sewing the frontal down to the dome cap just make sure to keep your stitching very close together so that you don't have any errors or mistakes. You don't want your frontal coming up later on, especially after you cut the front part of the dome cap off, so make sure to keep your stitching close together. So, of course, in the bag, we're gon na start with our longest length. This is the 28 inch bundle you guys these bundles are so soft, so pretty I'm in love with the vendor. At this point, I think this is who I'm gon na be shopping away from that on for my blonde hair. So in the back I doubled, my whip means I fold the West and had and that's how I sold again make sure to keep their stitching very closely. I'M using black brick. Excuse me in black thread only because I am gon na color the hair, so I won't matter but again, if you're keeping the hair blonde make sure to use blond or brown thread. Look how natural this front looks is pre plug the hair is flowing. The baby hairs are late god. This hair is just freaking beautiful. Besides showing you how it looks very natural. So for this part I also wanted to separate basically my parts. I did a middle part because I wanted to keep one color in the middle, then a side part, because I want to keep one color on the side. Basically, when I part my hair, it will be one side, one color, one side, the next color. I hope that makes sense to you guys it did not work that way, but that's how I try to get it so now. You just need your colors and you need a bowl for each one and then you need a brush as well. These are really inexpensive. So the colors I use was the orange marmelade by kiss and the price is very dependent on which location or which beauty supply store that you go to. I also used the neon pink bar door, the electric line, the viola Jim, then some yellow color - that I don't remember achieve this look. You'Re gon na need gloves. You'Re gon na need a towel to wipe your hands off after you use each color, and then you also got a mini foil and I use some colorful because they'd be maybe good with the mug down and that's how you achieve look. There is a more professional way to achieve it, but you guys are doing this by myself. So that's what I use and no colors blend it together. So it works and is very simple. So now he's gon na part, your section, I did two tracks per section. So, basically, one row because I double my whoops, so you're gon na take the hair that you want your desired amount. I went in with the pink color first, so all y'all do is make sure you saturate the hair with the color. You don't want any blind parts left. You want to make sure that you spread the hair out. You want to make sure you just flip it around do whatever we have to do. There should be no blonde left after you're done coloring each section. Also. I wanted to add, like y'all, about like four bottles of each color, depending on how many colors you use. How many excuse me how long the length of your hair is you'll only need one bottle per color. All I use is one bottle per each color. For this entire look so do not OD like I did and buy a bunch of the same colors cuz. Now I'm stuck with all the colors, so guess what you guys know we're coming so here's the less professional part because professionally I've done is looked before. I take a comb, I wrap it underneath the foil. I thought it's professional, but doing this by myself in my hands were really dirty. I just took a piece of foil. I wrapped the hair up like wanted it in a ball and then I folded it inside of the foil and, as you can see now, I'm just wiping my hands getting all of that pink residue off. So I can go in for my next color and you guys this technique works, like I said, no color transferred on to the next color at all. That'S the show on camera, but in between each section I wrapped a bigger layer of foil on top of the roll. I hope that makes sense so that no colour would transfer on to the next section. So here we have the look, no color transfer it until I was about to wash the hair I removed all of my foil inside before I got to the sink and the paint touch to get low, so be careful with that. So now I'm just gon na go in with some conditioner, and this is my swab from Kroger $ 1. I told y'all they be lit with them right now, I'm rinsing their hair off. As you can see, the colors are not transferring at all. This is because I let the hair dry - I literally left this for a day before I rinsed it off, because I know in this think that the colors will probably mix together and blend together, and I didn't want that to happen here - I'm just using Moroccan oil To kind of saturate the hair a little bit give it some shine, give you some less. You know it went through all that color. Although the color is my penetrating the shaft of the hair, I still think it will be better to put some oil on top of the hair after using the color. The easy part is styling the hair, so you just want to section it off. You don't want your sections to be too thick and you don't want it to be too thin unless you want to be curling your hair all day. Long! That'S on you before this look. I just wanted some big luxurious curls. So not too big of a part. Not to stand - and I just went in with my regular curling iron - nothing fancy nothing expensive to curl my hair and then I took a pin. You can use a curler like a hair roller pan or a the pins that used me you get twist. I cannot think of these things. I apologize you guys if you can use any kind of pan like that, just to hold the curl and again I love the crows in over night. With this whole thing, everything I did, I let the hair be overnight. It'S the whole, whatever it was that I was trying to achieve you guys. So the next part is to cut the lace part of, but you guys look at the baby. Hair stays stays separate after washing their hair and everything they stay separate for me, and I love this so much so now, I'm gon na go in with my godson be glue. It'S my favorite, I'm using the black kind, because it's clear the yellow kind is white and it shows up the black one. I can go like a wheeze without having to wash the residue off of my way, so we're gon na let that dry for a little while and get tacky before we place our wig on top. So with this part, you want to make sure you line everything up where it's supposed to be. You want to make sure your part is the where it's supposed to be the front of the lakes. Do you want to make sure it's like right over the right over your hairline? Excuse me just make sure it's where it's supposed to be before you dry it down. I just gon na take your blow dryer you just kind of blow. It make sure you use cool air, do not use hot and, as you go just keep on making sure that your wig is where it's supposed to be, because once it's down and dry, it's not moving at all. And you don't want to be mad because you then place your weak somewhere, it's not supposed to be, but look how look, how natural looks and how beautiful it is. So now I'm going to try to do my baby hairs. I actually ended up having a dual off camera because I need it to be like up close and personal with the mirror, so get it right because, as you'll see, they was looking a little thick and I didn't want day. I wanted my baby hair so again and natural, so I'm just now making sure that the flaps on the what is this part by my ear are laid down. They tend to come up like when his first starting to dry, so I just went back in to make sure they was down, but, as you could see, right here is not moving, so I just wanted this hair piece to the hair. Show I mean. Excuse me this face piece of the hair show and y'all they loved it. They freaking loved it. So thank you so much for watching guys make sure to like share comment and subscribe and I'll see you in the next one.
Comments
Queenbee 4life: You did amazing job.. love the colors
Jahnell H: