Diy How To Customize 360 Lace Wig / 360 Lace Frontal Natural Hairline | Abbyliciouz
- Posted on 18 June, 2017
- 360 Lace Wig
- By Anonymous
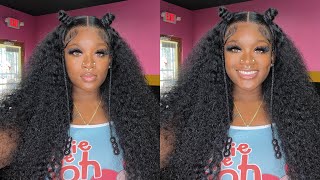
Hey Ladies! Welcome back to my Channel. In this video I show you guys how I customize this 360 lace wig. My method can be used for 360 lace frontal and a regular frontal as well. xoxo
Hair by RosaBeautyHair (On Aliexpress)
Brazilian Loose wavy 18"
Review on this hair in depth : https://youtu.be/7hWuTLmK0r4
THIS WIG WAS SENT TO ME FOR A REVIEW AND A DEMONSTRATION
Reach me here..
Instagram: abbyliciouz.co
Makeup Channel: Abbyleesh
Business inquiries: [email protected]
Hey guys welcome back to my channel, this is Arby's in this video. I'M going to show you how I customized this 360 leaflet from beginning to end. So if you want to learn how to cut and customize your own wig, I suggest you keep on watching. Also subscribe and hit the bell button, so you'll be notified when I upload my future video. So a 360 lace rig is basically similar to a lace front wig except I like a lace front wig and the has a lace. Expanding computer ear, a36 lace. Wig has lace all around the way testament. This is so great because the rig allows you to have your hair down metal part size park or no part of a forever. Then, on top of that, you can pull your hair into a neat ponytail. It'S installed correctly. So it's very versatile: now let's get started hi, so this is the three supreme lace from the wig I'm going to work with it from Rosa Beauty, hair company here on Aliexpress and, as you can see, there's a lace around the leg. So since this wig doesn't have bleach not first, let me share the bleach and was used today. As you already know, it's by law real quickly. I use the bleach many many times here on my channel and I love it and I'm going to use. I own sentence of 40 volume developer to activate the finish. This thing right here not only looks good and packaged well, but it's smells so good. Oh, maybe just me so since the lace I'm going to work with is quite large, I'm going to use one cup full of the bleach powder and I'm going to put that into my mixing bowl and in the same bowl. I'M going to pour some developer in by the way I'm eyeballing as I go. I pour stir pour stir mr. until the consistency of the mixture is like this very thick, you don't want to run. Then I'm going to leave the bleach for about ten minutes and then I'm going to start applying it on the leaf. So this is kind of tricky, but in order to apply the bleach, I flip the wig like this secure it on the mannequin head like this and with a toothbrush. So you use the one over food. I start applying some bleach using aqua lotion and yes like under the combs and all that and after I'm done it looks like this. The entire lathe is completely covered in weight, so I'm just going to cover the top with some saran wrap and let it sit for like one hour. So it's been about one hour but to see if the North has no lighting to my liking. I'M going to use a wet paper towel, rub it on a small area of the bleach and expose the lace. This way, I can see the condition of the knot. You see my big head um, I don't know if you guys can see, but the knobs are still dark, so I'm going to use the leftover bleach to public full spot and I'm going to wait for another hour. So after one hour has passed, I'm checking the notes again and this sign and the knots are bleached nicely now it's time to wash the hair. So, as you can see here in order to wash the lace effectively I've slipped away. So that's a brief side of the lace tracing the thing that way. I can allow the water to literally push through the lace, removing the bleach so here, as you can see, I'm doing just that next, I'm using a purple shampoo to wash their hair, removing the brassiness of the rain by the way I'm using hot water here so That the hair cuticles can open. This is to prep for conditioning. So for this week, I'm going to use dog, nursing oil care conditioner with smog June vine, let go and I'm just in love right. I love it cancel it now since, and this hair is already warmed up, I'm just rubbing the products in especially at the roots of the hair. After a minute or two of massaging the conditioner into the hair, I'm going to rinse out the hair with cold water. This time here, you can see that I've accidentally kind of like you, know, bleach the roots of the hair, but no worry, there's nothing. You know a good mascara can't disguise now it's time for me to customize the hairline of this week so forth. Today'S customization, you are going to need a mannequin head. The, and there are two combs - is very important: excuse myself done, acrylic nails, a hair tie and sometimes to secure the way you're, also going to need a pair of scissors that I didn't take to search alrighty. So, let's start here, I'm securing the wig on to the mannequin with some pens. So, as you can see, this is the hairline of the wig. It'S not too bad, but I still think it's too thick trust me like if you're, especially for dark skin and your skin. It'S my complexion like if you put this on and slap it on your head, it's gon na look super thick like this. One is like against a mannequin head and the mannequin head is obviously white. That'S why there's a you know huge contrast going on. That'S why it looks okay, but trust me if you put this against your dark skin dead skin or your harsh, like hairline, going to be too thick, and this is the nape area now the tricky part of most 360 lace wig is that it has the adjustable Straps stitched on like a very edge, so it's hard to pluck without exposing just six straps you can learn. I mean like it's not like this front. You can't really have that gradual effects going on, but I'll tell you my decision. So, let's get first step the front area. We are going to make them baby here, I'm going to section off some hair very thin, but again the density doesn't have to be perfect, starting from the end of the eyes. The other eyes is a make sense. Now. Take out a pair of scissors and take the piece of hair and layer it off then take another piece of hair and there layer it all again but make sure that the length is longer than the first piece and repeat step so that the finished product looks Like this now section of another piece, but this time a little thicker than the first section like this now take out a tweezer and start thinning out the section when finished, use the comb to comb out the excess hair. Now that's done clip away the excess here. Step 3 create another section again again, doesn't have to be perfect, but make sure is thicker than the last section. So so far we have. The baby. Here is the thin section and the second section is coming and then start thinning out. We are creating radiation step, 4, section off some hair again and start creating triangular baldness. Now I would like to say I'm kind of a little, an okay, no lover in the business but honestly, like I came up with this this triangle, but you know swap method, it's something I came up with, and I've used it on my lace console and my Lace, closure, and you can also like you, know, check that out out like props to me. I can link it down below and also like make it at the end of this video. So this is the area with a bald spot, and this is the area with south winds. I hope you guys can see the difference now, I'm going to be in other sections, don't forget to finally comb out the clock here. This is a hair line so far before and after and I'm liking it so far, all right. So now that that's done, let's move on to the skies over central. This is the right side of the rig, and this is a density. First, I'm going to create a million section about this much and I'm going to start packing on here, because this part of the hairline is to be thinned out. That'S to take another section about medium size again and with that section start talking about triangular shape. Once again is the you natural shape, and this is how the edges look after combing everything together. This is before and after now, I'm going to work on the left side. Alright, so finally, we are going to work on the nape area, so first create a medium section and start spinning outside plucking and as you can see, some of the bulkiness is gone okay. So this is the final product of the three pixilated and, as you can see, there's a gradual hairline. You can have the hair wherever you want and here if finally, I'm cutting off the excess rate,


Comments
Justtaylorthings: Beautiful
Eme M. U: I looooooooveeee this hair girl!! You slayin all over the place!!
Kersha Beaver: I just watched both of your previous video. very informative
Jessy queen: Love your videos and I just clicked the subscribe bottom please can you give me the link to where you bought the L’Oréal developer and the activator, especially the L’Oréal I will like to place an order , thanks and looking forward to hear from you soonest