How To : Diy Two Sided Natural Bun Wig / Diy Natural Looking Wig
- Posted on 18 June, 2022
- 360 Lace Wig
- By Anonymous
HOW TO : DIY TWO SIDED NATURAL BUN WIG / DIY NATURAL LOOKING WIG ,hello beauties I will be sharing with you all how I achieve this lovely diy two Sided bun wig using kinky hair to achieve this lovely wig on a budget .
Thank you so much for watching this video do not forget to LIKE,COMMENT,SHARE & RING THE BELL so you don't miss any of my upload have a bless day ❤
_____________________________________________
#ventilatingclosure #diylaceclosure #protectivestyle
_____________________________________________
For sponsorships & business opportunity-
_____________________________________________
PRODUCT USE
ventilating hook
https://alitems.site/g/1e8d114494c9c6b...
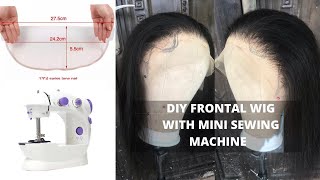
lace closure net https://alitems.site/g/1e8d114494c9c6b...
Female White Deflection Head Polystyrene Styrofoam Foam Head Model Stand Wig Hair :https://alitems.site/g/1e8d114494c9c6b...
Darling braiding hair : purple
Wig cap
Music: Zurna
Musician: Sapajou
Site: https://soundcloud.com/sapajoubeats/sa...
LINK TO WATCH MY OTHER VIDEOS
BRAIDS&TWIST / cute &
easy protective style for kids https://youtu.be/kqLbZsTMVyE
LINK TO WATCH MY OTHER VIDEOS
How to make a headband wig / using kids pantyhose https://youtu.be/8Teh-Z1xMzk
fake it till you make it natural hair style / using braiding hair https://youtu.be/b3AYVdXd1Ow
Diy passion twist using braiding hair https://youtu.be/5JjlrDXINEY
Diy: super tight curls using kebab stick https://youtu.be/pSYbQPeA3wI
how to passion twist on natural hair, https://www.youtube.com/watch?v=53uQbG...
Jumbo box braids /Brazilian wool box braids, kids hairstyle ft discoveringnatural https://youtu.be/9ScHVKV7tBU
How to goddess box braids tutorial for beginners,https://www.youtube.com/watch?v=ykU7Ok...
diy needle and thread flat twist cornrows diy hair style with brazilian wool,https://www.youtube.com/watch?v=NKCYRe...
Jumbo box braids using Brazilian wool /butt length braids https://youtu.be/kkzAK4740OQ
Music: Girls Like Me (Jamin OTB Remix)
Musician: AAPOfficial and Leo Valentine
Site: http://pixabay.com/music/-girls-like-m...
_____________________________________________
#ventilatingclosure #diylaceclosure #protectivestyle
_____________________________________________
For sponsorships & business opportunity-
________________________________________
Hello beauties welcome back to my channel. It was our first time back to my channel. My name is arsenica, so today i'll be sharing with you. How i achieve this gorgeous lovely amazing, diy 360 two-sided bond wig! Yes, so you can see what i'm doing now, i'm showing you the materials i'm going to be using a 360, less ventilating cup, wig. Sorry, for that, a 360 ventilated cup with ventilating, woke scissors tissue manicure, add paint a lot more and more. So that's what i'm going to be showing you guys consider my background. It'S kind of different today. This is the mood i feel like what i didn't finish, the video at the background. So, let's move to the most important part. Let me explain to you guys. I achieved this lovely gorgeous most natural to sideboned wig. I use afro kinky air. This is for twisting air, so that is the wig i use, because that is the only thing i know it can make the wig look so natural, like my hair, so you can see what i'm doing now. I paint this with cup. I open it down to my mannequin head guys. If you don't want to use this type, this very natural wig cap you can use also that doesn't have another kind of material they may be like mine, but i want to use this. I find you can use it. It will be obvious. We are going to see towards the end of the video, so you can see what i'm doing now. I'M trying to make sure the cap wig to two. You know we are going to be achieving two bone. So what i'm just doing now is to get a perfect bone to bond. I don't want one to be bigger than one, so that is why i'm using my teeth through to make sure and this cap they really draw your hairline. There are some cut that the hairline is not perfect, but this the airline is accurate, so you can see what i'm doing the the measurement of the cup. I actually was 16, so i divide it into two. Then i use my eyebrow pencil to mark a straight line with ruler. If you are there's no stretch, you can use ruler and you don't want to use ruler, you can use your hand but make sure you get the same size the same size. You understand you can see, i put the table at the middle to get the same size, so kylie. Please keep on watching this amazing instagram. Please make sure you watch to the end and please guys and guys guys don't forget to hit on the like button. So this is what we are going for. Okay, it's already done one part off camera. Yes, through the process, my crochet ventilation will broke and i didn't have another one-to-one. I wanted to strand of crochet ventilation woo, so i have to i use three to four ventilation to finish this tutorial, but i kind of you know i know to limit the header. It soon be more than that from the from the the most important part is the line line at the front to the edge into the back. Then inside. When you are ventilating, you can choose any amount you want. So i started from the airline, as i said from the beginning, you can see the very mentioned your airline out. You can see how it's like a twine. They use it to measure. If you look at this video very well, you are going to see so i started from the yellow line. That is what you can see me doing. This crochet hook was really giving me a tough time because i started with one to two strand of ventilation which these kinky air broke, so to control. What i'm picking is not easy. It'S easy later on, i get used to it, so you can see i'm kind of tracing the airline towards to the front. That'S what i'm trying to do. I'M tracing it out. So, as i was saying, the most important place is the first line at the front at the side, then at the back, then at the middle. The first line after that, you don't need to start speaking, one strand just keep on watching, so that i can understand what i'm trying to say. You can see that um. I follow this line line the jewel on the cap very accurate line. That is what i'm tracing to get a perfect airline. Yeah is, as i'm ventilating i ventilate one or skip one or ventilate one or skip one o very, very important so that the air will be feel kind of kinky and it won't look too fake um. Oh somebody fools girls like me now. The next step is the inside. You can see. We are still at the front. We have the airline at the front, i'm just showing you this. The back. This is the back, so i'm still at the front. So what i'm going to do now is to ventilate the inside. I already started some part. I just want to show you how i did that so now you can choose any strand of it, but be careful, because now we are working with kinky air. This is not a light. A little goes a long way you understand. So that's what you can see me doing now and let me explain the inside to you. I skipped a line. I am sorry i ventilated line. I skip two holes on each row of line. I then click a line. I skip two o's, then after i'm done ventilating that line. I skip two lines because we are working with kinky air kinky air can be full easily and it is too full. This air is going to be shapeless and we don't want that. Let me tell you what i mean again, eventually a whole sorry, you can't see a four years. Then i skip two or ventilate the next one skip to home. Then, when i'm done ventilating a line, i skip two line. One two. I skip two line you can see after i skip two line. I'Ll go back to those two line. I skip i'll just ventilate the down part so that it will show very, very important for you to do that. Go back to ventilate only the down part so that it will show you can see. I skip to line then ventilate on the third line. Then i translate on a hole. Then i skip two holes. I hope you grab that i'm just trying to be a good teacher. I hope you grab what i'm trying to say so kindly relax make sure you enjoy watching. Please leave a like for yourself, which i love what you're watching please and please kindly like my video. I look back of you and, if you're not subscribed, please don't please make sure you click on that subscribe button. I really appreciate you a lot somebody, so i didn't finish it on camera, but you're going to see the outcome, so you can see the back. The back. You have to like count. Two or three lines do not make it well do not allow it to be more than three life. Please, and please do not allow it to be more than three lines, so i i'm doing the same thing at the back skip a line then slit on it. Second line, i mean the hole, sorry ventilate on it or skip it. Oh, you have to count like two or three lines before you start ventilating, the back. That will really help you a lot. If you do more than that, i don't know what you want to put on since i don't know and make sure the weak cap is your size very important. So after i'm done ventilating the line, then we are going to move inside. The way i did the inside at the back is different from the front. I really ventilated a lot from the front, but the back is different, so you have to keep on watching. So you can see the only place i ventilated inside was the side of the elastic band and i didn't ventilate everything finished towards the upside, so that quantity is enough to cover the back so that quantity. We don't want the back to be bulky. You understand you have to use your brain when doing this. If there's less kinky air to have side see sorry to be over, for yourself you'll be able to pack it, it should be shapeless, don't look natural, so you have to know what you're working with and so kylie. Please keep on watching. So you can see i've inflated from the back to the edge side, considering what i'm doing so after i'm done doing that now, let me move today. Sorry, let's move to the middle part. That is what i'm doing. I left only two lines at the middle. You understand to make it look like a pattern on my head two lines. If you don't do that, i don't know how you want people to know that it's too bold you're putting on i don't know. I don't know. So that's what i'm trying to do here. I'M trying to ventilate the lines then ventilate the inside the same way. This side also ideally ventilates a lot at the inside, because we want that place to be flat. You can see the way i packed the first room. So can you please keep on watching? Oh, do you love yourself them girls like me, so when we are done, we are going to take normal crochet pin you understand normal crochet to ventilate like little quantity, not like ventilating to crochet. I mean sorry not ventilating to crochet at the middle so that we are going to have amazing puff you understand, so i up, i decided. I knew i want a foot foundation at my airline - oh my god, supreme love, just let it be like that. So the airline was like: it's really affected our life with the glue i used. It was melting with the foundation, but it still came out so neat. I put foundation at the middle of the line to make the airline look so natural, so that is all for the video. Please do not forget to hit on the like button. Please, and please and again i didn't cut the size of the cup out. That is the white thing you can see. Picking true. Thank you so much for the support. Thank you so much for the love. I really appreciate each and every one of you so so much please do not forget to hit on the like button subscribe share with your loved one. Thank you so much for all the support see my next video stay blessed, always bye.


Comments
Oghogho Juliet: It looks natural
Oghogho Juliet: Good job
Gugu Nyoni: How long did it take to finish from start to finish?