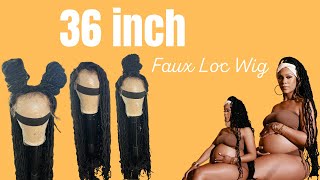
Full Lace Faux Loc Bob Wig
- Posted on 18 February, 2020
- Bob Wig
- By Anonymous
P R O D U C T S U S E D
1 Pack of #30 Marley Hair
6 packs of #T30 Water Wave Hair
Link To Purchase Wig
https://wynnejean.com/products/curly-r...
15% OFF ALL WIGS CODE "SUB15"
Just for my lovely subscribers
C O N N E C T W I T H M E:
My Website
Hair Appointment Booking
https://wynnejean.com/pages/hairtour
Instagram @WynneJean
https://www.instagram.com/wynnejean/
Facebook @WynneJean
https://m.facebook.com/WynneJean/?ref...
Twitter @WynneJeann
https://twitter.com/WynneJeann?s=09
For business inquiries [email protected]
F A Q:
Ethnicity: African American
Height: 5'7
Age: 23
Measurements: Bust 36'' Waist 26'' Hip 38''
Shoe Size: 8
F A V C A M E R A G E A R:
Camera - https://amzn.to/2NJcPPs
Camera remote - https://amzn.to/2CDAsm2
SD card - https://amzn.to/2Qim76w
Umbrella lights - https://amzn.to/351lJxv
Soft Box Lights - https://amzn.to/2O9zzXF
Full size ring light - https://amzn.to/2XcmDo4
Traveling ring light - https://amzn.to/2XaDLdQ
Traveling Tabletop Ring Light - https://amzn.to/2NJbisG
Lighting & Backdrop Kit - https://amzn.to/2OgmTP4
Backdrop - https://amzn.to/2CHxA7W
Mic - https://amzn.to/2KlQrcJ
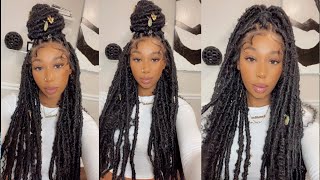
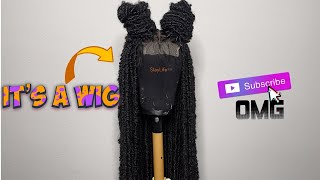
You want a supermodel poet, I'm a bit afraid me, hey babe. So today, I'm gon na show you guys how I got this gorgeous bob black wig. You guys have been really feelin this technique and I wanted to just pop in and show you guys that you can do it on a wig as well. If you wanted to go ahead and have it be able to last for a while so make sure you're following me on instagram, so that you can see everything first and let's get into it, so I'm starting off with this week. I'Ve already cut it to about eight inches. I just prefer to have a little less hair to work with it's a little unnecessary if you working with a week and as you can see here, I'm parting out about an inch around the perimeter on all the sides. This just allows for a bit of customization, and I find that the extra curls just make it look a little bit more natural and lived in being that it is a wig. It'S not really gon na loosen up, if that makes sense. So, by having these curls out in the back, it just makes it look really natural and kind of like I don't care, but I'm just cute. You know I'm Sam he's fired, so I've parted out all around the back and now we're gon na start working on the actual base braids. So here I have some color thirty Marley hair. Usually I would use like a 1b, but I'm gon na use. Thirty. Just so you guys can really see what I'm doing now, I'm parting off this first row, and typically I like to make the first row into three to four sections. I went ahead and did four for this week now, I'm using a piece of the Marley hair and I'm braiding it in at the root, leaving a little bit of like a slack, maybe about a half an inch at the root and the reason why I like To braid in the Marley hair is just because the wig hair is a bit fine and the marley can mix the locks really hold and last - and you want your brick to last a really long time. So that's a really important step that i like to do. But you don't really have to so now. When I get to the front, as you can see, I'm kind of rounding the parts out a bit more. I want them to look really really natural and the back. It really doesn't matter cuz. You won't be able to see, but in the front I am rounding the parts a little bit making sure that I'm still staggering them so that the hair looks really really fool kind of like that brick pattern. You want one braid coming down in between the bottom. Two, so for the locks, I'm using a similar technique that I did for my lack of bob video I'll go ahead and link that here. If you want to see, but I'm crocheting in one piece of hair and I'm braiding it in just for added security. And then I'm gon na crochet another piece to the roof, I'm overlapping this one with the braid and I'm holding it taut on one in and using the other end to wrap around everything together. Now, usually, I only leave about one to two inches, as like slack left over to hold on to, because I want things to be ombre. I started wrapping where the hair becomes black and that way I have a little bit more control over where the color falls. Now, once you get to about the lid that you want your lock to be, you want to just kind of check it every now and then and once I have it where I wanted, I just go ahead and start wrapping back up once I get to the End, I tie a knot around the hair and then we're gon na just crochet through one more piece and do the whole thing again and the second piece is really to add some hold to the lock. The first rack really just creates the base. It kind of helps you decide the length and everything, but this second wrap is what really holds everything together. You can even go in and wrap with a third piece if you want super thick locks, but I went ahead and stopped at the two for a more medium to large look. This wig was for a client and she loved that it came out so cute on. All of the information for the hair will be down below in the description box. I ordered this help Amazon and it's really really pretty. I like it, but as I've said it before, you can use this technique where pretty much any texture of hair. That you'd like I prefer to use a curly or afro texture, because I like the way it looks. But it's up to you and for a little added security on that second piece. I also crochet the end through the lock, because again this is a wig. So any note tightening up girl. It is what it is. You want it to be very, very sturdy. Now pretty much finished everywhere else. This is my last lock, so I'm just going ahead and crocheting that piece through and loosely braid and get with the brain that we created with the Marley hair earlier just for a little added security, then I'm flipping that second piece out crocheting it through holding the Blonde part in my hand, and then wrapping around with the black, to make sure that the ombre looks perfect and I'm kind of fluffing it out as I go as well, because the fluffy of the hair is the more it covers and the less you'll have to Actually wrap so I like to fluff it out quite a bit and once we've wrapped our desire, Lynn to just wrap back up, and now I'm going in with the second piece or a thicker, this girl and again, once you get to the end, you just wrap Back up and to secure it, I'm doing a double knot and then crocheting the end through the lock, and this is the final look as you can see. We threw in some layers, though ombre looks gorgeous and I love how the blonde is kind of peeking through throughout the way and almost gives it like a balayage vibe. Once these locks kind of phrase up a bit, they're gon na be even prettier, but I'm obsessed with this wig, as is, I hope that you guys really enjoyed this video, the link to where you can purchase this wig as well, will be down below in the Description bar and I'll see you guys in my next video. I love you guys. Bye, bye,

Comments
Chrishon Wiggins: Love this Thank you
Gigi M: I’m not sure how I came across this I was looking for crochet Marley twist lmao but I’m glad I did love your content girly you’re super talented
Kee Kee: So cute, how many strands did you use when wrapping the hair.
Reesey Buchanan: Where did you actually get the wig itself from?
Amina A.: Where did you get the original wig from?
Dee Dee Dimensional: Do you still make these wigs and if so how much do you charge
Charlotte Mandy: Do you do this on a human hair wig ???
Tremenisha Evans: You have the Marley hair link twice instead of the water wave link.