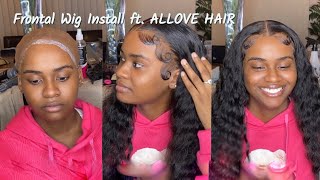
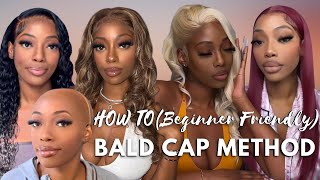
How To Install A Lace Frontal For Beginners *||* How To Melt A Bald Cap For Beginners
- Posted on 13 September, 2020
- Bob Wig
- By Anonymous
Hey Lovelies! I’m back with another video on how to install a lace frontal for beginners. This is a very detailed tutorial particularly about the melt down of the bald cap. Enjoy
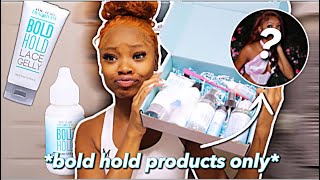
PRODUCTS USED:
Bald cap
Ghost bond glue
Got2b glued spray
Got2b glued glue
Scissors
A flat comb
BEST EYEBROW TUTORIAL:
https://www.youtube.com/watch?v=ju1S5f...
2020 SOFT GLAM TUTORIAL:
https://www.youtube.com/watch?v=xTxN57...
BESTFRIEND TAG:
https://www.youtube.com/watch?v=exJ-m2...
CONNECT WITH ME:
Instagram - @lolabello___
Snapchat - @lorlahbello
#frontal #slay #glue #lacefrontal #howtoinstallalacefrontal #baldcapmethod #boldhold #wig #youtube #youtuber #wiginstall
It'S time i'm going to start by applying that's a big load on my end and i'm just going to apply it around our edges um. So this is made perfect for the board cap and i'm just gon na apply it all the way from one hair to the other end of the hair, and that's what i'm doing right now. You just have to apply it a reasonable amount, depending on like um how long you want um the board cap to last, so it can hold the um lace frontal very well. So after doing that, i'm just gon na go ahead to try the um the glue and um next i'm gon na put on the cap. So i actually made a good choice of cap color and i'm glad i did that so um, i'm just gon na spray. Um the gutter base spray around the edges of our air, which is what i'm doing right now and i'm gon na spray it around the edges and i'll spread it into a little bit. So the bald cap can stay um pretty well, and you know so you just spray it and spread it with your fingers. So next i'm going to go ahead and dry it up, so it can dry up really well, and you know that's what i'm doing right now. I usually like to try at low ease. Sometimes i make um, i dry it with a cool setting, so it doesn't burn um ahead. You know so that's what i'm doing just draw it um as much as you can and then the next thing i'm going to do is to go ahead and cut out the excess part of the broadcast. So so, after drying, i'm just gon na go ahead to um cut out the excess parts of the car. You know, um, you have to be really careful. I usually like to use a razor stick, but um. I think i ran out of eight. That'S why i'm using my scissors, but it's very risky using this scissors, so it's better to use um a realistic. You know so: um yeah, you just cut out the excess parts and i'm gon na jump into the next thing, which is trying to um melt. The bald cap, now i'm just going to spray um the gutsy spray around the edges of on the ball cap and after doing that, i'm just going to press it down with a comb. I'M going to spray the glue at the edge of the cap and i'm gon na use. My comb to you know press it down really well, so you want to do that um very well and carefully, so you can have that um. You know smooth look at the edge of the bald cap, so i'm gon na do the same thing here. You can see that it's not smoothly um laid, so i'm just gon na apply the um spray glue and i'm gon na use. My comb to you know, press it down, make sure it's well laid, make sure it's very flat, and once you do this, you realize that it's already coming out really flat and smooth. So all you have to do is just to press it down with a comb and your finger as well and trust me. You get a very smooth result as you can see it's already. Looking like a scalp - and you know, i'm just gon na repeat the same step throughout the entire um edge of the ball cap. You see that it's looking really um smooth and nice, so i'm gon na repeat this step for the other parts of the bald cap. So do the next thing i'm going to dc is my first bond glue, i'm going to apply this around the edges of the ball cap and i'm just going to use um some portions of it make sure you do one side. First, before you move on to the other side, because it dries off very quickly and you don't want it to drop and you have to um, you know repeat the same procedure over again, so you just spread out the glue around the edge of the ball cap. Spread it out really nicely, and i usually like to use about two or three layers of this, so it's you know holds it down really well and after spreading this first layer, i'm gon na apply another layer onto each. So i'm doing that right now apply another layer onto it and repeat the same procedure which is to spread it out and i'm doing that really carefully. You don't want it to go beyond um the points you want the lace to stop. So you know i'm just spreading it out and i'm just going to apply it on another layer. This is a new layer because um, it's not a wig, it's um, it's still in so i wanted to. You know um last really long and that's why i'm trying to like expand the um areas, i'm applying the because bone glue, so it can last longer you know so i'm applying the second layer at the back of the first line and i'm just going to apply This really well spread it out to the back. So after doing so, i'm just checking out like i already measured it before, but i forgot so we cut that pad. So i'm just checking out again if i did the right thing and i'm going to try out the goosebumps here a little bit and i'm going to apply the um the frontal on the parts that i applied because onto you so um. That'S what i'm doing right now, i'm just gon na apply it on that pad. I'M gon na tell absolutely for me: she's gon na hold it down and i'm gon na walk on the other side of um the front towel. I mean the other side of my head, so i'm just gon na repeat the same steps from what i did on the other side of my head, and so so next, i'm just going to use a comb to like press down the edges and i'm going to Tie um a hair down just to make sure that glue stays in and the lace um. You know, glues down, really well so um after tying it down. Um, i'm gon na you know, leave it to dry out a little bit and i i'm going to like dry it up while it's tied, but i think i forgot to record that part. So um pardon me for that guys, and i forgot to record that part now, i'm just going to cut out the list. You have to do this very carefully because if you make any mistake, if it cuts excess lace, um the front eye is not going to grow back. So you have to be careful doing this. You have to cut it carefully, you know and that's what i'm doing right now, i'm just going to cut out um the lace from the frontal and after that i'll proceed to melting the frontal. So thank so so um. The next thing i'm going to do is to apply the um got7b spring around the edges of the um frontal. This is me trying to melt down the um the frontal. So it's just like the same thing i did with the bold cup earlier when i tried to melt it down. You do the same thing. You apply the glue, um the glue spray around the edges, and then you try to use your comb to you know. Stick it down and make it look really smooth. So that's basically what i'm going to do here and just imagine this for a while, because it's really important so i'm just gon na use the comb to like lay down the um, the very tip of the frontal - and you know that's gon na give you really Really good and smooth results do so so so after doing that, i had to tie the edges again and then i called um. You know i used a recording iron to curl up a. I think my camera died, so i couldn't record the whole process, but i'm sure you guys get the logic now. You know she wanted this towel and she got it. She loved our hair. You know we can't tell so thank you guys for watching see you next time. Bye, you
Comments
Miss K TeenTalks: Sister, you did a wonderful job I enjoyed this video!! God bless you, sis!! ❤️❤️ I love how it came out ❤️
THE HOT POT FAMILY WITH J.Y: You have a very good job