Tint Lace With Sally Hansen Airbrush Leg Spray | Amazon Lace Front Wig | Yayaku Wavy Bob
- Posted on 22 December, 2019
- Bob Wig
- By Anonymous
Don't forget to SUBSCRIBE!!!
Follow on Instagram @TheSCotton
Wig Details:
https://www.amazon.com/gp/aw/d/B07ZGCK...
Check out my other wig videos:
Pattern Review: https://youtu.be/guehBbm_phc
Rulinda Bob Wig: https://youtu.be/W0g0BQeVIuI
Easy Natural Hairstyles: https://youtu.be/fDTfZyfIXcQ
DIY curly clip-ins: https://youtu.be/bwcUJtM2A8w
For inquiries email [email protected]
D I S C L A I M E R
|| FTC: The product in this video was sent to me for review||
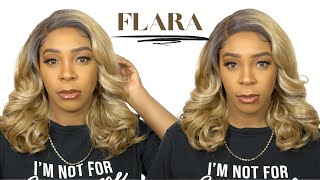
Hi and welcome back to cotton creation. So today I have another wig tutorial for you and it's that same company that I did previously if you missed the first video I'll link it up right here or in the description box below and this time I got their 10-inch bot wavy bob. So I think it was bodyweight, so let me go ahead and open that up and show you guys what it looks like. So the lace is a little thicker than what I remember from the previous one, but it does come with three or scuse me for combs. So one in the back two on the sides and one in the center which I usually will cut out, because I don't because I wear a wig cap too. Typically, I will not use this one, so I usually cut that out and then it does come with the adjustable elastic bands in the back and a little lace in the back as well. So what I'm gon na do is I'm gon na try a different technique. This time I'm not gon na bleach the knot I am going to use the Sally Hansen, airbrush leg spray instead and I'm a spray and tint the lace like that. So I'll show you guys that as well today, but yeah, I'm gon na see how this technique works out. So if you're interested stay tuned and make sure you hit that subscribe button, if you haven't already done so, let's hop into the video so to get started. I'M going to go ahead and tint the lace, and since it's my first time using this product, I decided to spray it on a paper towel just to test it out. Make sure that I know how heavy it's going to come out and how fast before I spray it on the lace. So I just spray it all over the lace and then I'm just going to take some hairspray and spray it on top of the color. And then I'm going to take my blow-dryer and just make sure that it's all nice and dry and then I'm gon na just you know, continue to layer that on in that same order until I've achieved the desired color and thickness of the color. So here's what it looks like now that the lease has been tinted and I was like okay, but I won't know if it's the true match until I get it on my head. As you can see, there is a little that did get on the hair. Don'T worry about that, we'll take a makeup, wipe and just wipe that away. So next, what I'm gon na do is take some plastic wrap and outline my hairline, and this is something that I've seen. Oh J beige do on her Channel. So I was like you know what the next time I do, a lace wig, I'm gon na try her technique out. So what I'm gon na do is just take that wrap and put it on my mannequin head and then line up the hairline of the wig with the outline of my hairline and then I'm just going to follow my hairline by parting, the hair, so it matches And then I'm just gon na take a razor blade and just cut the lace. So I've decided to spritz the hair with some water to hair line so that the hair can be easier to part and just kind of shift it in the direction that it needs to go in so that you know I can easily see and make sure that I'M following my hair line before I cut it so since this is my first time trying her technique, I will say that it is a lot more difficult than what it appears on video, so I think with practice. It could definitely be a technique that I would go to in the future, but it definitely is going to take some practice. So now I'm going to line up the wig with my hair line, just to make sure everything is matching and the way it's supposed to be. Next, I'm going to take some alcohol and I'm just gon na rub that around the hairline. Just to make sure that you know there's no grease or makeup or anything like that. That would prevent it from being tacky and sticking to the glue. So next I'm going to take my got to be, and I'm just going to spray a couple layers of that on and then I'm gon na use the blow dryer just to make sure that it gets tacky on a cool setting and just blow-dry that once it Is tacky? I'M just gon na place the lace right down on it with a rat tail comb, I'm so sorry I didn't realize my camera was not filming. While I was doing this next step, which was I added some baby hair - and I also applied mousse all throughout the hair - and I also took my blow-dryer and changed the parting space, because the middle part was cool. But I really wanted a side part just to give it a little bit more revival. As you can see, the tent of the lace is not an exact match. For me, this is the darkest color that Sally Hansen has. So I don't know that I would use it in the future just because it doesn't match my skin tone if it did match my skin tone. As you can probably tell it would be amazing, but yeah I probably won't use it just because it does it's not an exact match and here's the final look alright. So let me know what you guys think of this wig tutorial. As you can see, I've tried a few different techniques that are seen from a few other youtubers, and you know I'll link them as well. If you want to see how they do it, some of the methods were super easy and helpful, and others are gon na. Take some practice and some time, but overall I love this week. The hair is super soft, the curls are nice and fluffy and bouncy. As you can see, it was super easy to change up the parting space from the middle part to a side part. The middle part was fine, but I just was like. Ah I don't know it, it was fine, but I think I just wanted something more, so I decided to go with the side part and I'm loving this eye part. I feel like it's like that, Beyonce Bob. What look slash you know Rihanna inspired, but yeah, I like it a lot. I would definitely highly recommend this company and this particular wig, if you're looking for something super, easy and stylish to rock, like as an everyday type wig. This would be one that I would highly recommend for that, but, as I said before, I'll leave that link down in the description box below to their Amazon store and if you have any questions about this unit, oh wait. I almost forgot so this wig is. I would say for like a it's. A lo big. The cap is a little bit big for my head and I tend to be on the smaller side in terms of head size, so I would definitely say like if you had like a medium or even a larger size head. This unit should fit no problem. The even though I cut around the ears, the the actual wig cap itself, it's still sitting over top of my ear side of like shove, it up under my ears to get it to like do this like swoop back behind the ears. So anyway, I say all that to say this is big head friendly. If you will, and if you have a smaller head like mine, you will have to you know, do some little tuck in and all that to get it to fit properly, but other than that. It'S comfortable, I did not add an elastic band. I may add one later, but because I secured it, we've got to be Jo. I mean it's nice and secure it's not going anywhere at all, so yeah and, like I said before, drop me a comment down below. If you have any questions, let me know, and if you want to see more videos like this, be sure to hit that subscribe button. And if you like this video, you know, do give me a thumbs up thanks for watching


Comments
C Julien: Omg this is so smart! I have a weird hairline and get tired of the back and forth between the mannequin head and mine. Thank you so much for sharing! New subbie just for that . Also, you are so gorgeous ☀️
Diahm: Omg I loved that idea of cutting the lace!!!!
Sincere One: Super cute and great tips!
Yinksy93: Yoo that's a nice trick for cutting the lace, I get so nervous cutting the lace lol
Pretty Brown: Could you use medium glow on deep skin? That’s the one I have and it doesn’t look bad you ever tried it?
KeepinUpWithCookie: I ain’t never seen nobody cut the pace like this before
RiRi RiRi: Did u get deep glow?
Natasha Franklin: What color sally Hansen did you use
miss kaydee: what colour did you choose???
Yanni Ceecee: