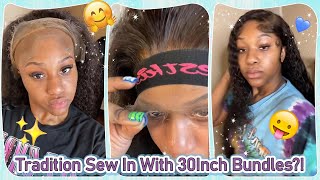
Beginner Friendly: How I Install My Closure Wigs|My First Time+Mini Walkthrough
- Posted on 01 March, 2021
- Closure Wig
- By Anonymous
WATCH IN 1080 for the best quality
Thanks so much for watching my video be sure to like comment and subscribe Don’t forget to click the notification bell so you can see when I post new content☺️
Socials
Instagram: https://instagram.com/niaahxoxo_?igshi...
Twitter: @niaahleanne
Tik tok: @niaahs.boutique
Boutique: https://instagram.com/niaahs.boutique?...
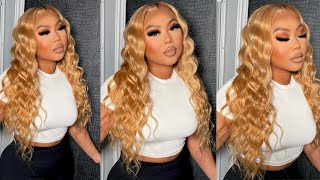
What'S up y'all, it's your girl, niley and and in today's video i will be showing you guys how i installed my very own customized closure wig. I did create this wig with my hair from nya's boutique, so without further ado, let's get into the video okay. So i have already braided my hair. I actually had my sister to braid my hair down and i braided hers down, because we were both being lazy, so shout out to kyla um right now, i'm just going in with my 3g essentials oil. This is still the lengthening oil y'all. This oil lasts for a long time. So if you are in the dallas area or not um, she does ship oils out so make sure that y'all shop with her but yeah right now, i'm just putting it in making sure my hair is nice and moisturized and then we're gon na get started. Okay, so now before we start, i'm just gon na take some edge control and put it all along my baby hair and then i'm gon na brush them back so that they're, nice and flat and out of the way, because we do not want to take out Our real hair in this process, so yeah, okay. So now i'm just going to be putting my cap on my head making sure it's pulled all the way down over my ears so that there's no bumps or gaps or anything on top of my cap. Okay, so i'm just going in with my black got to be um. I don't even know the official name of it. It'S just the black one y'all they only got black and yellow. So first you put the black one on and you're gon na make sure you put it on there real, real good, okay, and since this is a closure wig, i'm mainly gon na be focusing on the front like i'm still to show y'all the full cap process And everything, but i am going to be cutting the extra cap off because i don't have that much lace. I only have a closure so yeah. So now i'm just going to be taking the blow dryer and blow drying my hair um. I'M going to be repeating this process a couple of times as well as putting some got to be, and some ghost bond, because i really do not want my cap to come up. Y'All um. I just really want my edges and my hair to be protected. So this is my process like i said earlier: i'm not a professional. So this just what i do and yeah and y'all already know me and my sister got ta be goofy over here. Look like the setting camp twins, but yeah i'm just going to keep continuing that same exact process. I did repeat this process like two maybe three times just because i really really really wanted it to be securely. I don't do this. I then copyright so y'all. Then the glue busted on us, but i know y'all, see how much product that is so we definitely use it off the counter. Okay, so before we apply the glue, we will be cutting our cap, so i'm just going to cut until about where i want my hairline to be um. I have to use the mirror for part of this because it's so so hard trying to cut your cap off in front of your camera. So um, that's why you'll see me turning back and forth? Okay y'all! So now i'm just going to be using some brown powder um, i didn't have any brown foundation anymore. I only had liquid, so i'm just going to be using the powder going in and coloring my wig cap. I'M also going to make sure that i do it all the way back to my braids because, like i told y'all, this is a closure and not a frontal so yeah. So now i'm just going in and i'm also putting some powder on top of my wig before i put it on my head, you do not want to use liquid foundation only because it will run through and yeah we're just going to get ready to start installing. I did custom color colors wig as well, so if you guys need any color services, please feel free to be on my hair page. So now i'm just going to take some needle and thread, and i am going to sew the back of my head as well as like two or three stitches on each side. Just so, i can make sure that my wig is super super secure, because i do not want my wig sliding everywhere. Okay, so once i have the location that i want my closure in, i'm just going to flip it backwards and then i'm going to get ready to apply the glue. So i'm just going to apply the glue along the edge of my cap, trying to make sure that i do not get it on my skin. I really don't like that. So i'm just going to put a nice thin layer of glue along the cap, and i'm going to repeat this step about two or three times before i dry it as y'all can see. I started to get a little bit of glue on my skin so before i dry it, i'm just going to take a paper towel and i'm just going to line it up to make sure that there is no glue on my skin before i lay this closure Down do okay, so right now, i'm just gon na get ready to cut my lace and i know y'all saw the hole that was in my closure. Um, usually that's from like a t-pin or whatever, but i really don't be worried about it, because it's gon na get cut off anyway, okay, so now after i have already laid my closure down, i'm just going to put a little bit of water on the little Extra pieces of lace and then i'm just going to snip them right off. Okay, so now i'm just going to pull my baby hairs down. Like you see me well, like you see, i've done in this clip and now kyle is just going to trim them. For me get them nice and then i don't really want them to be super super long, just because i don't like how they look so she's going to raise the room a little bit and then she's going to use the scissors and cut them. This is style right here: hey. This might not go nowhere now. Okay, so now she's just trimming it into a bob for me and then i'm going to curl it and show y'all the finished result: okay, y'all! So here's how i did it the first time um. I really didn't like how my baby hairs look, so i switched them so here's that clip okay. So this is the final look. I did hot comb and press out my hair um. This hair is about eight or nine months old and i'm really happy with how it turned out. As always, please be sure to like comment and subscribe and i'll see, y'all later bye, guys

Comments
Atlanta Genya: Purd