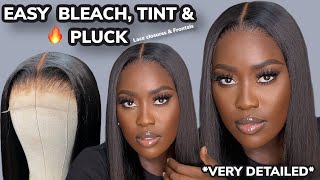
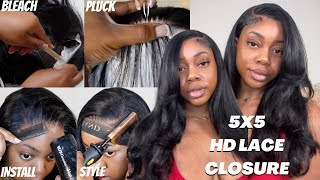
How To Bleach And Pluck Lace Wig *Detailed* | Alesha B.
- Posted on 30 March, 2022
- Closure Wig
- By Anonymous
*** Watch in HD/1080p ***
Hey Friendss
Updated how to bleach and pluck your lace wigs video as requested. Hair is from my wig collection on my shopaleshab site. 5x5 transparent lace closure wig 18-inch shopaleshab.com is where it can be found. The launch is April 1st. The email list is open to signing up now to be notified of the launch and new arrivals.
Make sure to subscribe and like this video! Also, add me on social media and follow my Amazon storefront ✨
https://www.amazon.com/shop/influencer...
DISCLAIMER:
Some links may be affiliate links where I receive a small commission from you clicking on the link and purchasing anything I have listed. No purchase is necessary.
Also, shop my wig resale site until March 31st site will be moving to shopaleshab.com ShopAleshaB
https://shopaleshab.bigcartel.com/
Shopaleshab Instagram/TikTok : @shopaleshab
Email: [email protected] for sponsorships, collaborations, and business opportunities.
Connect With Me!
Instagram @lesshhab
TikTok @lesshhab
About Me:
From: Virginia
Age: 23
Camera: Canon g7x
Sign: Gemini
If you want to know how to get your closures and your frontals from that to this, keep on watching what's up y'all welcome back to my channel, it's alicia! If you're new, if you're, not hey girl, welcome back again today, i'm going to be showing y'all how to bleach and pluck a unit i'll show what y'all wanted to see, and that is what i'm giving all these are all the products that i'm going to be Using so right now, i'm starting off with the got to be free spray, and i'm just spraying that on the hairline - and i want to use my retail comb to comb it back. This is just so, you can get the flyaways out the way you don't want to get bleach on the hair. It'S just going to be a mess, so this is where we're at. This is a 5x5 elise closure unit, transparent lace. This is from my wig collection. Wigology and i'm going to be using the collider colors bleach. This is like blue tinted and 40 volume developer. If you're a beginner use like 30 volume, developer 40 - just processes really fast, but i'm used to using it. So that's what i like to use and i'm going to mix it up until i get like a cake, frosting consistency, yogurt consistency, i go back and forth between the two. I like it to be a little bit on the runnier side, but not too runny, because i like it to go into my knots a little bit more. I noticed that if you have a thicker mixture that it takes longer to change the knots, so this is how i like to do it and i'm just going to be mixing that up and i just eyeball it there's really, no measurements that i do for this. I just eyeball it like. I said you want to have a cake, frosting consistency, and here this is pretty much what i was going for so now, i'm taking my aluminum foil and i'm just pulling out a little strip and i'm sitting it down shiny side up on my counter and i'm Going in with my bleach mixture, so you want to make sure you're, starting in the back of the frontal or the closure, whatever you're working with and move towards the front, mainly because if the processing time is different, so your knots in the back are way bigger Than the knots in the front anyway, if you have a good unit these wigs that i sell, they have small knots in the front. So you want to start in the back and move towards the front. So it does not bleach the front too fast and you have blonde in the front and it's still black. So that's the reasoning for while we're doing this so yeah just going to keep on doing that until it's completely covered, and i let it sit on here for like 20 minutes initially and then, if it's not changed by then i continue to leave it on there. For in five minute increments, and then i go back and check every five minutes, so the total time i left this one was about 30 minutes. So this is what it's gon na look like once you're done, it's covering the knots it's not seeping through, but it's covering the knots enough. I lay down on the aluminum foil and i let it sit. I just started doing this aluminum foil thing um. I know that you can wrap it to make it process faster. I don't know if i really noticed a difference, but i just like leaving it down flat like this, because it's better for my countertop number one and number two. You don't want to have your wig flipped over, because the bleach will run back up the hair. So now that it's been the 30 minutes that has passed, i'm going in with my blue shampoo and my miracle moist by aussie, deep conditioner and just rinsing everything out with warm water. I decided to use the blue conditioner. Blue shampoo. Excuse me, because it's just a lot better for toning, those knots down when they come out orange, if you're afraid of staining your lace use purple. Honestly, it's still going to work, but the blue just works better. So this is what we're getting. This is what it's looking like: it's given scalp, okay, but it still has that little orange tint. So i'm going with that blue shampoo and i'm just going to be toning, that orange down - i i must admit i was afraid this is my first time really putting the blue shampoo on this lace. But i i was just hoping that it was good lace right because it is from my company, but it is good lace, so it did not tip my lace at all. It was perfectly fine, didn't stain it at all or anything, and then i went in with my purple shampoo and the rest of the hair, not really for any specific reason. I just really like the way that it smells so go ahead and wash that out put your conditioner on there and then rinse that out and then we're going to get into the plucking process. Y'All bear with me with my voice. My allergies are kicking my butt, but now the hair has been rinsed out. Look at that shine. This hair is like really really nice super soft super silky, but yeah anyway, back into it. We want to go ahead and make our middle part, and this is because you do not want to pluck in that area like at all. You do not want to pluck your middle part, because then you want to be walking around with a crazy big part and i'm just showing y'all how it looks, as you part, the hair in different areas, and this is the hairline - this is pre pluck guys. This is how it comes straight out of the pack, if you prefer to pluck your own hairline, that's fine! I do offer that on my site as well for the pre-made factory units - and they come like this so going in and we're getting ready to plug used water to wet the hairline and the tweezers came from tj maxx, nothing special y'all. You can use whatever tweezers you want, i'm separating where that pre-plugged area is, and i'm parting it from the front. So you want to separate this because you just want to make sure you're not going to over. Pluck that part um it's already plucked, so you don't have to thin it out at all. So going in this is the first section and you want to make sure you're holding the hair taut, because this is going to show you what you're working with and you're going to start at the knot of the hair and pull back. So, as i'm doing start at the knot and just pull back - and i want to zoom in so y'all - can really see what i'm doing and make sure you're combing in between each section. If you don't comb the hair, then you don't know what you've pulled out and that's the easy way to over. Pluck the hairline so make sure you're combing as you're going through your sections, i like to go down and back one time, comb the hair and then repeat the process until i feel like i'm getting my desired look. That is just to make sure i don't over. Pluck so, if y'all want to use that, then that's a great tip to just know. So, as we are zoomed in you pluck from the front pull back from the very front of the hairline like the knot and you pull back and you just repeat this process. Until like i said you get your desired outcome, this is really just eyeballing it. What i recommend is just to find some pictures of stylists that y'all, like or hair. You know like wigs that y'all like and just mimic the hairline try to mimic it as best as you can that's what i choose to do the way i do my hairlines, i like a really really plugged hairline like a very over plucked hairline. I like it to look as natural as possible, and i love that fade that we do when we pluck our wigs. So that's what i try to do so i'm just going to keep on repeating that process, as i did before. So this is the second part of the plucking process that i do so. I combined two methods. The first thing that i showed y'all was really just to thin out the section of hair, because, of course, if you have a thick hairline, this is what you're going to need to do. This second portion is the second method that i go in and use so where these spaces are, is what we've created by thinning out the hairline and they're going to go in with your tweezers in the spaces and just make the spaces more dominant or you're. Going to create your own, i like to do both just because you know i like to have a little custom hairline going up but, like i said, you're going in and you're going to be going into those spaces and just making them a lot more dominant and You'Re going to see me continue to repeat this process, so i don't want to go in and do too too much on the first two sections, because you don't want to bald it really quick. So i part from the front to the back, because you're able to see that fade effect a lot easier if you're plucking from back to front it's just too hard to see, you really can't see what you're working with, because you haven't even plucked the front of The hairline yet then you end up over plucking. So i'm just repeating that same process that i did before go down and back a couple of times, maybe like two to three times three to four times but make sure you're counting. So you don't overclock and forget. Oh, did i do this? How many times have i done it? So that's what i do thinning out to my um. You know what i want and then i'm going in again and i'm doing that. One two three method that i just talked about, so i go in and i'm just making those little spaces a lot more defined, so you go in a little space. You count to three skip one go into space count to three skip one. This just helps me so i'm not over plucking, so you go in the space. One two three skip one two three skip and i do the whole thing as i come forward. So after we've thinned out the sections we're coming forward and we're just doing one two threes - and this is just so - the spaces can be a lot more dominant. So that's what i'm doing here. One two three skip one two three skip, so this is something that i started to do as i started to develop my own plucking method. I just like to go in between and just part little sections and comb the hair apart. So i can see if i'm creating any bald areas to kind of like know where to watch out from so as you all can see like this little area has a little circle and that's how you can tell it's a little bit plucked in that area. Like more plucked than the others so to just watch out for the area and try to stay away from it, it's not necessarily over plugged yet. But it's on that, like warning, sign, backup, type stuff, so i'm combing the hairline back and i'm going all the way to this front section where the baby hairs would be. This part is optional. If you like, the hairline, as is you like a fuller hairline, but still that fade effect, you can leave it just don't even mess with it and you're done, but, like i said, i like a really really plucked hairline and i don't like full full baby hairs. I like them to look as natural as possible, so i like to go in and pluck this, and especially if you don't even like wearing baby hairs, you just like doing a no baby, hair frontal install you need to do this part um. I just feel like it looks a lot better, but again it is preference, it's preference, but it just look a lot better. So i'm just showing you all the two sides from before to now and i'm using my hot comb and i'm getting ready to show y'all the end result. This is like the best part, because you get to see all your hard work, i'm using the btz heat protectant spray to turn up the heat spray and i'm also using my cantu wax stick and my sebastian shaper plus hairspray, so going in my hot comb. It'S on the hottest setting. I think it goes to like a 450 also she is hot hot i'm going in and i'm flattening out everything and then i'm going in on the front. Like look at that. Look at that, like, oh, my gosh, that's literally my favorite part. I love being able to see what i've done so at this point, i'm realizing that the other side is a little bit more plucked than the other one. So i'm about to go in which is the right, with the left side to y'all with the right side on the mannequin head, but i'm going to go in and just thin it out a little bit just so it can match. I mean the hairline is not going to be twins when you on the hairline. It'S just like doing eyebrows they're, not gon na, be twins, they may be sisters or cousins, but they're not gon na be identical, and i feel like that's the whole. Like great point part about plucking and makeup, and and these creative things that we do with our hair and makeup and things like that, nothing has to be perfect. I know we may try to be, but it doesn't have to be because nobody's real hairline is like these one-inch spaces exactly apart from each other, these half inch or whatever number spaces from each other. It'S just not realistic. Nobody'S hairline is like that, but yeah. When i thinned it out tried to match it as best as i could, it still was not perfect, but they're both plugged and nobody y'all - probably wouldn't even notice what i'm talking about. But i am a perfectionist and i pay attention to details so freaking strong that it's ridiculous, but it ended up looking really really cute. This is how i pluck all my wigs um. At this point, i feel like i'm in a groove of how i want things to be how they should be. They come out pretty much the same every time and i'm loving that process. So this is how i pluck my wigs. I hope you all enjoyed this video. It'S not over, so keep watching to the end, but i hope y'all enjoyed this video on how i plucked my wigs. I hope you all enjoyed seeing this unit if y'all are interested, it will be dropping on my website on friday. This is a 5x5 closure unit, transparent lace, 18 inches and just look at that hairline yeah. So i hope y'all learned something from this video and if y'all watch this video and y'all use my methods tag me on instagram. I would love to see your work. Alright, see you guys in my next one


Comments
Yagurlnelly: This video was so good so detailed it gave me all the info I needed
Troyah Carter: I love the speed of the video you broke it down well & I can’t wait to try out the techniques thanks a million!
Cherry Adeyinka: Thank you, This is by far the best detailed video on plucking and believe me I’ve watched many thank you looks fantastic x
P Thompson: ... Bless you & thank you!!! I shall no longer walk around either wiggieeeeeee or baldie wit a dip and a quick dip to cover up!!!! I now see and understand from your video how I should be doing it. You seriously a great teacher
DOLLEDBY_ANJ: Thank you so much for this❤
Crowned Creations: Great video! Thank you for zooming in & being super detailed. Where can I get one of those purple combs I tried checking on your Amazon storefront I didn’t see it.
Janis Ford: Thank u so much. This was a very informational video
Noel Bailey: Did you air dry or blow dry the wig after all the washing ??
Just us: Ugh I wish I can FaceTime u to walk me through this step by step lol ♀️