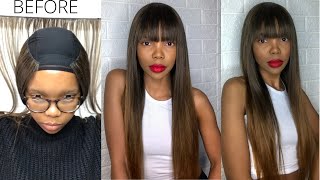
Installing The Custom Frontal Wig I Made Out Of An Old Wig
- Posted on 07 May, 2021
- Closure Wig
- By Anonymous
Hello everyone, welcome back to my channel!
Making A Brand New Wig From Scratch Out Of An Old Wig https://youtu.be/6VTDwIbfWYM
Thanks for watching
Please LIKE, SHARE, COMMENT, and SUBSCRIBE for more videos!
https://instagram.com/vivianbeautyands...
[email protected] ( For business inquiries)
My second channel https://youtube.com/c/StylebyViv ( Sewing channel )
DIY: Lace Front Wig Cap For Crochet Braids Wig https://youtu.be/tSfUbhaWX-E
CLOSE-UP: How-to Make A Lace Closure/Lace Frontal Using A Tiny Crochet Hook | Latch Hook Method https://youtu.be/LlcjrN4FKsY
CLOSE-UP: How-to Ventilate Hair Lace Closure/Frontal wig Using Ventilating Needle
HAIR: Virgin Human Hair (I bought the hair in 2016)
Where I purchase my materials/tools (Aliepxpress Links )
Wig mannequin head https://s.click.aliexpress.com/e/_DCaG...
Adjustable Wig Stand https://s.click.aliexpress.com/e/_DDZt...
✨SWISS LACE NET FOR WIG MAKING✨
1/4 Yard Swiss Lace For Wig Making https://s.click.aliexpress.com/e/_DCqN...
Closure/Frontal Lace (4x4'' 13x4'' 2x4'' 2x6 and more) https://s.click.aliexpress.com/e/_DnqI...
3 Pcs Pin ventilating needle https://s.click.aliexpress.com/e/_DeIy...
Small/ Tiny Latch Hook https://s.click.aliexpress.com/e/_DFlH...
✨✨CAPS✨✨
Mesh Dome Caps (Small-Large Size) https://s.click.aliexpress.com/e/_Dk9n...
Spandex Dome Cap (Small-Large Size) https://s.click.aliexpress.com/e/_DDZA...
Thick Mesh Dome Cap (Net Free Size) https://s.click.aliexpress.com/e/_DBzv...
Elastic Band https://s.click.aliexpress.com/e/_DesL...
AMAZON LINKS
Swiss Lace For Wig Making https://amzn.to/3tiErPJ
Small/ Tiny Latch Hook https://amzn.to/38U5Kc2
4 Pcs Pin ventilating needle https://amzn.to/3tk64Yz
Spandex Dome cap & Mesh Caps For Wigs Making (Small-Large Size) https://amzn.to/3NYCxLU
Black Elastic Band For Wigs https://amzn.to/3NpendS
More videos
JUST ONE BUNDLE NO PRE-MADE CLOSURE: How-to/ DIY Closure Wig Side Part https://youtu.be/-oQXwQ49lrc
How To Natural Texture Hair: DIY U-part Crochet Wig With Leave Out https://youtu.be/kXzGeAApKGs
HOW-TO: Lace Frontal Crochet Wig Using One Pack Of Braiding Hair! |Straight Crochet Wig https://youtu.be/bVY7Ulf9LfU
How To Make A Lace Frontal Crochet Wig | Yaki Straight Hair https://youtu.be/3PMboDarNCs
DIY 2*5 Lace Closure Straight Crochet Wig Using Braiding Hair https://youtu.be/FbjtbxL_1xU
HOW-TO Braided Lace Front Wig With Baby Hair Using All My Leftover Braiding Hair | DIY Ombre: https://youtu.be/dtU2WsZGsBE
HOW-TO: DIY 8x6 Lace Closure Wig With Kinky Curly Human Hair Bundles https://youtu.be/6BKSo9sNpGE
This video is not sponsored. The links above are affiliate links. This means I'll make a small commission if you make a purchase using any of the links
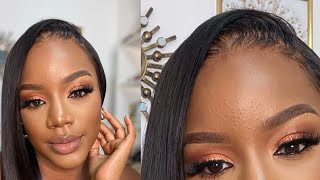
Hello guys and welcome back to my channel if you're new, here you're welcome, and i hope you all are doing well so for today's video, i'm going to be installing this beautiful wig that i made from scratch out of an old wig. So before we start, if you haven't seen the video on how i make this beautiful wig from scratch, i'll put the link in the description box down below. If you want to see that video go ahead and click on the link in the description box down below all right, okay, so first thing: first, i'm going to go ahead and uh bleach the knot, so i'm just going to hate to prepare the bleach and also I make sure that the consistency is thick, so i just want to bleach the knots and not the uh, the hair, so i'm just after mixing it i'm just using the edge of the comb to apply that, on the lace, be very careful and gentle. So after i applied the bleach, i went ahead and let it sit for 15 minutes before going ahead to wash it out. So i've already went ahead and washed the wig off camera. So you can see right here. So next i'm gon na let it air dry overnight. Okay, so moving on to the next step, i'm gon na go ahead and attach the elastic band to the black cap. So first you want to go ahead and measure out the length of the elastic band. You need in order to secure the wig in place, so once you have your measurement so so, once you have your measurement, then you can go ahead and cut it out. So next you can go ahead and attach it to the black cap, not the lace. Okay, you need to attach it to the black cap, so, as you can see right here, i'm going ahead to sew the elastic band in on the uh on the black cap, and so i'm gon na sew this side, this very side down. First, before going ahead to sew the other side that, obviously you can sew two spots at the same time: okay, so now that that part is secure, i'm gon na go ahead and secure the other end. Okay, so now that the the elastic band is secured in place it's time to go into the main part of the video which is the installation pad, but first i'm going ahead to cut off the excess lace following the hairline and also taking my time. So i went ahead and applied foundation on the lace off camera to kind of tint the lace using the foundation. As you can see right here, i've already applied the foundation off camera, so this is the uh the inside of the cap right there, okay. So this is the wig right here. As you can see, it's uh, the the um, the middle part, is pretty much like secured done. The wig is going nowhere. Okay! No! Where look at that! That'S the headband, it's just holding it in place, but still since there's a lace frontal, we still need to do some like extra step in order to really secure the wig in place. So to do that, i'm going ahead with the go to blee spray and i'm going to be using that to secure the wig in place. Okay, so i'm going to be securing the middle part of the wig in place. First, before moving on to the side of the wig, so right now, i'm just going ahead to spray in the gut to be spray. So next i'm going to take my hand dryer and blow air on nate. So i want it to be a bit sticky before going ahead to uh place the wig on top. So right now, as you can see, i'm going ahead with my hand, dry with my hand, dryer to blow a little bit of air on it. So right here, i'm going to hate to check to make sure it's a bit sticky before going ahead to stick the wig on top. So i'm going ahead to secure the middle part first and also making sure to hold that spot down and pressing it down. So next i'm going to hate to use a ratti comb to press the edge of the lace down to help this help it to lay flat and happy to lay the edge of the um, the lace flat so like pressing it down. So doing the same thing. I'Ve already went ahead and sprayed the uh got to be spray so right now, i'm just going ahead to secure on the sides in place, so i'm just working on a little section at a time. It helps when you walk like a session by session, always want to take your time for the best results again doing the same thing, i'm using the right side, comb to press the edge of the lace down. Okay, all done the wig is secured in place. Look at that no baby hair, yet no baby hair. Yet, oh my god, i so much so much love this wig. So by far this is my favorite wig out of the ones i've made so far. This right here is my favorite look at that. That is just awesome, beautiful, okay, so for the final touch up, i'm going ahead to pull out a little bit of hair, so i can create some baby hair and lay down the edges, so yep, okay, guys. So this is the final results right here and i love love, love this wig. I took my time to create this wig following my hairline and all that work paid off like look at this, the wig is so beautiful. I can't just get over how much i really love this wig, alright guys. So this is the final result right here. I hope you enjoyed this video. I hope you find this video helpful. If you do, please don't forget to give it a big thumbs up and also, if you're new to my channel, please don't forget to hit the subscribe button down below if you already subscribed. Thank you so much for subscribing. Thank you so much for popping by my channel today and uh i'll, see you all in my next one. You


Comments
mesxxygigi: goddess you are BOMB!!! you have me over here working on my OWN hand made lace front closure im getting there it's gonna be AMAZINGLY GORGEOUS and i KNOW im going to be feeling myself once i realize what i've accomplished!!! THANK YOU MaM you are BOMB!!!
Mmakwena Nokeri: It’s also my favorite ❤️well done it looks so beautiful
J Mac: Another awesome DIY wig‼️. And your looking beautiful as always
Opah Mali Makumba: It is equally my favorite time wig. You look stunning
Adebayo Juliet: Always love your videos, very detailed
Sage Ndoro: Amazing work as always ♥️♥️♥️. You inspire me sis
sweettwiny: Love the hair you slay that orange eyeshadow tho
Josephine ebhoomhan: This is so lovely, you are blessed
Tiffany aka MissTiffany Galore: Wonderful work
Nora Mickey: Love your makeup baby girl and the hair
Cate Sonia: Hi Vivian. I have been following you for an year or more since I discovered this channel. I can say I have partly learnt how to ventilate using this channel. Thank you. Now, I can see that your hairline is okay and you have healthy natural hair. How comes that the glue doesn't ruin your hair? I would like to try this DIY but am afraid for my hairline. Am too careful. Again, do you like remove the wig before bed and the following day putting the glue again?
Ijay: Inside Life: I keep trying these tutorials...why don't they work for me
Barb.thangz: I can’t even tell you how many time I watch this video
mimouna mimouna: ماأروعك❤
Ariana Ansibe: It is so good
Sherry Benton:
anonymous anonymous:
Adebayo Juliet: Please what can be added to syntectic hair to make it silky and straight
goldensylslist: wow u are doing well
Cneh Makhathini: Dear do u also sell wigs
Pretty Queen: I came first today